Konica Minolta MS6000 MK II Twain Driver and Overlay Manager Software Installa - Page 53
ual scan buttons cannot be used to con or control the PS 3000. When a scan
 |
View all Konica Minolta MS6000 MK II manuals
Add to My Manuals
Save this manual to your list of manuals |
Page 53 highlights
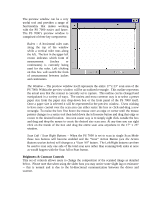
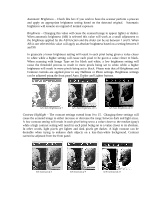
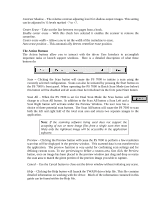
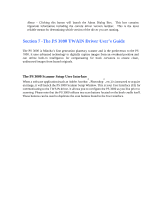
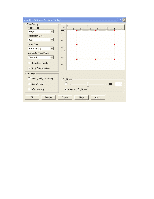
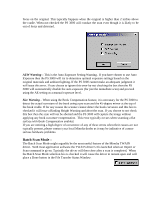
Important Note: Unlike the MS 6000 or MS 7000, the Front Panel controls (except for the actual scan buttons) cannot be used to configure or control the PS 3000. When a scan takes place whatever settings are chosen in the driver will take precedence. Scan Settings: The Scan Settings section allows you to define most of the key elements of the scanner's settings. They are as follows: Scan Mode - Because the PS 3000 has a large 11" x 17" scan area, it is capable of actually capturing two 8 ½" x 11" side-by-side images with one scan command. The Scan Mode setting allows users to choose whether to have the PS 3000 deliver either one image or a series of two images - one each for the left and rights sides. Your choices in the Scan Mode drop-down box are: Single - When in single scan mode, the PS 3000 driver will deliver one image as defined by the scan area marker in the preview window (see below). Dual - When in dual mode the PS 3000 will automatically divide the total scan area into two 8 ½" wide by 12" high scan areas. When the actual scan takes place one image from each of these scan areas can be delivered using the Scan All button (see below) or just the left or right side image can be captured using the Scan Left/Scan Right button beneath the preview window. You can also us either Start button on the PS 3000's scan cradle to initiate a scan. Resolution (DPI) - This drop-down box allows you to select the resolution at which the scanner will deliver data to the scanning software. The resolution is measured in Dots Per Inch or DPI. Available settings for the PS 3000 are 200, 300 and 400 DPI. Higher DPI settings will result in better quality scans as well as longer scanning times. In addition, higher resolutions will result in larger file sizes. Note: The optical resolution of the scanner is 400 DPI. All other resolutions are derived from reduction algorithms. Paper Size - This drop-down box allows you to select the actual Scan Area captured by the PS 3000. The driver supports a wide range of standard U.S. and European sizes. The scan area selected will be reflected in the Preview Window via a dashed box. When in single scan mode any selected size will be centered in the middle of the 11" x 17" scan area. Please note that when in Dual Scan mode you cannot select an area larger than 8 ½" x11" as two images larger than this would exceed the total 11" x 17" scan area. Original is Photo - When this box is checked, the PS 3000 will perform a dithering process that will produce an overall lighter image tending to better capture lower-contrast areas of the original.
-
 1
1 -
2
-
3
-
4
-
5
-
6
-
7
-
8
-
9
-
10
-
11
-
12
-
13
-
14
-
15
-
16
-
17
-
18
-
19
-
20
-
21
-
22
-
23
-
24
-
25
-
26
-
27
-
28
-
29
-
30
-
31
-
32
-
33
-
34
-
35
-
36
-
37
-
38
-
39
-
40
-
41
-
42
-
43
-
44
-
45
-
46
-
47
-
 48
48 -
 49
49 -
 50
50 -
 51
51 -
 52
52 -
 53
53 -
 54
54 -
 55
55 -
 56
56 -
 57
57 -
 58
58 -
59
 |
 |
