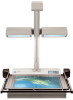
Konica Minolta ScanDIVA ImageDIVA Touch User Guide - Page 14
Application Window, Operation of Application, ImageDIVA Touch
 |
View all Konica Minolta ScanDIVA manuals
Add to My Manuals
Save this manual to your list of manuals |
Page 14 highlights
3 3-3 Application Window 6 1 2 3 4 5 Operation of Application 9 7 8 1 Scan Mode 2 Image Mode 3 Image Adjustment 4 File Format 5 Scan 6 Preview Area 7 Cropping Area 8 Output Buttons 9 Help Button Select the desired settings for Scan Size, Resolution, Book Correction, and Auto Cropping. See Section 3.4 Scan Mode Select the image type to be scanned. See Section 3.5 Image Mode Adjust the brightness and contrast of the image. See Section 3.6 Image Adjustment Select the file format. See Section 3.7 File Format Start scanning the document and display the image in the Preview Window. See Section 3.7 Scan The scanned image is displayed. See Section 3.8 Preview Area The area of the output file or printer is selected and displayed. The Cropping Area can be adjusted by dragging the rectangular handles. The scanned image is printed, saved, or e-mailed. See Section 3.9 Output Buttons The Help file is displayed. The Help file is also displayed when the "F1" key on the keyboard is pressed. 3-2 ImageDIVA Touch
-
 1
1 -
2
-
3
-
4
-
5
-
6
-
7
-
8
-
 9
9 -
 10
10 -
 11
11 -
 12
12 -
 13
13 -
 14
14 -
 15
15 -
 16
16 -
 17
17 -
 18
18 -
 19
19 -
20
-
21
-
22
-
23
-
24
-
25
-
26
-
27
-
28
-
29
-
30
-
31
-
32
-
33
-
34
 |
 |
