Konica Minolta bizhub PRO 951 bizhub PRO 951 Security User Guide - Page 34
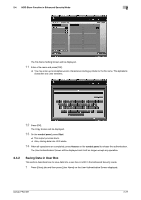
The Output Setting Screen will be displayed.
 |
View all Konica Minolta bizhub PRO 951 manuals
Add to My Manuals
Save this manual to your list of manuals |
Page 34 highlights
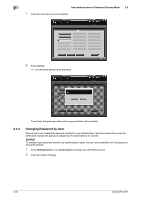
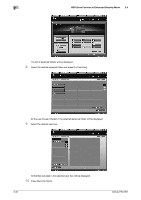
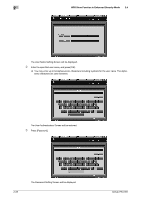
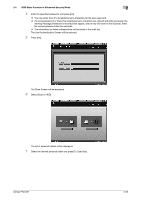
2.4 HDD Store Function in Enhanced Security Mode 2 The Password Setting Screen will be displayed. 4 Enter the specified password, and press [OK]. % You may enter from 8 to 64 alphanumeric characters for the user password. % If a wrong password or fewer than 8 alphanumeric characters are entered and [OK] is pressed, the warning message [Password is incorrect] will appear, and no key will work for five seconds. Enter the correct password after five seconds. % The information on failed authentication will be saved in the audit log. The User Authentication Screen will be restored. 5 Press [OK]. The Copy Screen will be displayed. % Position the original. 6 Press [Output Setting]. The Output Setting Screen will be displayed. 7 Press [HDD Store]. bizhub PRO 951 2-25
-
 1
1 -
2
-
3
-
4
-
5
-
6
-
7
-
8
-
9
-
10
-
11
-
12
-
13
-
14
-
15
-
16
-
17
-
18
-
19
-
20
-
21
-
22
-
23
-
24
-
25
-
26
-
27
-
28
-
 29
29 -
 30
30 -
 31
31 -
 32
32 -
 33
33 -
 34
34 -
 35
35 -
 36
36 -
 37
37 -
 38
38 -
 39
39 -
40
-
41
-
42
-
43
-
44
-
45
-
46
-
47
-
48
-
49
-
50
-
51
-
52
-
53
-
54
-
55
-
56
-
57
-
58
-
59
-
60
-
61
-
62
-
63
-
64
-
65
-
66
-
67
-
68
-
69
-
70
-
71
-
72
-
73
-
74
 |
 |
