Kyocera TASKalfa 5052ci Kyocera NET ADMIN Operation Guide for Ver 3.2.2016.3 - Page 12
Networks and Agents, Adding Networks, Adding an IPv4 Network
 |
View all Kyocera TASKalfa 5052ci manuals
Add to My Manuals
Save this manual to your list of manuals |
Page 12 highlights
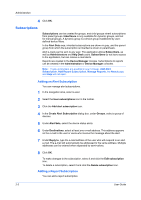
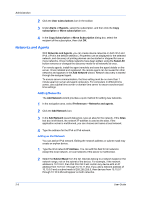
Administration 2 Click the User subscriptions icon in the toolbar. 3 Under Alerts or Reports, select the subscription, and then click the Copy subscription or Move subscription icon. 4 In the Copy Subscription or Move Subscription dialog box, select the recipient of the subscription, then click OK. Networks and Agents With Networks and Agents, you can create device networks on both IPv4 and IPv6. (IPv4 is the default selection.) Properties can be displayed for the selected network, and discovery of printing devices can be started or stopped for one or more networks. Once multiple networks have been added, using the Select All button removes or changes the discovery mode for all networks at once. For remote agents, install the agent remotely and save the agent details on the server. Once installed and registered, the remote agent can be reused for other networks and appears in the Add Network wizard. Network discovery is started through the assigned agent. To ensure secure communication, the time setting must be no more than 1 minute apart on server and agent computers. For computers in different time zones, use a global time server or domain time server to ensure synchronized time settings. Adding Networks The Add Network wizard provides a quick method for adding new networks. 1 In the navigation area, select Preferences > Networks and agents. 2 Click the Add Network icon. 3 In the Add Network wizard dialog box, type an alias for the network. If the Alias text box is left blank, the network IP address is used as the alias. If the application server is multihomed, you can choose and name a local network. 4 Type the address for the IPv4 or IPv6 network. Adding an IPv4 Network You can add an IPv4 network. Editing the network address or subnet mask may create an orphan device. 1 Type the IPv4 network IP Address. You can edit this field for all networks except the local network, or local networks if the server is multihomed. 2 Select the Subnet Mask from the list. Devices belong to a network based on the network range, not on the subnet of the device. For example, if the network address is 10.10.8.0, then 255.255.252.0 will contain any device with an IP address from 10.10.8.1 through 10.10.11.254. If you add a network address of 10.10.9.0 and a subnet mask of 255.255.255.0, then devices from 10.10.9.1 through 10.10.9.254 will appear on both networks. 2-5 User Guide
-
 1
1 -
2
-
3
-
4
-
5
-
6
-
 7
7 -
 8
8 -
 9
9 -
 10
10 -
 11
11 -
 12
12 -
 13
13 -
 14
14 -
 15
15 -
 16
16 -
 17
17 -
18
-
19
-
20
-
21
-
22
-
23
-
24
-
25
-
26
-
27
-
28
-
29
-
30
-
31
-
32
-
33
-
34
-
35
-
36
-
37
-
38
-
39
-
40
-
41
-
42
-
43
-
44
-
45
-
46
-
47
-
48
-
49
-
50
-
51
-
52
-
53
-
54
-
55
-
56
-
57
-
58
-
59
-
60
-
61
 |
 |