LG 32LX2D Service Manual - Page 12
AD9883A-Set Adjustment - hdmi
 |
View all LG 32LX2D manuals
Add to My Manuals
Save this manual to your list of manuals |
Page 12 highlights
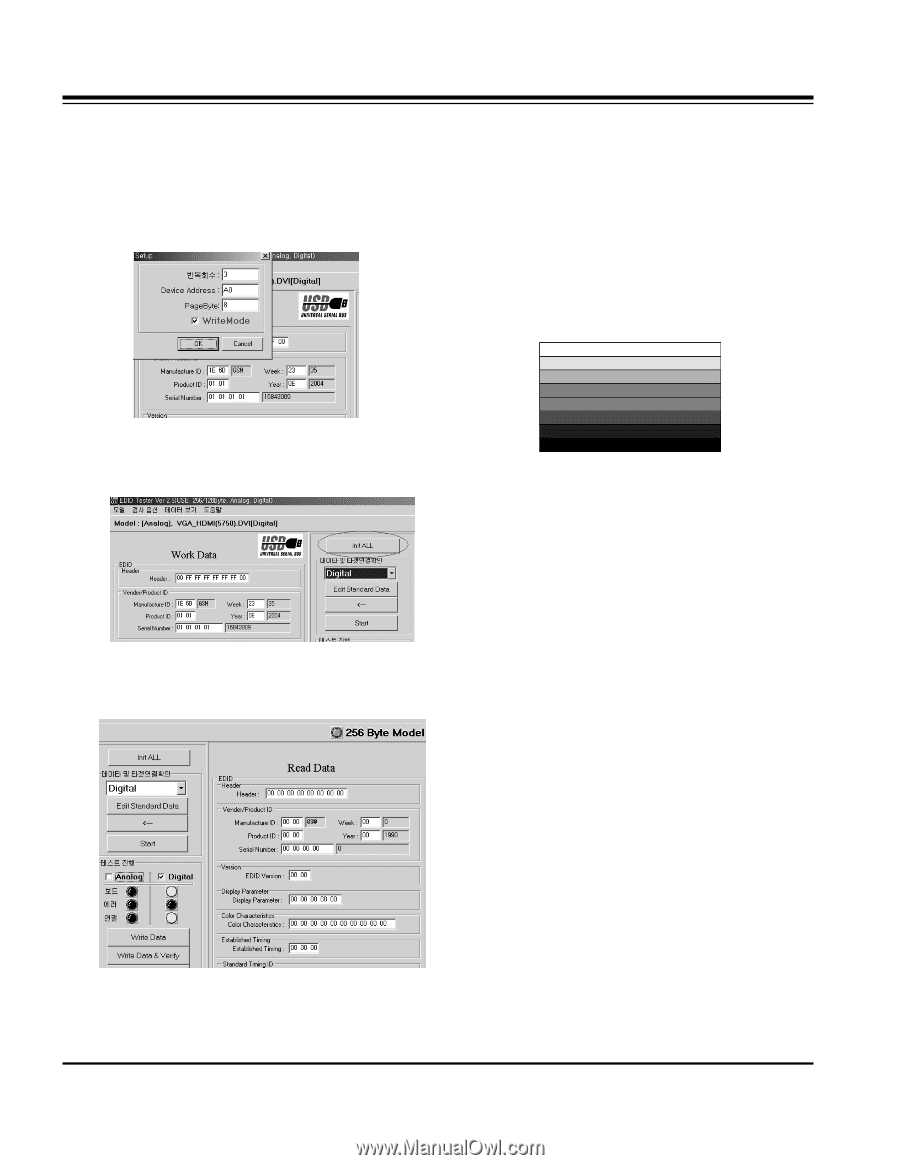
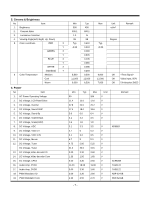
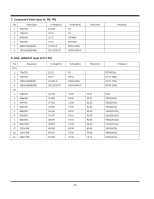
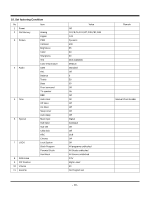
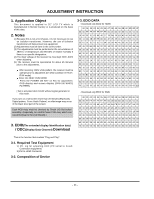
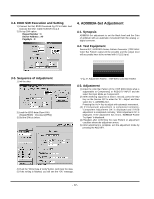
3-4. EDID S/W Execution and Setting 1) Connect the Set, EDID Download Jig, PC & Cable. And Execute the S/W : EDID TESTER Ver,2.5 2) Set up S/W option Repeat Number : 3 Device Address : A0 PageByte : 8 4. AD9883A-Set Adjustment 4-1. Synopsis AD9883A-Set adjustment to set the black level and the Gain of optimum with an automatic movement from the analog => digital converter. 4-2. Test Equipment Service R/C, MSPG925 Series Pattern Generator (720P 60Hz Color Bar Pattern output will be possible and the output level will accurately have to be revised with 0.7±0.1Vp-p) 3-5. Sequence of Adjustment 1) Init the data 2) Load the EDID data.(Open File) [Digital(HDMI) : Checksum(5750)] 3) Set the S/W as below. Adjustment Pattern : 720P 60Hz Color Bar Pattern 4-3. Adjustment (1) Input the color Bar Pattern of the 720P 60Hz Mode what is supportable to Component2 or RGB-DTV INPUT and the select the Input Mode as Component2. (2) After receiving signal for at least 1 second, press the ADJ Key on the Service R/C to enter the 'Ez - Adjust' and then select the '1. AD9883A-Set'. Pressing the Vol + Key to adjust with automatic movement. (3) If Component adjustment is completed normality, 'Component Adjustment OK' is displayed and if RGB adjustment is completed normality, 'RGB Adjustment OK' is displayed. If the adjustment has errors, 'AD9883A-Failed! Try Again' is displayed. (4) Readjust after confirming the case Pattern or adjustment condition where the adjustment errors. (5) After adjustment is complete, exit the adjustment mode by pressing the ADJ KEY. 4) Push the "Write Data & Verify"button. And input the data. 5) If the writing is finished, you will see the "OK" message. - 12 -
-
 1
1 -
2
-
3
-
4
-
5
-
6
-
 7
7 -
 8
8 -
 9
9 -
 10
10 -
 11
11 -
 12
12 -
 13
13 -
 14
14 -
 15
15 -
 16
16 -
 17
17 -
18
-
19
-
20
-
21
-
22
-
23
-
24
-
25
-
26
-
27
-
28
-
29
-
30
-
31
-
32
-
33
-
34
-
35
-
36
-
37
-
38
-
39
-
40
-
41
-
42
-
43
-
44
-
45
-
46
-
47
-
48
-
49
-
50
-
51
-
52
-
53
-
54
-
55
-
56
-
57
-
58
-
59
-
60
-
61
-
62
-
63
-
64
-
65
-
66
-
67
-
68
-
69
-
70
-
71
-
72
 |
 |