LG DLGX3701W Owners Manual - Page 29
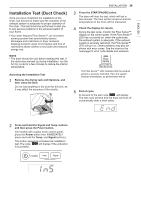
Installation Test (Duct Check), Press the START/PAUSE button.
 |
View all LG DLGX3701W manuals
Add to My Manuals
Save this manual to your list of manuals |
Page 29 highlights
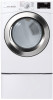
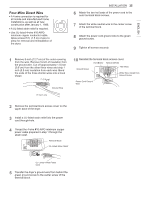
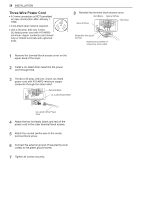
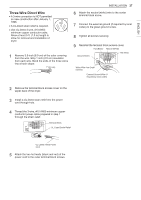
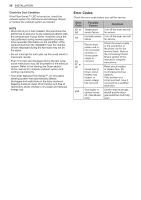
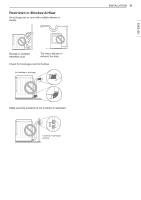
ENGLISH Installation Test (Duct Check) Once you have completed the installation of the dryer, use this test to make sure the condition of the exhaust system is adequate for proper operation of the dryer. This test should be performed to alert you to any serious problems in the exhaust system of your home. ••Your dryer features Flow Sense™, an innovative sensing system that automatically detects blockages and restrictions in dryer ductwork. Keeping ductwork clean of lint buildup and free of restrictions allows clothes to dry faster and reduces energy use. NOTE • The dryer should be cool before starting this test. If the dryer was warmed up during installation, run the Air Dry cycle for a few minutes to reduce the interior temperature. Activating the Installation Test 1 Remove the drying rack and literature, and then close the door. Do not load anything in the drum for this test, as it may affect the accuracy of the results. INSTALLATION 29 3 Press the START/PAUSE button. The dryer will start the test, which will last a few minutes. The heat will be turned on and the temperatures in the drum will be measured. 4 Check the display for results. During the test cycle, monitor the Flow Sense™ display on the control panel. If the Flow Sense™ LED has not turned on, when the cycle ends, the exhaust system is adequate. If the exhaust system is severely restricted, the Flow Sense™ LED will turn on. Other problems may also be shown with error codes. See the chart on the next page for error code details and solutions. LED turned on: RESTRICTED The Flow Sense™ LED indicates that the exhaust system is severely restricted. Have the system checked immediately, as performance will be 5 End of cycle. At the end of the test cycle, will display. The test cycle will end and the dryer will shut off automatically after a short delay. 2 Press and hold the Signal and Temp. buttons and then press the Power button. (On models with a glass touch control panel, press the Power button then IMMEDIATELY press and hold the Temp. and Signal buttons.) This button sequence activates the installation test. The code will display if the activation is successful.
-
 1
1 -
2
-
3
-
4
-
5
-
6
-
7
-
8
-
9
-
10
-
11
-
12
-
13
-
14
-
15
-
16
-
17
-
18
-
19
-
20
-
21
-
22
-
23
-
 24
24 -
 25
25 -
 26
26 -
 27
27 -
 28
28 -
 29
29 -
 30
30 -
 31
31 -
 32
32 -
 33
33 -
 34
34 -
35
-
36
-
37
-
38
-
39
-
40
-
41
-
42
-
43
-
44
-
45
-
46
-
47
-
48
-
49
-
50
-
51
-
52
-
53
-
54
-
55
-
56
-
57
-
58
-
59
-
60
-
61
-
62
 |
 |