LG KF900 User Guide - Page 55
Adding text to a photo, Adding an effect to a photo
 |
View all LG KF900 manuals
Add to My Manuals
Save this manual to your list of manuals |
Page 55 highlights
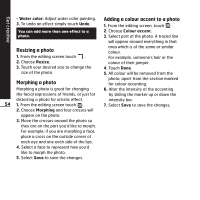
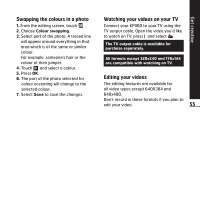
Decorate your photo with stamps. Choose from the different stamps available and touch your photo wherever you'd like them to be. Remove the drawing line. Touch to return to the gallery. Save the changes you have made to the photos. Select to save the changes over the Original file, or as a New file. If you select New file enter a file name. Undo the last Effect or edit you made to the photo. Add an effect to a photo by using various tools. Touch to open further effect options including Rotate. There are also more advanced editing options. See Morphing a photo, Adding a colour accent and Swapping the colours in a photo on page 55. See Adding an effect to a photo on page 53. Adding text to a photo 1. From the editing screen, touch . 2. Select Signature to add unframed text or choose one of the speech bubble shapes then touch OK. 3. Enter your text using the keypad and touch Done. 4. Move the text bubble by touching it and sliding it to the place you'd like it to be. Adding an effect to a photo 1. From the editing screen, touch . 2. Choose to apply any of the eighteen options to the photo. Select OK icon to apply the changes or choose to cancel. ° Face Beautify: Automatically detect a face in the image and brighten it up. ° Tunnel effect: Change the effect so that the picture appears to have been taken in a tunnel. ° Colour negative: Colour negative effect. ° Black and white: Black and white colour effect. ° Sepia: Sepia effect. ° Blur: Apply a blurred effect. ° Sharpen: Move the marker along the bar 53 to sharpen the focus of the photo. ° Mosaic blur: Touch to apply a blurred mosaic effect to the photo. ° Oil painting: Oil painting effect. ° Sketch: Apply an effect to make the picture look like a sketch. ° Emboss: Emboss effect. ° Solarize: Change the effect of exposure to the light ° Vivid: An effect of clearness and brilliance. ° Moonlight: Change the light to look like moonlight. ° Antique: An old image effect. ° Glow: A light beam effect. ° Cartoon: A cartoon effect. Get creative
-
 1
1 -
2
-
3
-
4
-
5
-
6
-
7
-
8
-
9
-
10
-
11
-
12
-
13
-
14
-
15
-
16
-
17
-
18
-
19
-
20
-
21
-
22
-
23
-
24
-
25
-
26
-
27
-
28
-
29
-
30
-
31
-
32
-
33
-
34
-
35
-
36
-
37
-
38
-
39
-
40
-
41
-
42
-
43
-
44
-
45
-
46
-
47
-
48
-
49
-
 50
50 -
 51
51 -
 52
52 -
 53
53 -
 54
54 -
 55
55 -
 56
56 -
 57
57 -
 58
58 -
 59
59 -
 60
60 -
61
-
62
-
63
-
64
-
65
-
66
-
67
-
68
-
69
-
70
-
71
-
72
-
73
-
74
-
75
-
76
-
77
-
78
-
79
-
80
-
81
-
82
-
83
-
84
-
85
-
86
-
87
-
88
-
89
-
90
-
91
-
92
-
93
-
94
-
95
-
96
-
97
-
98
 |
 |