LG LRG30355SB Owner's Manual (English) - Page 23
Caution
 |
UPC - 048231315876
View all LG LRG30355SB manuals
Add to My Manuals
Save this manual to your list of manuals |
Page 23 highlights
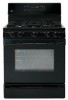
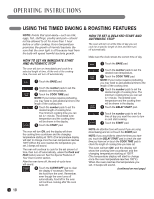
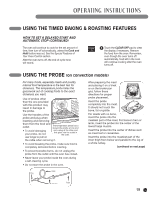
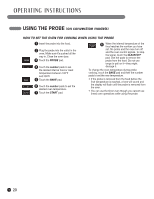
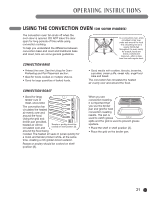
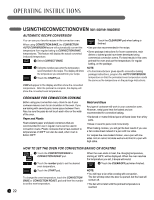
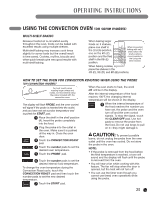
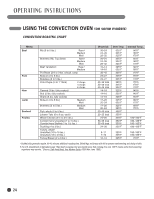
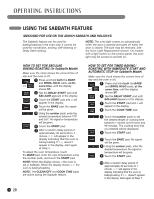
OPERATING INSTRUCTIONS USING THE CONVECTION OVEN (on some models) MULTI-SHELF BAKING Because heated air is circulated evenly throughout the oven, foods can be baked with excellent results using multiple shelves. Multi-shelf baking may increase cook times slightly for some foods but the overall result is time saved. Cookies, muffins, biscuits and other quick breads give very good results with multi-shelf baking. When baking larger foods on 3 shelves, place one shelf in the 2nd (A) position, one on the 4th (C) position and the third shelf in the 6th (E) position. When convection E baking with only 1 D shelf, follow the C shelf positions B recommended in A the Using the Oven section. R When baking cookies, place the shelves in the 4th (C), 5th (D), and 6th (E) positions. HOW TO SET THE OVEN FOR CONVECTION ROASTING WHEN USING THE PROBE (on convection models) For best results when roasting large turkeys and roasts, we recommend using the probe included with the convection oven. When the oven starts to heat, the word LO will be in the display. After the internal temperature of the food reaches 100°F, the changing internal temperature will be shown in the display. The display will flash PROBE and the oven control will signal if the probe is inserted into the outlet, and you have not set a probe temperature and touched the START pad. 1 Place the shelf in the shelf position (A). Insert the probe completely into the food. 2 Plug the probe into the outlet in the oven. Make sure it is pushed all the way in. Close the oven door. 3 Touch the CONVECTION ROAST pad. 4 Touch the number pads to set the desired oven temperature. 5 Touch the PROBE pad. 6 Touch the number pads to set the desired internal food temperature. To change the oven temperature during the Convection Roast cycle, touch the CONVECTION ROAST pad and then touch the number pads to set the new desired temperature. 8 When the internal temperature of the food reaches the number you have set, the probe and the oven turn off and the oven control signals. To stop the signal, touch the CLEAR/OFF pad. Use hot pads to remove the probe from the food. Do not use tongs to pull on it-they might damage it. CAUTION: To prevent possible burns, do not unplug the probe from the oven outlet until the oven has cooled. Do not store the probe in the oven. NOTE: • If the probe is removed from the food before the final temperature is reached, a tone will sound and the display will flash until the probe is removed from the oven. • You will hear a fan while cooking with this feature. The fan will stop when the door is opened, but the heat will not turn off. • You can use the timer even though you cannot use timed oven operations while using the probe. 7 Touch the START pad. 23
-
 1
1 -
2
-
3
-
4
-
5
-
6
-
7
-
8
-
9
-
10
-
11
-
12
-
13
-
14
-
15
-
16
-
17
-
 18
18 -
 19
19 -
 20
20 -
 21
21 -
 22
22 -
 23
23 -
 24
24 -
 25
25 -
 26
26 -
 27
27 -
 28
28 -
29
-
30
-
31
-
32
-
33
-
34
-
35
-
36
-
37
-
38
-
39
-
40
-
41
-
42
-
43
-
44
-
45
-
46
-
47
-
48
 |
 |