LG LTWS24223S Owners Manual - Page 17
To replace the Pantry Drawer
 |
View all LG LTWS24223S manuals
Add to My Manuals
Save this manual to your list of manuals |
Page 17 highlights
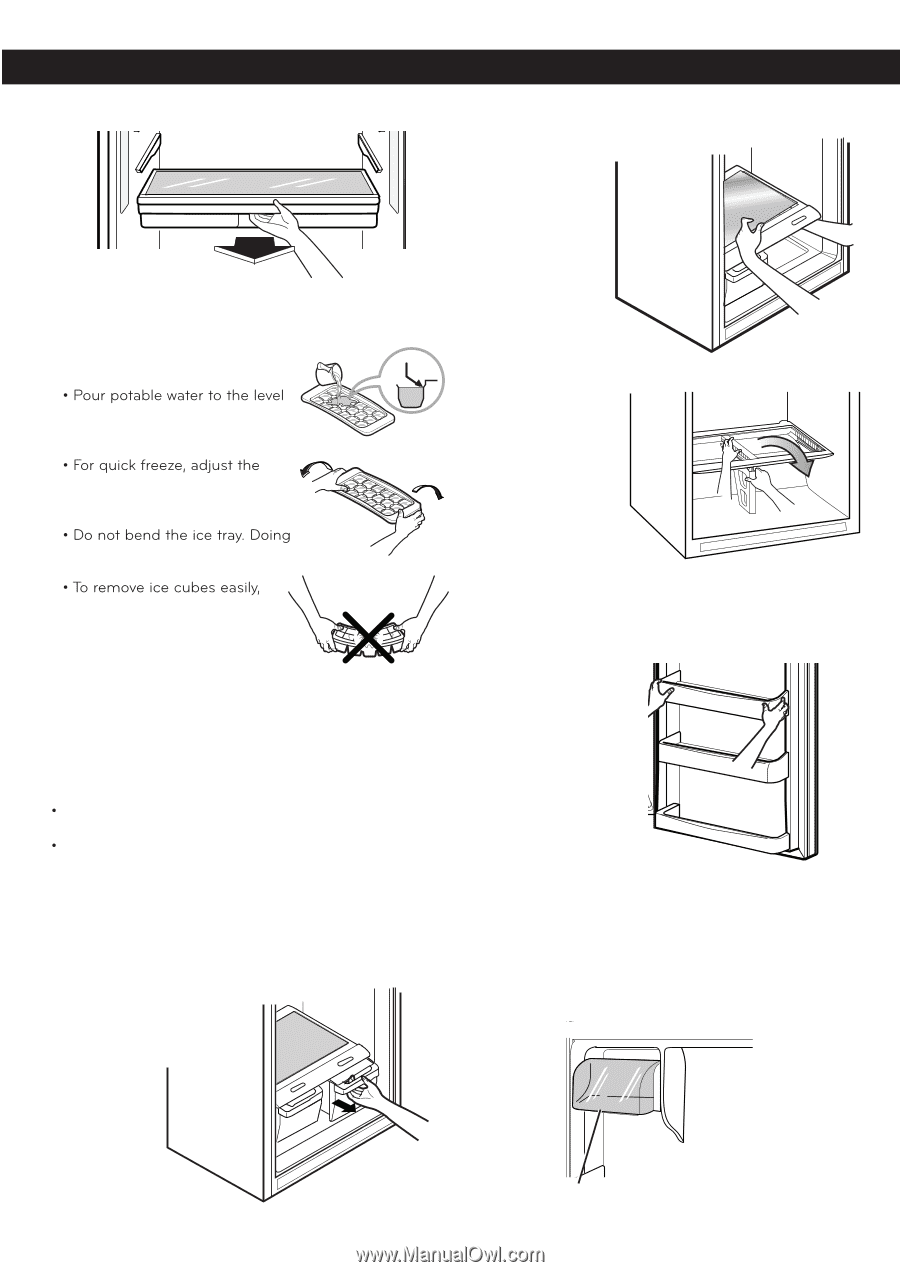
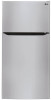
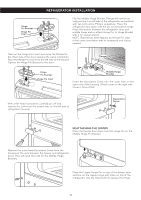
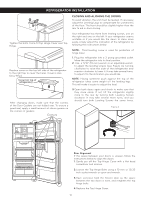
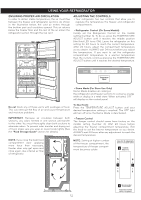
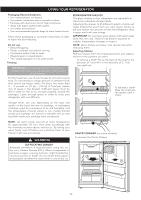
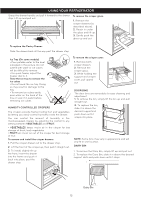
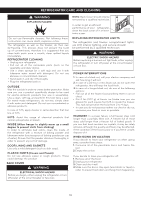
USING YOUR REFRIGERATOR Grasp the drawer handle and pull it forward to the drawer stop. Lift up and pull out. To remove the crisper glass: 1. Remove the crisper drawers (as described above). 2. Reach in under the glass and lift up. 3. Gently push the glass up and out. To replace the Pantry Drawer: Slide the drawer back all the way past the drawer stop. Ice Tray (On some models) indicated in the picture. Do not overfill with water or ice cubes will be difficult to remove freezer dial to 3. Twist the ice tray to remove the ice cubes To remove the crisper cover: 1. Remove both crisper drawers. 2. Remove the crisper glass. 3. While holding the support and crisper cover, pull upand out. so may result in damage to the tray. pour water on the back of the tray or soak it in water before removing ice cubes. HUMIDITY CONTROLLED CRISPERS The crispers provide fresher tasting fruit and vegetables by letting you easily control humidity inside the drawer. You can control the amount of humidity in the moisturesealed crispers by adjusting the control to any setting between VEGETABLES and FRUIT. VEGETABLES keeps moist air in the crisper for bes storage of fresh, leafy vegetables. FRUIT lets moist air out of the crisper for best storage of fruit. To remove and install the crisper drawers: 1. Pull the crisper drawer out to the drawer stop. 2. Lift the front of the crisper up, then pull it straight out. 3. To install, slightly tilt up the front, insert the drawer into the frame and push it back into place, past the drawer stop. DOOR BINS The door bins are removable for easy cleaning and adjustment. 1. To remove the bin, simply lift the bin up and pull straight out. 2. To replace the bin, slide it in above the desired supportand push down until it snaps into place. NOTE: Some bins may vary in appearance and will only fit in one location. DAIRY BIN 1. To remove the Dairy Bin, simply lift up and pull out. 2. To replace the Dairy Bin, slide it in above the desired support slots and push down until it stops. DaDirayiryBiBnin 15
-
 1
1 -
2
-
3
-
4
-
5
-
6
-
7
-
8
-
9
-
10
-
11
-
 12
12 -
 13
13 -
 14
14 -
 15
15 -
 16
16 -
 17
17 -
 18
18 -
 19
19 -
 20
20 -
 21
21 -
 22
22 -
23
-
24
-
25
-
26
-
27
-
28
-
29
-
30
-
31
-
32
-
33
-
34
-
35
-
36
-
37
-
38
-
39
-
40
-
41
-
42
-
43
-
44
-
45
-
46
-
47
-
48
-
49
-
50
-
51
-
52
-
53
-
54
-
55
-
56
-
57
-
58
-
59
-
60
-
61
-
62
-
63
-
64
-
65
-
66
-
67
-
68
-
69
-
70
-
71
-
72
-
73
-
74
-
75
-
76
-
77
-
78
-
79
-
80
-
81
-
82
-
83
-
84
-
85
-
86
-
87
-
88
-
89
-
90
-
91
-
92
-
93
-
94
-
95
-
96
-
97
-
98
-
99
-
100
-
101
 |
 |