LG RU-42PZ90 Owners Manual - Page 15
Input Select, Notes
 |
UPC - 719192166066
View all LG RU-42PZ90 manuals
Add to My Manuals
Save this manual to your list of manuals |
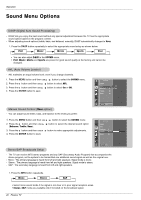
Page 15 highlights
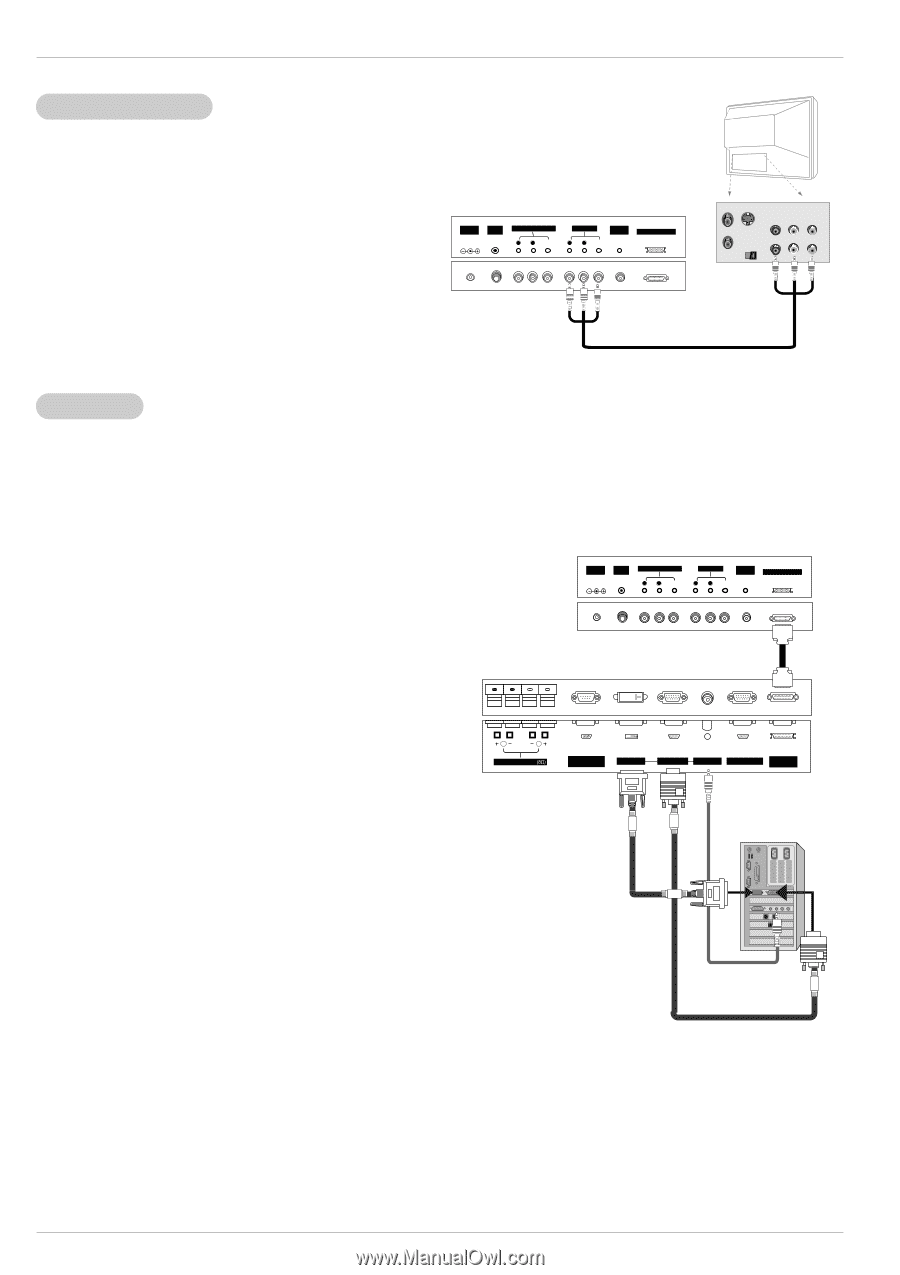
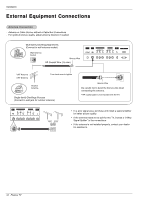
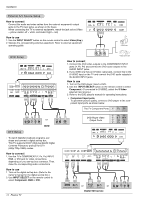
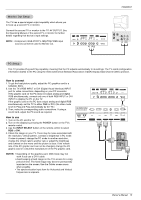
Installation Monitor Out Setup The TV has a special signal output capability which allows you to hook up a second TV or monitor. Connect the second TV or monitor to the TV' AV OUTPUT. See the Operating Manual of the second TV or monitor for further details regarding that device's input settings. NOTE: • Component, RGB-PC/DTV 480p/720p/1080i input sources cannot be used for Monitor out. DC IN (DC 12V) ANT IN +75 Ω AV(EXPANDED) INPUT R AUDIO L (MONO) VIDEO AV OUTPUT REMOTE CONTROL R AUDIO L VIDEO EXPANDED OUTPUT ANT OUT ANT IN S-VIDEO OUT (R) AUDIO (L) IN VIDEO PC Setup - This TV provides Plug and Play capability, meaning that the PC adjusts automatically to its settings. The TV sends configuration information (EDID) to the PC using the Video Electronics Standard Association (VESA) Display Data Channel (DDC) protocol. How to connect 1. To get the best picture quality, adjust the PC graphics card to a 640x480, 60Hz. 2. Use the TV's RGB INPUT or DVI (Digital Visual Interface) INPUT port for video connections, depending on your PC connector. If the graphic card on the PC does not output analog and digital RGB simultaneously, connect only one of both RGB INPUT or DVI INPUT to display the PC on the TV. If the graphic card on the PC does output analog and digital RGB simultaneously, set the TV to either RGB or DVI; (the other mode is set to Plug and Play automatically by the TV.) 3. Then, make the corresponding audio connections. If using a sound card, adjust the PC sound as required. How to use 1. Turn on the PC and the TV. 2. Turn on the display by pressing the POWER button on the TV's remote control. 3. Use the INPUT SELECT button on the remote control to select RGB or DVI. 4. Check the image on your TV. There may be noise associated with the resolution, vertical pattern, contrast or brightness in PC mode. If noise is present, change the PC mode to another resolution, change the refresh rate to another rate or adjust the brightness and contrast on the menu until the picture is clear. If the refresh rate of the PC graphic card can not be changed, change the PC graphic card or consult the manufacturer of the PC graphic card. NOTES: • Depending on the graphics card, DOS mode may not work if you use a DVI-I cable. • Avoid keeping a fixed image on the TV's screen for a long period of time. The fixed image may become permanently imprinted on the screen. Use the Orbiter screen saver when possible. • The synchronization input form for Horizontal and Vertical frequencies is separate. DC IN (DC 12V) ANT IN +75 Ω AV(EXPANDED) INPUT R AUDIO L (MONO) VIDEO AV OUTPUT REMOTE CONTROL R AUDIO L VIDEO EXPANDED OUTPUT ( )R( ) ( )L ( ) EXTERNAL SPEAKER RS-232C INPUT (CONTROL/SERVICE) DVI INPUT RGB INPUT AUDIO INPUT RGB OUTPUT EXPANDED INPUT Owner's Manual 15
-
 1
1 -
2
-
3
-
4
-
5
-
6
-
7
-
8
-
9
-
 10
10 -
 11
11 -
 12
12 -
 13
13 -
 14
14 -
 15
15 -
 16
16 -
 17
17 -
 18
18 -
 19
19 -
 20
20 -
21
-
22
-
23
-
24
-
25
-
26
-
27
-
28
-
29
-
30
-
31
-
32
-
33
-
34
-
35
-
36
-
37
-
38
-
39
-
40
-
41
-
42
-
43
-
44
-
45
-
46
-
47
-
48
 |
 |