LG WM2677HSM Owners Manual - Page 9
n Level adjustment
 |
View all LG WM2677HSM manuals
Add to My Manuals
Save this manual to your list of manuals |
Page 9 highlights
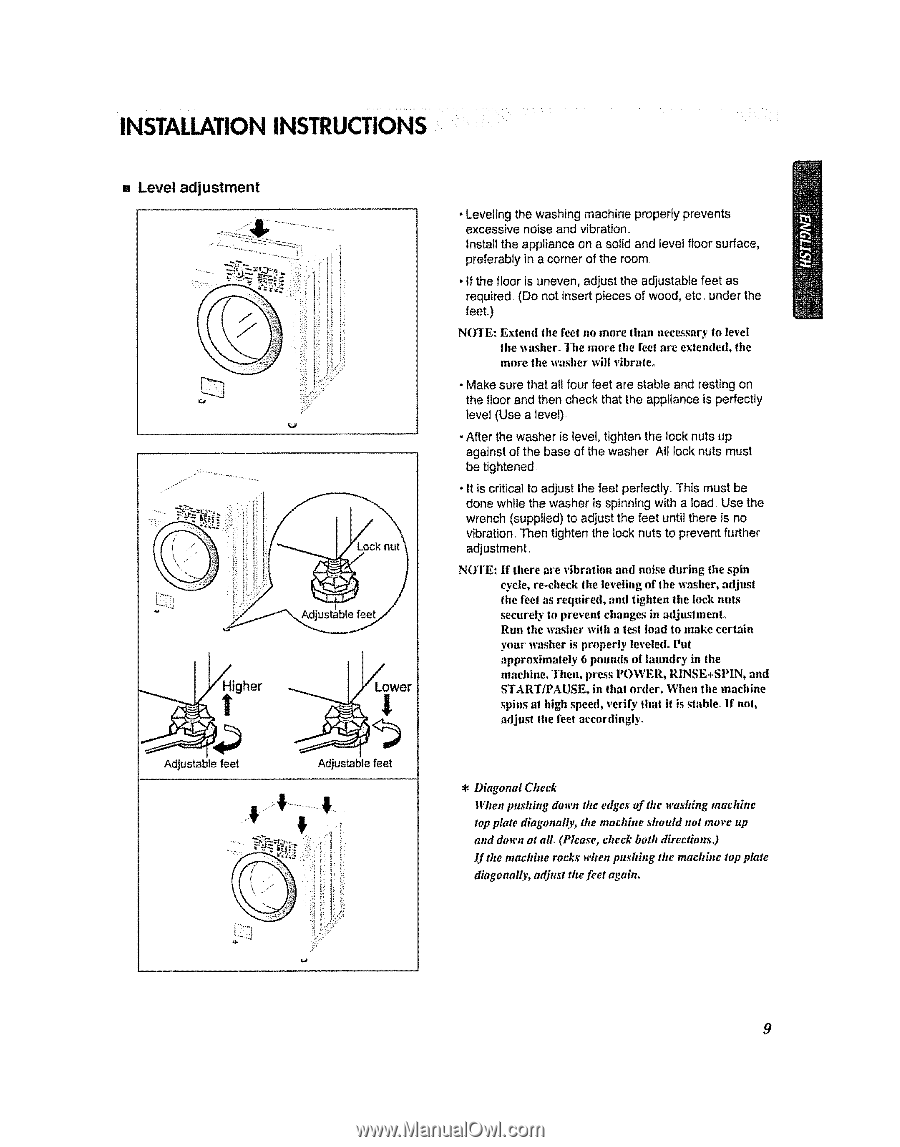
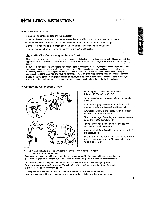
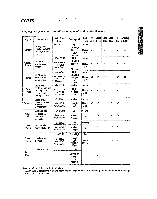
INSTALLATION INSTRUCT..I.O...N...S...... n Level adjustment _ii_i_ ii:i ilk Adjustable feet Adjustable feet • Leveling the washing machine properly prevents excessive noise and vibration,, Install the appliance on a solid and level floor surface, preferably in a corner of the room , if the floor is uneven, adjust the adjustable feet as required (Do not insert pieces of wood, etc, under the feet.) NOTE: Exlend tlme feet no more than a_essary to level the _asher- The more the feet are extended, the mnre Ihe wast_er will vibraleo • Make sure that all four feet are stable and resting on the floor and then check that the appliance is perfectly level (Use a level) • After the washer is level, tighten the lock nuts up against of the base of the washer All lock nuts must be tightened • it is critical to adjust the feet perfectly This must be done while the washer is spinning with a toad Use the wrench (supplied) to adjust the feet until there is no vibration Then tighten the Iock nuts to prevent further adjustment, NOTE: If Iltere are vibration and noise during the spin cycle, re.check the leveling of Ihe washer, adjust the feel ms req_fired, and lighten the lock nuls securely to prevent changes in adjuslmenL Run the washer wilh a lest load to make certain your washer is properly leveled. Pal appreximalely 6 peomls of taundry in the machine. Then, press POWER, RINSE+SPIN, and START/PAUSE, in lhal order. When the machine spins at high speed, yetiS* thai it is stable. If hal adjust Ihe feel accordingly. * Diagonal Check When pushing do_lw the edges af th¢ washing machine top plate diagonally, the machine should not move up attd dowll at all, (Please, elteck both directions,) If the machine rocks when pushing the machine top plate diagonal!v, adjust the feet again. 9
-
 1
1 -
2
-
3
-
 4
4 -
 5
5 -
 6
6 -
 7
7 -
 8
8 -
 9
9 -
 10
10 -
 11
11 -
 12
12 -
 13
13 -
 14
14 -
15
-
16
-
17
-
18
-
19
-
20
-
21
-
22
-
23
-
24
-
25
-
26
-
27
-
28
-
29
-
30
-
31
-
32
-
33
-
34
-
35
-
36
-
37
-
38
-
39
-
40
-
41
-
42
-
43
-
44
-
45
-
46
-
47
-
48
 |
 |