Lenovo H520s Lenovo H520s Hardware Maintenance Manual - Page 42
Slide then insert the new graphic card to the same connector on the motherboard.
 |
View all Lenovo H520s manuals
Add to My Manuals
Save this manual to your list of manuals |
Page 42 highlights
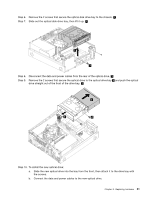
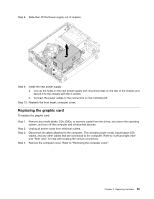
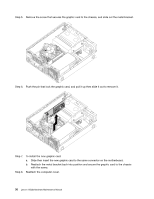
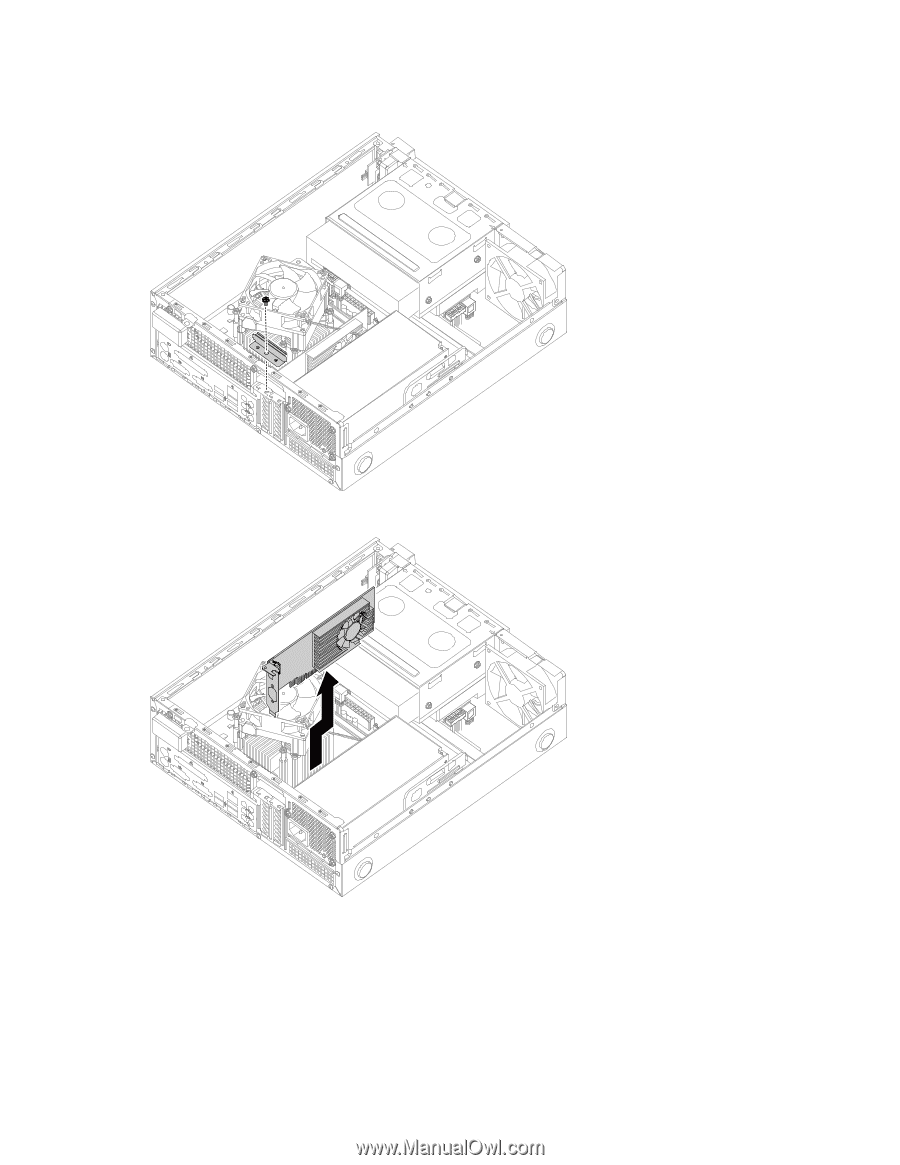
Step 5. Remove the screw that secures the graphic card to the chassis, and slide out the metal bracket. Step 6. Push the pin that lock the graphic card, and pull it up then slide it out to remove it. Step 7. To install the new graphic card: a. Slide then insert the new graphic card to the same connector on the motherboard. b. Reattach the metal bracket back into position and secure the graphic card to the chassis with the screw. Step 8. Reattach the computer cover. 36 Lenovo H520sHardware Maintenance Manual
-
 1
1 -
2
-
3
-
4
-
5
-
6
-
7
-
8
-
9
-
10
-
11
-
12
-
13
-
14
-
15
-
16
-
17
-
18
-
19
-
20
-
21
-
22
-
23
-
24
-
25
-
26
-
27
-
28
-
29
-
30
-
31
-
32
-
33
-
34
-
35
-
36
-
 37
37 -
 38
38 -
 39
39 -
 40
40 -
 41
41 -
 42
42 -
 43
43 -
 44
44 -
 45
45 -
 46
46 -
 47
47 -
48
-
49
-
50
-
51
-
52
-
53
-
54
-
55
-
56
-
57
-
58
-
59
 |
 |
Step 5.
Remove the screw that secures the graphic card to the chassis, and slide out the metal bracket.
Step 6.
Push the pin that lock the graphic card, and pull it up then slide it out to remove it.
Step 7.
To install the new graphic card:
a.
Slide then insert the new graphic card to the same connector on the motherboard.
b.
Reattach the metal bracket back into position and secure the graphic card to the chassis
with the screw.
Step 8.
Reattach the computer cover.
36
Lenovo H520sHardware Maintenance Manual