Lenovo IdeaCentre K230 IdeaCentre K220 Hardware Replacement Guide - Page 25
Note: Replacement of some models equipped with graphic, adapter bracket is different.
 |
View all Lenovo IdeaCentre K230 manuals
Add to My Manuals
Save this manual to your list of manuals |
Page 25 highlights
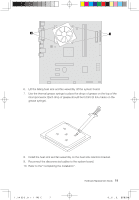
3. Install the new adapter into the same adapter connector. 4. Ensure the adapter is fully seated into the adapter connector. 5. At the rear of the computer, pivot the adapter latch to the closed position to secure the adapter. 6. Refer to the "Completing the installation". Note: Replacement of some models equipped with graphic adapter bracket is different. Please remove the bracket first as the following: 1. Remove the two screws that secure the bracket at the bottom of the chassis. 2. Lift the bracket out of the chassis. 3. Then remove the adapter as above. 22 Hardware Replacement Guide 31036127 IdeaCentre K_HRG_EN.indd 22 2008.10.20 1:59:38 PM
-
 1
1 -
2
-
3
-
4
-
5
-
6
-
7
-
8
-
9
-
10
-
11
-
12
-
13
-
14
-
15
-
16
-
17
-
18
-
19
-
 20
20 -
 21
21 -
 22
22 -
 23
23 -
 24
24 -
 25
25 -
 26
26 -
 27
27 -
 28
28 -
 29
29 -
 30
30 -
31
-
32
-
33
-
34
-
35
-
36
-
37
 |
 |
22
Hardware Replacement Guide
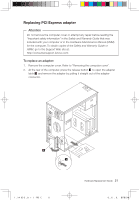
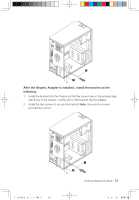
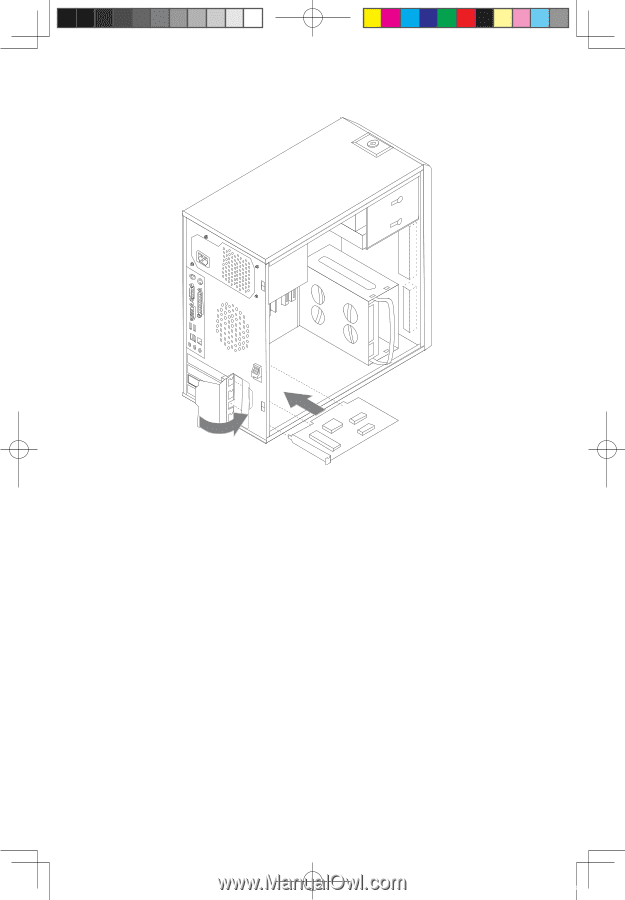
3.
Install the new adapter into the same adapter connector.
4.
Ensure the adapter is fully seated into the adapter connector.
5.
At the rear of the computer, pivot the adapter latch to the closed position to
secure the adapter.
6.
Refer to the “Completing the installation”.
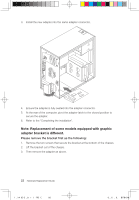
Note: Replacement of some models equipped with graphic
adapter bracket is different.
Please remove the bracket first as the following:
1.
Remove the two screws that secure the bracket at the bottom of the chassis.
2.
Lift the bracket out of the chassis.
3.
Then remove the adapter as above.
3
036
27 I
aC
t
K
HRG
E
22
2008
0 20
:59:38 PM