Lenovo ThinkCentre M50e Quick Reference Guide - Page 31
Using, rescue, recovery, workspace
 |
View all Lenovo ThinkCentre M50e manuals
Add to My Manuals
Save this manual to your list of manuals |
Page 31 highlights
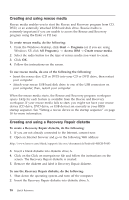
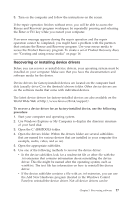
v On recordable CDs or DVDs (a recordable CD or DVD drive is required for this option) After you have backed up your hard disk, you can restore the complete contents of the hard disk or restore selected files only. To perform a backup operation, do the following: 1. From the Windows desktop, click Start -> All Programs -> Access IBM -> the Rescue and Recovery program. The Rescue and Recovery program opens. 2. In the menu bar, click Backup; then click Back up now. 3. Follow the instructions on the screen. To perform a restore operation from the Rescue and Recovery program, do the following: 1. From the Windows desktop, click Start -> All Programs -> Access IBM -> the Rescue and Recovery program. The Rescue and Recovery program opens. 2. In the menu bar, click Restore; then do one of the following: v Click Restore your system if you want to restore your hard disk to a previously backed-up state. This recovery method deletes all data currently stored on your hard disk and replaces it with the data from the backup. During the recovery process, you will be given an opportunity to transfer files currently on your hard disk to other media before any data is removed. v Click Restore files if you want to restore only selected files from your backup. 3. Follow the instructions on the screen. For information about performing a restore operation from the Rescue and Recovery workspace, see "Using the rescue and recovery workspace." Using the rescue and recovery workspace The Rescue and Recovery workspace resides in a protected, hidden area of your hard disk that operates independently from the Windows operating system. This enables you to perform recovery operations even if the Windows operating system cannot be started. You can perform the following recovery operations from the Rescue and Recovery workspace: v Rescue files from your hard disk or from a backup: The Rescue and Recovery workspace enables you to locate files on your hard disk and transfer them to a network drive or other recordable media such as a USB hard disk drive or a diskette. This solution is available even if you did not back up your files or if changes were made to the files since your last Chapter 3. Recovering software 13
-
 1
1 -
2
-
3
-
4
-
5
-
6
-
7
-
8
-
9
-
10
-
11
-
12
-
13
-
14
-
15
-
16
-
17
-
18
-
19
-
20
-
21
-
22
-
23
-
24
-
25
-
 26
26 -
 27
27 -
 28
28 -
 29
29 -
 30
30 -
 31
31 -
 32
32 -
 33
33 -
 34
34 -
 35
35 -
 36
36 -
37
-
38
-
39
-
40
-
41
-
42
-
43
-
44
-
45
-
46
-
47
-
48
-
49
-
50
-
51
-
52
-
53
-
54
-
55
-
56
-
57
-
58
-
59
-
60
-
61
-
62
-
63
-
64
-
65
-
66
-
67
-
68
-
69
-
70
-
71
-
72
-
73
-
74
-
75
-
76
-
77
-
78
-
79
-
80
-
81
-
82
-
83
-
84
-
85
-
86
-
87
-
88
-
89
-
90
-
91
-
92
-
93
-
94
 |
 |