Lexmark Apps Accessibility Solution - Page 6
Configuring the application, Setting up user access - for windows 8
 |
View all Lexmark Apps manuals
Add to My Manuals
Save this manual to your list of manuals |
Page 6 highlights
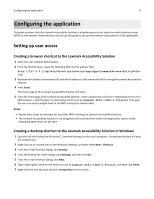
Configuring the application 6 Configuring the application This guide assumes that the Lexmark Accessibility Solution is already present on at least one multi-function printer (MFP) on the network. Administrators should use this guide to set up the browser‑based portion of the application. Setting up user access Creating a browser shortcut to the Lexmark Accessibility Solution 1 Open the user's default Web browser. 2 From the Web browser, paste the following URL into the address field: http://127.0.0.1/cgi‑bin/direct/printer/prtapp/apps/LexmarkAccessibilitySolut ion 3 Replace the IP address in the above URL with the IP address or DNS name of an MFP running the Lexmark Accessibility Solution. 4 Press Enter. The home page of the Lexmark Accessibility Solution will open. 5 From the home page of the Lexmark Accessibility Solution, create a bookmark or favorite-depending on the user's Web browser-and then give it a descriptive name (such as Lexmark X651, or Bob's Printer). That way, the user can easily navigate back to the MFP running the solution later. Notes: • Repeat these steps as necessary for any other MFPs running the Lexmark Accessibility Solution. • The Lexmark Accessibility Solution is not designed to be launched from within the Application section of the Embedded Web Server for the MFP. Creating a desktop shortcut to the Lexmark Accessibility Solution in Windows 1 Save the LAS‑Win‑Utility.exe file to the C:\Lexmark directory on the user's computer. Create that directory if it does not already exist. 2 Right-click on an unused area of the Windows Desktop, and then select New > Shortcut. 3 From the Create Shortcut dialog, click Browse. 4 From the Browse for Folder dialog, click Desktop, and then click OK. 5 From the Create Shortcut dialog, click Next. 6 Type a descriptive name for the shortcut, such as Lexmark X651, or Bob's Printer, and then click Finish. 7 Right-click the new shortcut and select Properties from the menu.
-
 1
1 -
 2
2 -
 3
3 -
 4
4 -
 5
5 -
 6
6 -
 7
7 -
 8
8 -
 9
9 -
 10
10 -
 11
11 -
 12
12 -
13
-
14
-
15
-
16
-
17
 |
 |