Lexmark C762 Quick Reference Pages - Page 12
Verify printer setup - review
 |
View all Lexmark C762 manuals
Add to My Manuals
Save this manual to your list of manuals |
Page 12 highlights
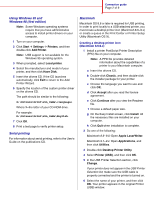
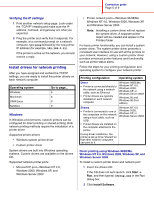
Connection guide Page 3 of 9 7 In the PostScript Printer Description (PPD) File section, click Auto Setup. Make sure your printer PPD now matches your printer. 8 Click Create, and then click Save. 9 Specify a printer name, and then click Save. Your printer is now saved as a desktop printer. Creating a queue in Print Center or Printer Setup Utility (Macintosh OS X) 1 Install a printer PostScript Printer Description (PPD) file on your computer. Note: A PPD file provides detailed information about the capabilities of a printer to your Macintosh computer. a Insert the drivers CD. b Double-click Mac OS X, and then doubleclick the installer package for your printer. c On the Authorization screen, choose Click the lock to make changes. d Enter your password, and then click OK. e Click Continue on the Welcome screen and again after you view the Readme file. f Click Agree to accept the license agreement. g Select a Destination, and then click Continue. h On the Easy Install screen, click Install. All the necessary files are installed on your computer. i Click Close when installation is complete. 2 Open the Finder, click Applications, and then click Utilities. 3 Double-click Print Center or Printer Setup Utility. 4 Do one of the following: - If your USB-attached printer appears in the Printer List, you can quit Print Center. A queue has been created for your printer or Printer Setup Utility. - If your USB-attached printer does not appear in the Printer List, make sure the USB cable is properly connected and the printer is turned on. After the printer appears in the Printer List, you can quit Print Center or Printer Setup Utility. UNIX/Linux Local printing is supported on many UNIX and Linux platforms, such as Sun Solaris and Red Hat. Some printer driver packages are available on the drivers CD. The User's Guide in each package gives detailed instructions for installing and using printers in UNIX and Linux environments. All the printer driver packages support local printing using a parallel connection. The driver package for Sun Solaris supports USB connections to Sun Ray appliances and Sun workstations. Verify printer setup Printing a menu settings page Print a menu settings page to review the default printer settings and to verify that printer options are installed correctly. Note: For more information about using the printer operator panel and changing menu settings, refer to the publications CD. 1 Make sure the printer is on. 2 Press Menu until you see Utilities Menu, and then press Select. 3 Press Menu until you see Print Menus, and then press Select to print the page. The message Printing Menus appears on the display. 4 Verify the options you installed are correctly listed under "Installed Features." If an option you installed is not listed, turn the printer off, unplug the power cord, and reinstall the option. 5 Verify the amount of memory installed is correctly listed under "Printer Information." 6 Verify the paper trays are configured for the sizes and types of paper you loaded. Printing a network setup page If the printer is attached to a network, print a network setup page to verify the network connection. This page
-
 1
1 -
2
-
3
-
4
-
5
-
6
-
 7
7 -
 8
8 -
 9
9 -
 10
10 -
 11
11 -
 12
12 -
 13
13 -
 14
14 -
 15
15 -
 16
16 -
 17
17 -
18
-
19
-
20
-
21
-
22
-
23
-
24
-
25
-
26
-
27
-
28
-
29
-
30
-
31
-
32
-
33
 |
 |
