Lexmark C762 Quick Reference Pages - Page 18
UNIX/Linux, NetWare
 |
View all Lexmark C762 manuals
Add to My Manuals
Save this manual to your list of manuals |
Page 18 highlights
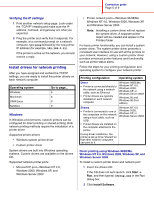
Connection guide Page 9 of 9 Step 2: Create a print queue in Print Center or Printer Setup Utility Using AppleTalk Follow these steps to create a print queue using AppleTalk. To create an IP print queue, see "Using IP Printing" on page 9. 1 Open Finder, click Applications, and then click Utilities. 2 Double-click Print Center or Printer Setup Utility. 3 Choose Add Printer from the Printers menu. 4 Choose AppleTalk from the pop-up menu. Note: If you don't know which zone or printer to select, look on the network setup page under the AppleTalk heading. 5 Select the AppleTalk zone from the list. 6 Select the new printer from the list, and then click Add. 7 Verify printer installation: a Open Finder, click Applications, and then click TextEdit. b Choose Print from the File menu. c Choose Summary from the Print Panel menu. d Do one of the following: - If the PPD file displayed in the Summary window is correct for your printer, then printer setup is complete. - If the PPD file displayed in the Summary window is not correct for your printer, delete the printer from printer list in Print Center or Printer Setup Utility and repeat "Step 1: Install a custom PPD file" on page 8. Using IP Printing Follow these steps to create a print queue using IP Printing. To create an AppleTalk print queue, see "Using AppleTalk" on page 9. 1 Open Finder, click Applications, and then click Utilities. 2 Double-click Print Center or Printer Setup Utility. 3 Choose Add Printer from the Printers menu. 4 Choose IP Printing from the pop-up menu. 5 Enter the IP address or the printer DNS name in the Printer's Address box. 6 Choose the printer manufacturer from the Printer Model pop-up menu. 7 Select the new printer from the list, and then click Add. 8 Verify printer installation: a Open Finder, click Applications, and then click TextEdit. b Choose Print from the File menu. c Choose Summary from the Print Panel menu. d Do one of the following: - If the PPD file displayed in the Summary window is correct for your printer, then printer setup is complete. - If the PPD file displayed in the Summary window is not correct for your printer, delete the printer from printer list in Print Center or Printer Setup Utility and repeat "Step 1: Install a custom PPD file" on page 8. UNIX/Linux Your printer supports both UNIX and Linux network environments. For the latest information about installing a network printer in a UNIX or Linux environment, click View Documentation on the drivers CD. NetWare Your printer supports both Novell Distributed Print Services (NDPS) and regular queue-based NetWare environments. For the latest information about installing a network printer in a NetWare environment, launch the drivers CD and click View Documentation.
-
 1
1 -
2
-
3
-
4
-
5
-
6
-
7
-
8
-
9
-
10
-
11
-
12
-
 13
13 -
 14
14 -
 15
15 -
 16
16 -
 17
17 -
 18
18 -
 19
19 -
 20
20 -
 21
21 -
 22
22 -
 23
23 -
24
-
25
-
26
-
27
-
28
-
29
-
30
-
31
-
32
-
33
 |
 |
