Lexmark CX331 Quick Reference - Page 7
Identifying jam locations, Paper jam in the standard tray
 |
View all Lexmark CX331 manuals
Add to My Manuals
Save this manual to your list of manuals |
Page 7 highlights
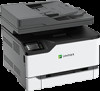
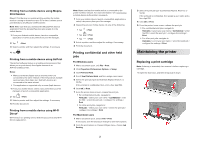
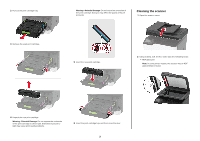
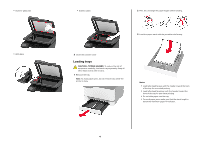
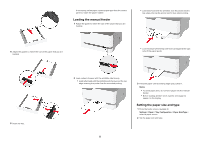
Identifying jam locations Notes: • When Jam Assist is set to On, the printer might attempt to flush blank pages or pages with partial prints after clearing the jam. Check your printed output for blank pages. • When Jam Recovery is set to On or Auto, the printer reprints jammed pages. Jam locations 1 Automatic document feeder (ADF) 2 Standard bin 3 Manual feeder 4 Trays 5 Door B 6 Door E Paper jam in the standard tray 1 Open door B. CAUTION-HOT SURFACE: The inside of the printer might be hot. To reduce the risk of injury from a hot component, allow the surface to cool before touching it. 3 Close the door. 4 Remove the tray and the manual feeder. 2 Remove the jammed paper. Note: Make sure that all paper fragments are removed. 5 Remove the jammed paper. 7
-
 1
1 -
 2
2 -
 3
3 -
 4
4 -
 5
5 -
 6
6 -
 7
7 -
 8
8 -
 9
9 -
 10
10 -
 11
11
 |
 |
