Lexmark E360 Quick Reference - Page 3
Loading the optional 250- or 550-sheet tray, Using the multipurpose feeder
 |
View all Lexmark E360 manuals
Add to My Manuals
Save this manual to your list of manuals |
Page 3 highlights
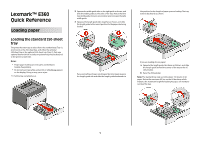
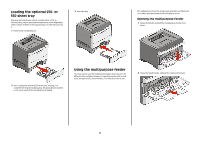
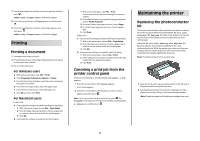
Loading the optional 250- or 550-sheet tray Only one optional drawer, which includes either a 250- or 550-sheet tray, may be attached to the printer at a time. Regardless of the number of sheets in the optional tray, it is referred to as Tray 2. 1 Pull the tray completely out. 3 Insert the tray. the multipurpose feeder for single-page print jobs on letterhead or on other specialty media you do not keep in a tray. Opening the multipurpose feeder 1 Grasp the handle, and pull the multipurpose feeder door down. 2 See "Loading the standard 250-sheet tray" on page 1 to complete the steps for loading a tray. An optional tray is loaded in the same way that the standard tray is loaded. Using the multipurpose feeder You may want to use the multipurpose feeder when you print on different sizes and types of papers or specialty media, such as card stock, transparencies, and envelopes. You may also want to use 2 Grasp the raised handle, and pull the extension forward. 3
-
 1
1 -
 2
2 -
 3
3 -
 4
4 -
 5
5 -
 6
6 -
 7
7 -
 8
8
 |
 |
