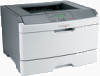
Lexmark E360 Quick Reference - Page 6
Printing, Printing a document, Canceling a print job from the printer control panel - toner
 |
View all Lexmark E360 manuals
Add to My Manuals
Save this manual to your list of manuals |
Page 6 highlights
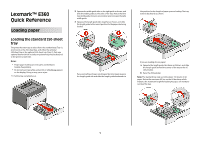
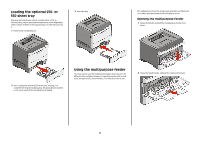
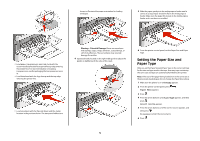
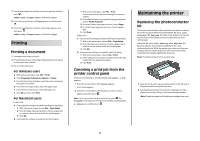
7 Press the arrow buttons until the correct size appears, and then press . Submitting Changes appears, followed by Size. 8 Press the arrow buttons until Type appears, and then press . 9 Press the arrow buttons until the correct type appears, and then press . Submitting Changes appears, followed by Type. Printing Printing a document 1 Load paper into a tray or feeder. 2 From the Paper menu, set the Paper Type and Paper Size based on the paper that is loaded. 3 Do one of the following: For Windows users a With a document open, click File ª Print. b Click Properties, Preferences, Options, or Setup. c From the Form Source list box, select the source containing the paper you loaded. d From the Form Type list box, select the paper type. e From the Form Size list box, select the paper size. f Click OK, and then click Print. For Macintosh users In Mac OS X: a Customize the settings as needed in the Page Setup dialog. 1 With a document open, choose File > Page Setup. 2 From the Paper Size pop-up menu, choose a paper size or create a custom size to match the loaded paper. 3 Click OK. b Customize the settings as needed in the Print dialog: 1 With a document open, click File > Print. If necessary, click the disclosure triangle to see more options. 2 From the print options or Copies & Pages pop-up menu, choose Printer Features. 3 From the Feature Sets pop-up menu, choose Paper. 4 From the Paper type pop-up menu, choose a paper type. 5 Click Print. In Mac OS 9: a Customize the settings as needed in the Page Setup dialog: 1 With a document open, choose File > Page Setup. 2 From the Paper pop-up menu, choose a paper size or create a custom size to match the loaded paper. 3 Click OK. b Customize the settings as needed in the Print dialog: 1 With a document open, choose File > Print. 2 Select a Paper Source option, and then choose the tray loaded with the appropriate paper. 3 Click Print. Canceling a print job from the printer control panel If the job is formatting or already printing, and Cancel a job appears: 1 Press the arrow buttons until Cancel appears. A list of jobs appears. 2 Press the arrow buttons until the job you want to cancel appears, and then press . Note: Once a print job is sent, to cancel a job, press . The Stopped screen appears. Press the arrow buttons until Cancel a job appears, and then press . Maintaining the printer Replacing the photoconductor kit The printer automatically notifies you before the photoconductor kit reaches a page maximum by showing 84 PC Kit life warning or 84 Replace PC Kit on the display. You can also see the status of the photoconductor kit by printing a menu settings page. When 84 PC Kit life warning or 84 Replace PC Kit first appears, you should immediately order a new photoconductor kit. While the printer may continue to function properly after the photoconductor kit has reached its official end-of-life, print quality significantly decreases. Note: The photoconductor kit is one item only. 1 Open the front door by pressing the button on the left side of the printer and lowering the front door. 2 Pull the photoconductor kit and toner cartridge out of the printer as a unit by pulling on the toner cartridge handle. Note: The photoconductor kit and toner cartridge form a unit. 6
-
 1
1 -
 2
2 -
 3
3 -
 4
4 -
 5
5 -
 6
6 -
 7
7 -
 8
8
 |
 |
