Lexmark E360 Quick Reference - Page 5
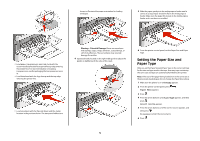
Setting the Paper Size and Paper Type, Ready, Paper Menu, Size/Type, Select Source
 |
View all Lexmark E360 manuals
Add to My Manuals
Save this manual to your list of manuals |
Page 5 highlights
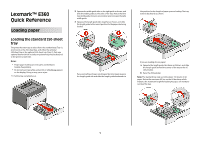
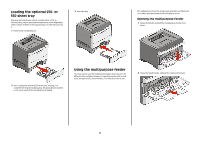
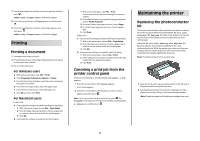
shown to illustrate the proper orientation for loading envelopes. 5 Slide the paper gently into the multipurpose feeder until it comes to a stop. Paper should lie flat in the multipurpose feeder. Make sure the paper fits loosely in the multipurpose feeder and is not bent or wrinkled. • Load paper, transparencies, and card stock with the recommended print side faceup and the top edge entering the printer first. For more information on loading transparencies, see the packaging the transparencies came in. • Load letterhead with the logo faceup and the top edge entering the printer first. • Load envelopes with the flap side down and the stamp location in the position shown. The stamp and address are Warning-Potential Damage: Never use envelopes with stamps, clasps, snaps, windows, coated linings, or self-stick adhesives. These envelopes may severely damage the printer. 4 Squeeze the tab located on the right width guide to adjust the guides to lightly touch the sides of the stack. 6 From the printer control panel, set the Paper Size and Paper Type. Setting the Paper Size and Paper Type After you set the Paper Size and Paper Type to the correct settings for the size and type used in the trays, then any trays containing the same size and type are automatically linked by the printer. Note: If the size of the paper being loaded now is the same size as the previously loaded paper, do not change the Paper Size setting. 1 Make sure the printer is on and Ready appears. 2 From the printer control panel, press . Paper Menu appears. 3 Press . 4 Press the arrow buttons until Size/Type appears, and then press . Select Source appears. 5 Press the arrow buttons until the correct source appears, and then press . Size appears under the source name. 6 Press . 5
-
 1
1 -
 2
2 -
 3
3 -
 4
4 -
 5
5 -
 6
6 -
 7
7 -
 8
8
 |
 |
