Lexmark MarkNet N4050e User's Guide for Windows - Page 19
Changing your wireless print server settings
 |
View all Lexmark MarkNet N4050e manuals
Add to My Manuals
Save this manual to your list of manuals |
Page 19 highlights
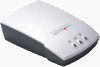
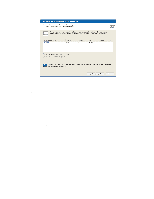
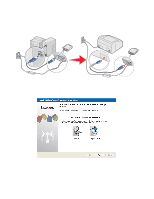
3 Changing your wireless print server settings The easiest way to change settings in the wireless print server is through the embedded Web server. For this to work, you must successfully complete the installation of the print server on your network. 1 Enter the IP address of the print server in a browser window. The embedded Web page for the print server will open. For information on locating the IP address of the print server, see Finding the network printer IP address below. 2 Select the settings you want to change, such as IP address. 3 Enter the changes, and then click Submit. Finding the network printer IP address Using the IP Setup Utility The IP Setup Utility is installed in addition to the N4050e Wireless Setup Utility Wizard when you run the Setup Utility CD. You can use this utility to find the IP address of your print server. 1 Launch the IP Setup Utility. For example: In Windows operating systems go to Start Æ Programs Æ Lexmark Æ , Lexmark Wireless Print Server N4050e Æ IP Setup Utility. The IP Setup Utility will discover all Lexmark print servers on the network. A list of print servers, including their MAC and IP addresses, will be displayed. 2 Select your print server from the list. 3 Click Launch Web Page. Printing a network setup page Once the print server and printer are connected, for most printers, press and release the test button on the back of the print server to print a network setup page. Note: If you have not successfully completed the installation of this product on the wireless network, the IP address may not be listed on the network setup page. Changing your wireless print server settings 13
-
 1
1 -
2
-
3
-
4
-
5
-
6
-
7
-
8
-
9
-
10
-
11
-
12
-
13
-
 14
14 -
 15
15 -
 16
16 -
 17
17 -
 18
18 -
 19
19 -
 20
20 -
 21
21 -
 22
22 -
 23
23 -
 24
24 -
25
-
26
-
27
-
28
-
29
 |
 |