Lexmark Network Printer Device User's Guide for Macintosh - Page 8
Configuring your wireless print server - manager
 |
View all Lexmark Network Printer Device manuals
Add to My Manuals
Save this manual to your list of manuals |
Page 8 highlights
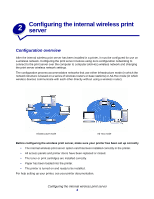
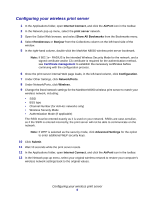
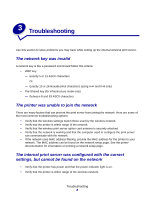
Configuring your wireless print server 1 In the Applications folder, open Internet Connect, and click the AirPort icon in the toolbar. 2 In the Network pop-up menu, select the print server network. 3 Open the Safari Web browser, and select Show All Bookmarks from the Bookmarks menu. 4 Select Rendezvous or Bonjour from the Collections column on the left-hand side of the window. 5 In the right-hand column, double-click the MarkNet N8050 wireless print server bookmark. Note: If 802.1x-RADIUS is the intended Wireless Security Mode for the network, and a signed certificate and/or CA certificate is required for the authentication method, see Certificate management to establish the necessary certificates before continuing with the configuration process. 6 Once the print server internal Web page loads, in the left-hand column, click Configuration. 7 Under Other Settings, click Network/Ports. 8 Under Network/Ports, click Wireless. 9 Change the listed network settings for the MarkNet N8050 wireless print server to match your wireless network, including: • SSID • BSS type • Channel Number (for Ad-Hoc networks only) • Wireless Security Mode • Authentication Mode (If applicable) The SSID must be entered exactly as it is used on your network. SSIDs are case-sensitive, so if the SSID is entered incorrectly, the print server will not be able to communicate on the network. Note: If WEP is selected as the security mode, click Advanced Settings for the option to enter additional WEP security keys. 10 Click Submit. 11 Wait 10 seconds while the print server resets. 12 In the Applications folder, open Internet Connect, and click the AirPort icon in the toolbar. 13 In the Network pop-up menu, select your original wireless network to restore your computer's wireless network settings back to the original values. Configuring your wireless print server 5
-
 1
1 -
2
-
 3
3 -
 4
4 -
 5
5 -
 6
6 -
 7
7 -
 8
8 -
 9
9 -
 10
10 -
 11
11 -
 12
12 -
 13
13 -
14
-
15
-
16
-
17
-
18
 |
 |