Lexmark W840N User's Guide - Page 13
Serial printing, Installing drivers for local printing, Setting parameters in the printer
 |
UPC - 734646079723
View all Lexmark W840N manuals
Add to My Manuals
Save this manual to your list of manuals |
Page 13 highlights
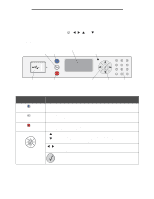
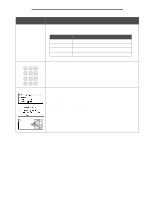
Installing drivers for local printing Serial printing With serial printing, data is transferred one bit at a time. Although serial printing is usually slower than parallel printing, it is the preferred option when there is a great deal of distance between the printer and computer, or when a parallel interface is not available. Note: A serial interface card is required and can be purchased separately. Before printing, establishing communication between the printer and computer is required. To do this: 1 Set serial parameters in the printer. 2 Install a printer driver on the attached computer. 3 Match the serial settings in the COM port. Setting parameters in the printer 1 Press on the operator panel. 2 Press until Network/Ports appears, and then press . 3 Press until Serial Option X appears, and then press . 4 Press until appears, and then press a change). (where is the parameter required for 5 Press until appears, and then press change). (where is the setting required for a Note the following restrictions: • Maximum baud rate supported is 115,200. • Data Bits must be set to 7 or 8. • Parity must be set to Even, Odd, or None. • Stop Bits must be set to 2. • Flow Control recommended protocol setting is Xon/Xoff. 6 Press repeatedly to return the printer to the Ready state. 7 Print a Menu Settings page, and verify that the serial parameters are correct. Note: Keep this page for later use. a Press on the operator panel. b Press until Reports appears, and then press . c Press until Menu Settings Page appears, and then press . d Look under the Standard Serial (or Serial Option X if a serial interface card is installed) heading to find the serial parameters. Installing a printer driver A printer driver must be installed on the computer that is connected to the printer. Note: Windows 95 and Windows 98 (first edition) users should follow the installation directions in Using Windows 95 and Windows 98 (first edition). 1 Insert the drivers CD. It should launch automatically. If the CD does not launch automatically, click Start Æ Run, and type the following in the Run dialog: D:\Setup.exe Where D is the letter of the CD-ROM drive. Windows 13
-
 1
1 -
2
-
3
-
4
-
5
-
6
-
7
-
 8
8 -
 9
9 -
 10
10 -
 11
11 -
 12
12 -
 13
13 -
 14
14 -
 15
15 -
 16
16 -
 17
17 -
 18
18 -
19
-
20
-
21
-
22
-
23
-
24
-
25
-
26
-
27
-
28
-
29
-
30
-
31
-
32
-
33
-
34
-
35
-
36
-
37
-
38
-
39
-
40
-
41
-
42
-
43
-
44
-
45
-
46
-
47
-
48
-
49
-
50
-
51
-
52
-
53
-
54
-
55
-
56
-
57
-
58
-
59
-
60
-
61
-
62
-
63
-
64
-
65
-
66
-
67
-
68
-
69
-
70
-
71
-
72
-
73
-
74
-
75
-
76
-
77
-
78
-
79
-
80
-
81
-
82
-
83
-
84
-
85
-
86
-
87
-
88
-
89
-
90
-
91
-
92
-
93
-
94
-
95
-
96
-
97
-
98
-
99
-
100
-
101
-
102
-
103
-
104
-
105
-
106
-
107
-
108
-
109
-
110
-
111
-
112
-
113
-
114
-
115
-
116
-
117
-
118
-
119
 |
 |