Lexmark X125 Quick Reference - Page 28
The printer or scanner is not working., Check the printer status - windows 7
 |
UPC - 734646247528
View all Lexmark X125 manuals
Add to My Manuals
Save this manual to your list of manuals |
Page 28 highlights
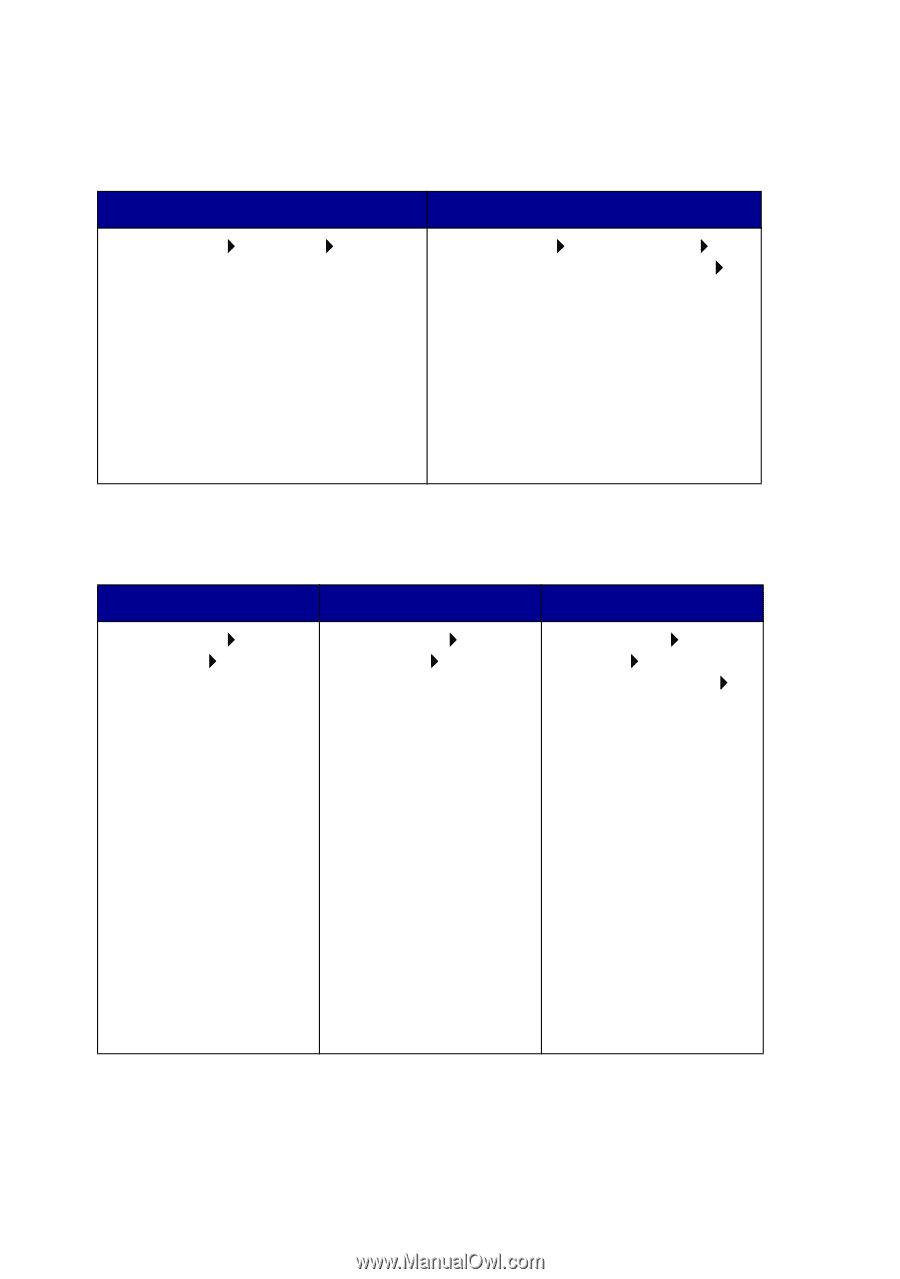
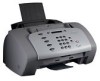
The printer or scanner is not working. 1 Check the printer status: Windows 98/Me/2000 Windows XP 1 Click Start Settings Printers. 2 From the Printers folder, double-click the Lexmark X125 printer icon. 3 From the Printer menu, make sure: • Default Printer is selected. • Pause Printing is not selected. 1 Click Start Control Panel Printers and Other Hardware Printers and Faxes. 2 From the Printers folder, double-click the Lexmark X125 printer icon. 3 From the Printer menu, make sure: • Default Printer is selected. • Pause Printing is not selected. 2 Check the printer port: Windows 98/Me Windows 2000 Windows XP 1 Click Start Settings Printers. 2 Right-click the Lexmark X125 printer icon, and then click Properties. 3 Click the Details tab. 4 From the Ports drop-down menu, check the printer port. If the USB port is not listed, uninstall and then reinstall the printer software. For help, see page 25. 5 Click OK. 1 Click Start Settings Printers. 2 Right-click the Lexmark X125 printer icon, and then click Properties. 3 Click the Ports tab. 4 From the list of ports, select the USB printer port. If the USB port is not listed, uninstall and then reinstall the printer software. For help, see page 25. 5 Click Apply. 6 Click OK. 1 Click Start Control Panel Printers and Other Hardware Printers and Faxes. 2 Click the Ports tab. 3 From the list of ports, select the USB printer port. If the USB port is not listed, uninstall and then reinstall the printer software. For help, see page 25. 4 Click Apply. 5 Click OK. 24
-
 1
1 -
2
-
3
-
4
-
5
-
6
-
7
-
8
-
9
-
10
-
11
-
12
-
13
-
14
-
15
-
16
-
17
-
18
-
19
-
20
-
21
-
22
-
 23
23 -
 24
24 -
 25
25 -
 26
26 -
 27
27 -
 28
28 -
 29
29 -
 30
30 -
 31
31 -
 32
32 -
 33
33 -
34
-
35
 |
 |