Lexmark X5450 Setup Solutions - Page 16
Installing print cartridges, Warning-Potential Damage
 |
View all Lexmark X5450 manuals
Add to My Manuals
Save this manual to your list of manuals |
Page 16 highlights
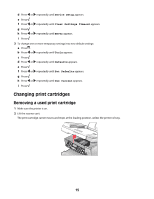
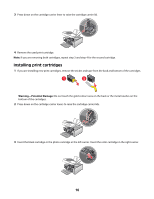
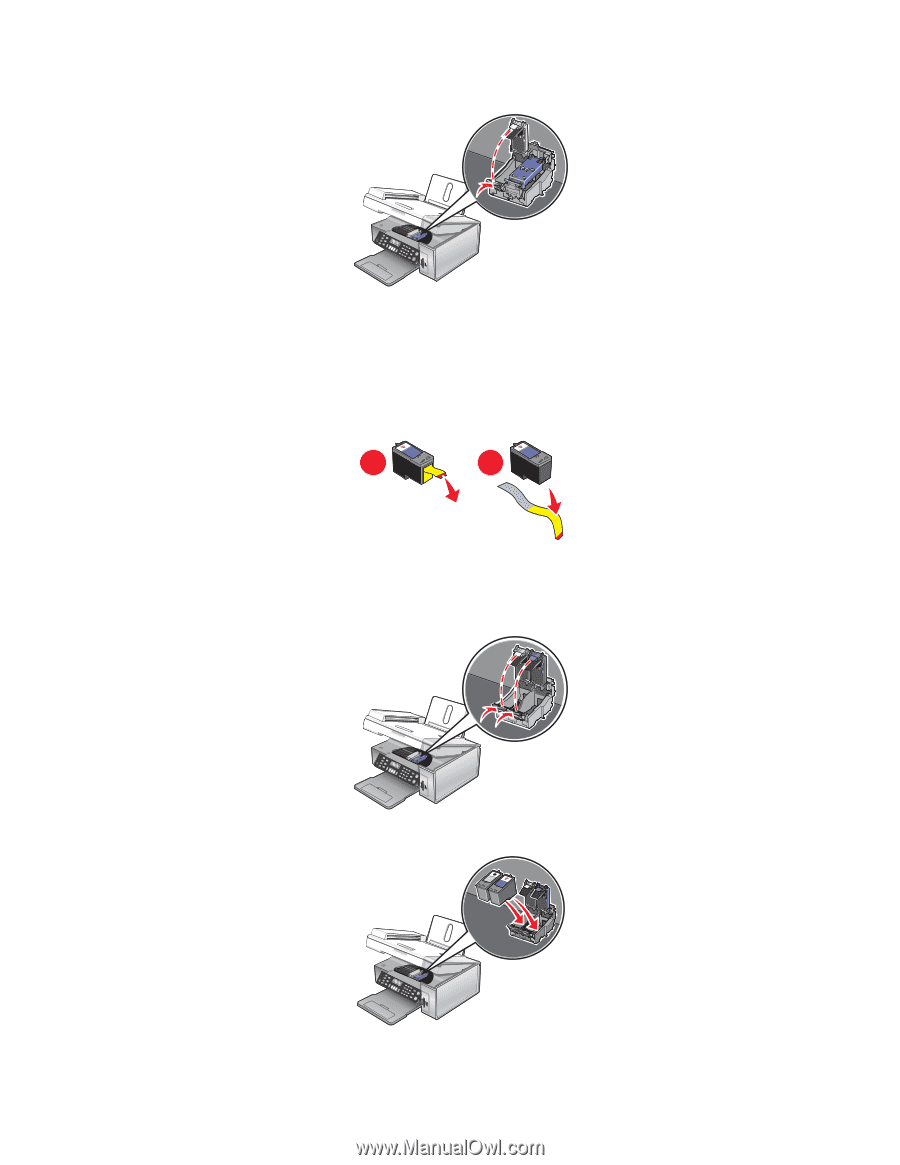
3 Press down on the cartridge carrier lever to raise the cartridge carrier lid. 4 Remove the used print cartridge. Note: If you are removing both cartridges, repeat step 3 and step 4 for the second cartridge. Installing print cartridges 1 If you are installing new print cartridges, remove the sticker and tape from the back and bottom of the cartridges. 1 2 Warning-Potential Damage: Do not touch the gold contact area on the back or the metal nozzles on the bottom of the cartridges. 2 Press down on the cartridge carrier levers to raise the cartridge carrier lids. 3 Insert the black cartridge or the photo cartridge in the left carrier. Insert the color cartridge in the right carrier. 16
-
 1
1 -
2
-
3
-
4
-
5
-
6
-
7
-
8
-
9
-
10
-
 11
11 -
 12
12 -
 13
13 -
 14
14 -
 15
15 -
 16
16 -
 17
17 -
 18
18 -
 19
19 -
 20
20 -
 21
21 -
22
-
23
-
24
-
25
 |
 |
3
Press down on the cartridge carrier lever to raise the cartridge carrier lid.
4
Remove the used print cartridge.
Note:
If you are removing both cartridges, repeat step 3 and step 4 for the second cartridge.
Installing print cartridges
1
If you are installing new print cartridges, remove the sticker and tape from the back and bottom of the cartridges.
1
2
Warning—Potential Damage:
Do
not
touch the gold contact area on the back or the metal nozzles on the
bottom of the cartridges.
2
Press down on the cartridge carrier levers to raise the cartridge carrier lids.
3
Insert the black cartridge or the photo cartridge in the left carrier. Insert the color cartridge in the right carrier.
16