Lexmark X792 Lexmark Document Distributor - Page 14
System setup overview, Supported printers, Notes, Remote Management, Create Profiles, Firmware
 |
View all Lexmark X792 manuals
Add to My Manuals
Save this manual to your list of manuals |
Page 14 highlights
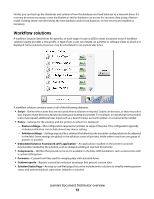
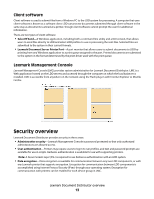
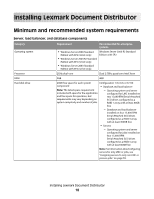
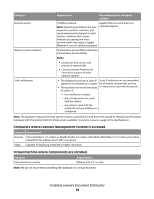
System setup overview Each of the following steps represents a different stage of the system setup process, covered in the chapter indicated: 1 Activate the appropriate licenses, and then install the database, load balancer, and servers. ("Installing Lexmark Document Distributor" on page 18) 2 Perform initial system configuration, including setting up device groups, discovering printers, and scheduling a backup. ("Managing device groups and devices" on page 87, "Backup and disaster recovery" on page 78) 3 Deploy solutions to printers. ("Managing solutions" on page 83) 4 If you are using software clients, prepare software client groups and install client software where necessary. ("Managing software clients" on page 99) 5 Test deployed solutions on printers and software clients. ("Testing and using Lexmark Document Distributor solutions" on page 109) Supported printers LDD supports the printers listed below. Only e-Task 2, e-Task 2+, and X642 printers support eSF applications used in hybrid solutions and prompts that contain double-byte characters. Notes: • e-Task 2, e-Task 2+, and X642 printers are distinguished as separate classes for home screen customization and eSF application configuration because of different capabilities in those areas. However, discoveries and solution profiles do not distinguish among these classes and designate all printers listed in those classes as e-Task 2 printers. • During the first policy update after installation or an update, LDD installs an "Advanced Prompting Bundle" eSF application on e-Task 2 and e-Task 2+ multifunction and single-function printers and X642 multifunction printers. This application is required for LDD support and provides prompting capabilities, held job support, and security support for these printers with LDD. • On e-Task 2 printers, you must set the Access Controls Remote Management, Create Profiles, and Firmware Updates to No Security. Using the Guided Security Setup may change these settings. To change settings for Access Controls, type the IP address of the printer in your Web browser to access the printer Embedded Web Server, and then click Settings Security Edit Security Setups Access Controls. Lexmark Document Distributor overview 14
-
 1
1 -
2
-
3
-
4
-
5
-
6
-
7
-
8
-
 9
9 -
 10
10 -
 11
11 -
 12
12 -
 13
13 -
 14
14 -
 15
15 -
 16
16 -
 17
17 -
 18
18 -
 19
19 -
20
-
21
-
22
-
23
-
24
-
25
-
26
-
27
-
28
-
29
-
30
-
31
-
32
-
33
-
34
-
35
-
36
-
37
-
38
-
39
-
40
-
41
-
42
-
43
-
44
-
45
-
46
-
47
-
48
-
49
-
50
-
51
-
52
-
53
-
54
-
55
-
56
-
57
-
58
-
59
-
60
-
61
-
62
-
63
-
64
-
65
-
66
-
67
-
68
-
69
-
70
-
71
-
72
-
73
-
74
-
75
-
76
-
77
-
78
-
79
-
80
-
81
-
82
-
83
-
84
-
85
-
86
-
87
-
88
-
89
-
90
-
91
-
92
-
93
-
94
-
95
-
96
-
97
-
98
-
99
-
100
-
101
-
102
-
103
-
104
-
105
-
106
-
107
-
108
-
109
-
110
-
111
-
112
-
113
-
114
-
115
-
116
-
117
-
118
-
119
-
120
-
121
-
122
-
123
-
124
-
125
-
126
-
127
-
128
-
129
-
130
-
131
-
132
-
133
-
134
-
135
-
136
-
137
-
138
-
139
-
140
-
141
 |
 |
