Lexmark XC9465 Quick Reference - Page 19
Paper jam in the standard tray
 |
View all Lexmark XC9465 manuals
Add to My Manuals
Save this manual to your list of manuals |
Page 19 highlights
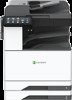
Jam locations 1 Automatic document feeder 2 Standard bin 3 Paper transport 4 Staple, hole punch finisher Jam locations 5 Trifold/Z-fold finisher 6 Booklet finisher 7 2000-sheet tray 8 Optional trays 9 Standard trays 10 Staple finisher 11 Multipurpose feeder 12 Door A Paper jam in the standard tray 1 Open door A. CAUTION-HOT SURFACE: The inside of the printer might be hot. To reduce the risk of injury from a hot component, allow the surface to cool before touching it. 2 Remove the jammed paper. Note: Make sure that all paper fragments are removed. 3 Pull out the standard tray. 4 Remove the jammed paper. Note: Make sure that all paper fragments are removed. 19
-
 1
1 -
2
-
3
-
4
-
5
-
6
-
7
-
8
-
9
-
10
-
11
-
12
-
13
-
 14
14 -
 15
15 -
 16
16 -
 17
17 -
 18
18 -
 19
19 -
 20
20 -
 21
21 -
 22
22 -
 23
23 -
 24
24 -
25
-
26
-
27
-
28
-
29
-
30
-
31
-
32
-
33
-
34
-
35
 |
 |

Jam locations
1
Automatic document feeder
2
Standard bin
3
Paper transport
4
Staple, hole punch finisher
Jam locations
5
Trifold/Z-fold finisher
6
Booklet finisher
7
2000-sheet tray
8
Optional trays
9
Standard trays
10
Staple finisher
11
Multipurpose feeder
12
Door A
Paper jam in the standard tray
1
Open door A.
CAUTION—HOT SURFACE:
The inside of the printer
might be hot. To reduce the risk of injury from a hot
component, allow the surface to cool before touching
it.
2
Remove the jammed paper.
Note:
Make sure that all paper fragments are removed.
3
Pull out the standard tray.
4
Remove the jammed paper.
Note:
Make sure that all paper fragments are removed.
19