Lexmark XM9145 Quick Reference
Lexmark XM9145 Manual
 |
View all Lexmark XM9145 manuals
Add to My Manuals
Save this manual to your list of manuals |
Lexmark XM9145 manual content summary:
- Lexmark XM9145 | Quick Reference - Page 1
wake the printer from Hibernate mode: • Pressing the Sleep button until the printer wakes • Performing a power‑on reset using the main power switch Use the printer. 11 Held Jobs Display all current held jobs. 12 Status/Supplies • Show a warning or error message whenever the printer requires - Lexmark XM9145 | Quick Reference - Page 2
error condition occurs, then this icon appears. Status message bar • Show the current printer status such as Ready or Busy. • Show printer conditions such as Toner 7 Tips Open a context-sensitive Help dialog. Other touch-screen buttons Touch Accept To Save a setting. Cancel • Cancel an action - Lexmark XM9145 | Quick Reference - Page 3
as 123.123.123.123. 2 Open a Web browser, and then type the printer IP address in the address field. 3 Press Enter. Note: If you are Do one or more of the following: • Show or hide the icons of basic printer functions. a Click Settings > General Settings > Home screen customization. b Select the - Lexmark XM9145 | Quick Reference - Page 4
paper and showing the information on the card in a more convenient manner. 1 Open a Web browser, and then type the printer IP address in the address field. Note: View the printer IP address on the printer resolution is not more than 200 dpi for color, and 400 the instructions on the printer display - Lexmark XM9145 | Quick Reference - Page 5
import the configuration file. Notes: • If a JVM Out of Memory error occurs, then repeat the export process until the configuration file is saved. on the printer display. Doing so may cause a jam. 5 2 Squeeze and slide the paper guides to the correct position for the size of the paper you are - Lexmark XM9145 | Quick Reference - Page 6
with the header on the left side of the tray. • Make sure that the paper is below the maximum fill line on the edge of the paper tray. Overfilling may cause paper jams. 2 Adjust the guide to match the size of the paper you are loading. 3 Flex the sheets back and forth to loosen them, and - Lexmark XM9145 | Quick Reference - Page 7
‑stick adhesives. These envelopes may severely damage the printer. • Make sure that the paper is below the maximum fill line. Overfilling may cause paper jams. 5 From the control panel, set the paper size and paper type in the Paper menu to match the paper loaded in the feeder. Linking and unlinking - Lexmark XM9145 | Quick Reference - Page 8
the changes. Printing a document 1 From the printer control panel, set the paper type and size to match the paper loaded. 2 Send the print job: For Windows flash drives must support the full‑speed standard. Low-speed USB devices are not supported. • USB flash drives must support the File Allocation - Lexmark XM9145 | Quick Reference - Page 9
• .png Canceling a print job Canceling a print job from the printer control panel 1 From the printer control panel, touch Cancel Job or press on the keypad. 2 Touch sure the size of the original document and the size of the copy paper are the same. 2 From the home screen, navigate to: Copy - Lexmark XM9145 | Quick Reference - Page 10
you are loading a document into the ADF tray, then adjust the paper guides. 3 From the home screen, navigate to: Fax > enter the fax number > Options > Delayed Send Note: If Fax Mode is set to Fax Server, then the Delayed Send button does not appear. Faxes waiting for transmission are listed in the - Lexmark XM9145 | Quick Reference - Page 11
specified by your system support person. After the destinations jams Avoiding jams Load paper properly • Make sure paper lies flat in the tray. 11 Correct loading of paper Incorrect loading of paper • Do not remove a tray while the printer is printing. • Do not load a tray while the printer - Lexmark XM9145 | Quick Reference - Page 12
Jam Recovery is set to On or Auto, the printer reprints jammed pages. However, the Auto setting reprints jammed pages only if adequate printer cover. [28y.xx] jammed paper. [x]‑page jam, clear jammed paper from the multipurpose feeder. [200.xx] Remove the jammed paper from the feeder. Area - Lexmark XM9145 | Quick Reference - Page 13
area 6 Reload the paper. [x]‑page jam, open door C and clear all jammed paper. [2yy.xx] 1 Open door C. Make sure that it does not hit any cable attached to the printer. • Above the duplex area 3 Open the standard trays, and then locate the jammed paper. 4 Remove the jammed paper. Note: Make sure - Lexmark XM9145 | Quick Reference - Page 14
tray and open door C. [2yy.xx] 1 Slide the 3000‑sheet tray. 3 Remove the jammed paper from any of the following locations: Note: Make sure that all paper fragments are removed. CAUTION-HOT SURFACE: The inside of the printer might be hot. To reduce the risk of injury from a hot component, allow the - Lexmark XM9145 | Quick Reference - Page 15
‑sheet tray and open door D. [24y.xx] 1 Slide the 3000‑sheet tray. 5 Remove the jammed paper. Note: Make sure that all paper fragments are removed. 3 Remove the jammed paper. Note: Make sure that all paper fragments are removed. 6 Close the trays and door C. 7 Slide the 3000‑sheet tray back into - Lexmark XM9145 | Quick Reference - Page 16
C. Make sure that it does not hit any cable attached to the printer. 6 Remove the jammed paper from any of the following locations: Note: Make sure that all paper fragments are removed. CAUTION-HOT SURFACE: The inside of the printer might be hot. To reduce the risk of injury from a hot component - Lexmark XM9145 | Quick Reference - Page 17
‑sheet tray back into place. [x]‑page jam, open doors G, H, and J and clear jammed paper. Leave paper in bin. [4yy.xx] 1 Open door G, and then remove the jammed paper. Note: Make sure that all paper fragments are removed. 3 Open door H. 4 Remove the jammed paper from any of the following locations - Lexmark XM9145 | Quick Reference - Page 18
• Door J • Areas H1 and H2 • Areas H3 and H4 Note: If there is a jammed paper between the finisher bins, then remove the paper. • Area H6 5 Close Door H. 6 Open door C, and then remove the jammed paper. Note: Make sure that door C does not hit any cable attached to the printer. 18 - Lexmark XM9145 | Quick Reference - Page 19
are removed. • If necessary, turn spinner wheel G1 downward to feed jammed paper into the finisher bin, and then remove the paper. 4 Open door C, and then remove the jammed paper. CAUTION-HOT SURFACE: The inside of the printer might be hot. To reduce the risk of injury from a hot component - Lexmark XM9145 | Quick Reference - Page 20
, press latch to access area G and clear jammed staples. Leave paper in bin. [402.93] 1 Remove all paper from the staple finisher bin. 3 Remove the staple cartridge holder. 6 Press the staples against the metal bracket. 2 Press the latch on the staple finisher, and - Lexmark XM9145 | Quick Reference - Page 21
then lift handle J1. 3 Remove the jammed paper from any of the following locations: Note: Make sure that all paper fragments are removed. • Door J [x]‑page jam, open door H and rotate knob H6 clockwise. Leave paper in bin. [426.xx-428.xx] If the jammed paper is located under door G, then open the - Lexmark XM9145 | Quick Reference - Page 22
there is a jammed paper between the finisher bins, then remove the paper. • Area H6 • Area H8 • Areas H1 and H2 • Areas H3 and H4 4 Using handle H5, pull out the booklet maker. • Area H9 5 Remove the jammed paper from any of the following locations: Note: Make sure that all paper fragments are - Lexmark XM9145 | Quick Reference - Page 23
• Area H10 6 Push the booklet maker back into place. 7 Close door H. 8 Open door C, and then remove the jammed paper. CAUTION-HOT SURFACE: The inside of the printer might be hot. To reduce the risk of injury from a hot component, allow the surface to cool before touching it. Notes: • Make sure - Lexmark XM9145 | Quick Reference - Page 24
7 Close the door. 8 Close the scanner cover. 24
-
 1
1 -
 2
2 -
 3
3 -
 4
4 -
 5
5 -
 6
6 -
 7
7 -
8
-
9
-
10
-
11
-
12
-
13
-
14
-
15
-
16
-
17
-
18
-
19
-
20
-
21
-
22
-
23
-
24
 |
 |

Quick Reference
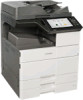
Learning about the printer
Using the control panel
Use the
To
1
Display
•
View the printer status and messages.
•
Set up and operate the printer.
2
Home button
Go to the home screen.
3
Sleep button
Enable Sleep mode or Hibernate mode.
The following actions wake the printer from
Sleep mode:
•
Touching the control panel home screen
•
Opening the scanner cover
The following actions wake the printer from
Hibernate mode:
•
Pressing the Sleep button until the printer
wakes
•
Performing a power
‑
on reset using the
main power switch
Use the
To
4
Keypad
Enter numbers, letters, or symbols.
5
Start button
Start a job, depending on which mode is
selected.
6
Clear all /
Reset button
Reset the default settings of a function, such
as copying, faxing, or scanning.
7
Stop or Cancel
button
Stop all printer activity.
8
Indicator light
Check the status of the printer.
Understanding the home screen
When the printer is turned on, the display shows a basic screen,
referred to as the home screen. Touch the home screen buttons and
icons to initiate an action such as copying, faxing, or scanning; to open
the menu screen; or to respond to messages.
Note:
Your home screen may vary depending on your home screen
customization settings, administrative setup, and active embedded
solutions.
Touch
To
1
Change Language
Launch the Change Language pop
‑
up
window that lets you change the primary
language of the printer.
2
Copy
Access the Copy menus and make copies.
3
Fax
Access the Fax menus and send fax.
4
E-mail
Access the E-mail menus and send e
‑
mails.
Touch
To
5
FTP
Access the File Transfer Protocol (FTP)
menus and scan documents directly to an
FTP server.
6
Arrows
Scroll up or down.
7
Forms and
Favorites
Quickly find and print frequently used
online forms.
8
Menu icon
Access the printer menus.
Note:
The menus are available only when
the printer is in Ready state.
9
Bookmarks
Create, organize, and save a set of
bookmarks (URL) into a tree view of folders
and file links.
Note:
The tree view supports only
bookmarks created from this function,
and not from any other application.
10
USB Drive
View, select, print, scan, or e
‑
mail photos
and documents from a flash drive.
Note:
This icon appears only when you
return to the home screen while a
memory card or flash drive is connected
to the printer.
11
Held Jobs
Display all current held jobs.
12
Status/Supplies
•
Show a warning or error message
whenever the printer requires
intervention to continue processing.
•
Access the messages screen for more
information on the message, and how
to clear it.
13
Tips
Open a context-sensitive Help dialog.
14
Search Held Jobs
Search for one or more of the following
items:
•
User name for held or confidential print
jobs
•
Job names for held jobs, excluding
confidential print jobs
•
Profile names
•
Bookmark container or print job names
•
USB container or print job names for
supported file types
1