Lexmark XM9145 Quick Reference - Page 16
jam, slide the 3000, sheet tray, and open door F. [24y.xx]
 |
View all Lexmark XM9145 manuals
Add to My Manuals
Save this manual to your list of manuals |
Page 16 highlights
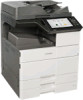
3 Open the optional tray, and then locate the jammed paper. [x]‑page jam, slide the 3000‑sheet tray and open door F. [24y.xx] 1 Slide the 3000‑sheet tray. 4 Remove the jammed paper. Note: Make sure that all paper fragments are removed. 5 Close the tray and door D. 6 Slide the 3000‑sheet tray back into place. 2 Remove the jammed paper. Note: Make sure that all paper fragments are removed. 3 Open door F, and then remove the jammed paper. Note: Make sure that all paper fragments are removed. 16 4 Close door F. 5 Open door C. Make sure that it does not hit any cable attached to the printer. 6 Remove the jammed paper from any of the following locations: Note: Make sure that all paper fragments are removed. CAUTION-HOT SURFACE: The inside of the printer might be hot. To reduce the risk of injury from a hot component, allow the surface to cool before touching it.
-
 1
1 -
2
-
3
-
4
-
5
-
6
-
7
-
8
-
9
-
10
-
 11
11 -
 12
12 -
 13
13 -
 14
14 -
 15
15 -
 16
16 -
 17
17 -
 18
18 -
 19
19 -
 20
20 -
 21
21 -
22
-
23
-
24
 |
 |
