Linksys HPN100 User Guide - Page 17
Internet LanBridge, Client, I Accept, Host Name, My Computer, CD-ROM Drive, autorun.exe, Server,
 |
UPC - 745883548972
View all Linksys HPN100 manuals
Add to My Manuals
Save this manual to your list of manuals |
Page 17 highlights
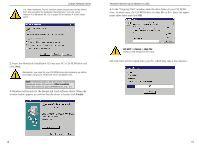
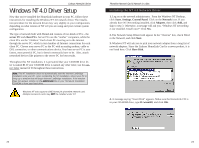
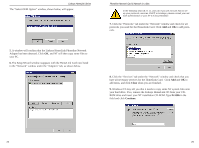
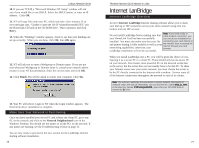
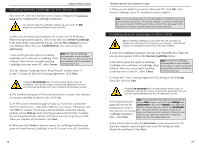
Linksys HomeLink Series Installing Internet LanBridge on Your Server PC Your server PC must have Internet access already configured and fully functional before beginning the LanBridge installation. You should install the LanBridge software on your server PC first, before you install LanBridge on any client PCs. 1. Make sure the HomeLink Installation CD is into your CD-ROM drive. When the pop-up menu appears, click on the first icon, Internet LanBridge. If the menu doesn't automatically pop up, click the My Computer icon on your Desktop. Then click your CD-ROM Drive icon, and run the file autorun.exe. 2. You will be given the option of installing LanBridge server software or LanBridge client software. Since you are currently installing LanBridge onto your server PC, select Server. Note: The Internet LanBridge documentation is also available on this menu, in case you run into any problems with the installation or during future use. 3. In the "Internet LanBridge Server Setup Wizard" window, select "I accept" to accept the End User Licensing Agreement. Click Next. Clicking I do not accept will in no way prevent future access to LanBridge. If you do not choose to accept the agreement now, you can still install LanBridge from your HomeLink CD whenever you like. 4. The Installation program will ask your permission to create a new directory for storing LanBridge installation files. Click Yes. 5. An ISP account information page will pop up. If you have a permanent Internet connection (i.e., cable, DSL, Ethernet, etc.), choose "Permanent" and click Next to continue. If you have a dial-up Internet connection (analog modem), choose Dial-up. Enter your log-in name in the first box. Complete the remaining three boxes with the information you use to log into your ISP. When you complete all four boxes, click Next. 6. When you click Finish on the next screen, the LanBridge Installation program will install Internet LanBridge server PC to your server PC's hard drive. 28 Phoneline Network Card & Network in a Box 7. When you are asked if you want to reboot your PC, click OK. Your Internet LanBridge server PC installation is now complete. Note: It is recommended that you use the NetBEUI or IPX/SPX protocol on your client and server PCs. For security reasons, it is also recommended that you remove the TCP/IP protocol from all client PCs. See page 51 for instructions on how to manually install and remove protocols. Installing Internet LanBridge on Client PC(s) Before installing LanBridge on any client PCs, be sure that you already have one server PC running on your network. There should only be one designated server PC on the entire network. 1. Insert the LanBridge Installation CD into your CD-ROM drive. When the pop-up menu appears, click on the Internet LanBridge button. 2. You will be given the option of installing Note: The Internet LanBridge documentation is also available LanBridge server software, or LanBridge client on this menu, in case you run into software. Since you are currently installing any problems with the installation LanBridge onto a client PC, select Client. or during future use. 3. Accept the " User Licensing Agreement" by clicking on the I Accept check box and click Next. Clicking I do not accept will in no way prevent future access to LanBridge. If you do not choose to accept the agreement now, you can still install LanBridge from this CD whenever you like. Note: If you forgot the Host name of your server PC, 4. The Installation pro- choose Start on your server PC, then Settings and gram will ask you for Control Panel. Click on the Network icon. When the permission to create a Network window pops up, choose the Identification new directory for storing tab. The name listed as Computer Name is the same Host Name you are looking for. Return to your LanBridge installation client PC and enter your server PC's Computer files. Click Next. Name into the Host Name field now. 5. You will be asked to enter the Host Name of your network server PC. Enter the computer name you gave your server PC during the initial HomeLink installation. Click Next. 29
-
 1
1 -
2
-
3
-
4
-
5
-
6
-
7
-
8
-
9
-
10
-
11
-
 12
12 -
 13
13 -
 14
14 -
 15
15 -
 16
16 -
 17
17 -
 18
18 -
 19
19 -
 20
20 -
 21
21 -
 22
22 -
23
-
24
-
25
-
26
-
27
-
28
-
29
-
30
-
31
-
32
-
33
 |
 |
