Logitech 966193-0403 Harmony 890 User Guide - Page 17
Step 5: Updating the Harmony Remote and RF Wireless Extender, Update, Step 6: Connecting
 |
UPC - 097855036889
View all Logitech 966193-0403 manuals
Add to My Manuals
Save this manual to your list of manuals |
Page 17 highlights
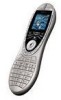
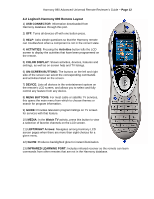
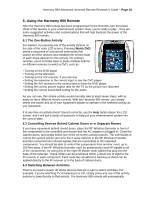
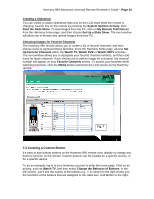
Harmony 890 Advanced Universal Remote Reviewer's Guide - Page 17 Step 5: Updating the Harmony Remote and RF Wireless Extender Once you have finished the first four steps, your account has been prepared with all of the information the remote needs to control your entertainment system. At this point, connect the RF Wireless Extender to the USB cord, and click Update. Next, follow the instructions to update the RF Wireless Extender (fig. 5). Don't plug in the AC power cord for the RF Wireless Extender - you'll do that in just a moment. Click Next to download your system information into the RF Wireless Extender. The progress bar of the Harmony wizard interface will show you the status of the download as it happens. When this process is complete you'll be prompted to connect the USB cable to your remote control (fig. 6). Make the connection and begin the update of the remote. After the updates, all of the data to control the homeentertainment system is stored in flash memory within the remote and the RF Wireless Extender. This ensures that in the event the remote's battery is depleted, the system configuration will not be lost. Fig. 6 Step 6: Connecting the Remote to the RF Wireless Extender After a successful update of the remote and the extender, a message on the remote's display screen will prompt you to connect a Z-Wave module; in this case the module is your RF Wireless Extender. Plug the RF Wireless Extender into a power outlet nearby the components you want to control, and press the Connect button for at least one full second. Your Harmony 890 remote will then recognize that the RF Wireless Extender is part of the Z-Wave wireless network. Confirmation of this process is shown in the remote's color display with a green check mark. Place the RF Wireless Extender near the components you want to control, and you can then control the components from up to 100 feet away. After basic setup is complete, you may decide to customize the buttons or the color display options of the Harmony remote. At any time, you can go back to your Harmony member page and adjust the settings. The Web page can be reached by simply connecting the remote over USB or clicking on the Harmony logo that should be located in your system tray of a Windows OS PC or DOCK bar on a Mac OS X.
-
 1
1 -
2
-
3
-
4
-
5
-
6
-
7
-
8
-
9
-
10
-
11
-
 12
12 -
 13
13 -
 14
14 -
 15
15 -
 16
16 -
 17
17 -
 18
18 -
 19
19 -
 20
20 -
 21
21 -
 22
22 -
23
-
24
-
25
 |
 |
