Logitech 966193-0403 Harmony 890 User Guide - Page 19
Optimizing and Customizing the Remote
 |
UPC - 097855036889
View all Logitech 966193-0403 manuals
Add to My Manuals
Save this manual to your list of manuals |
Page 19 highlights
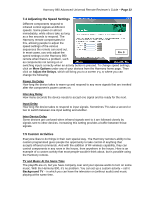
Harmony 890 Advanced Universal Remote Reviewer's Guide - Page 19 power on or off the necessary components and change input settings accordingly. With the Harmony 890 remote, it takes just one button to launch - or change - an activity. With conventional macro-based universal remote controls, the entertainment system will need to be reset, with every component turned off, before it can launch a new activity. 6.4 Controlling Individual Devices The Harmony 890 remote can work in two different modes: through programmed activities, as discussed above, or through individual device mode. Here's one example of where you may want to use the Device control. Let's say you want to listen to music through your satellite TV or digital cable service, which runs through both your audio system and your television. You may want the TV screen to be on during this activity, to see what music you're listening to. But then again, maybe you don't - you just want a nice relaxing time with music and don't need to have an obtrusive TV picture. Once you've called up the music you want, press the Device button, and the remote's screen will display the option to select any device in your system (if the device you are looking for is not on the initial screen, press More). Once you select the TV, the remote will be set up to control the television only - now you can simply turn it off or make any other adjustments. 7. Optimizing and Customizing the Remote One of the strengths of the Harmony remote is the adjustable level of programming. Some people may choose to run only the basic setup and have all of their primary needs fulfilled. But people may choose to run setup options and make adjustments that can further customize how the Harmony remote is used to control the given system. For example, some of the more advanced capabilities of the remote include: 7.1 Customizing the Color Display The Harmony 890 remote's color display can be customized in several different ways to suit personal preferences. Choosing a Background To change the background image on the remote, log in to your Harmony account and go to the home page. Click on My Remote Preferences, then choose Set a Background. From there, you can browse your computer for the image you would like to set as your background picture. Files in the .png, .bmp, .jpg, or .gif formats are accepted, up to 160 KB file size. Choosing a Theme for Font/Icon Appearance Choosing a different theme can change the appearance of the Harmony 890 remote's display menu. From the home page, click on My Remote Preferences, and then choose Select a Theme. From there, you can choose from different font styles and whether or not to include the icons in the display.
-
 1
1 -
2
-
3
-
4
-
5
-
6
-
7
-
8
-
9
-
10
-
11
-
12
-
13
-
 14
14 -
 15
15 -
 16
16 -
 17
17 -
 18
18 -
 19
19 -
 20
20 -
 21
21 -
 22
22 -
 23
23 -
 24
24 -
25
 |
 |
