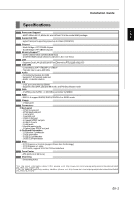
MSI K9A PLATINUM User Guide - Page 12
Central Processing Unit: CPU - am2
 |
UPC - 816909034073
View all MSI K9A PLATINUM manuals
Add to My Manuals
Save this manual to your list of manuals |
Page 12 highlights
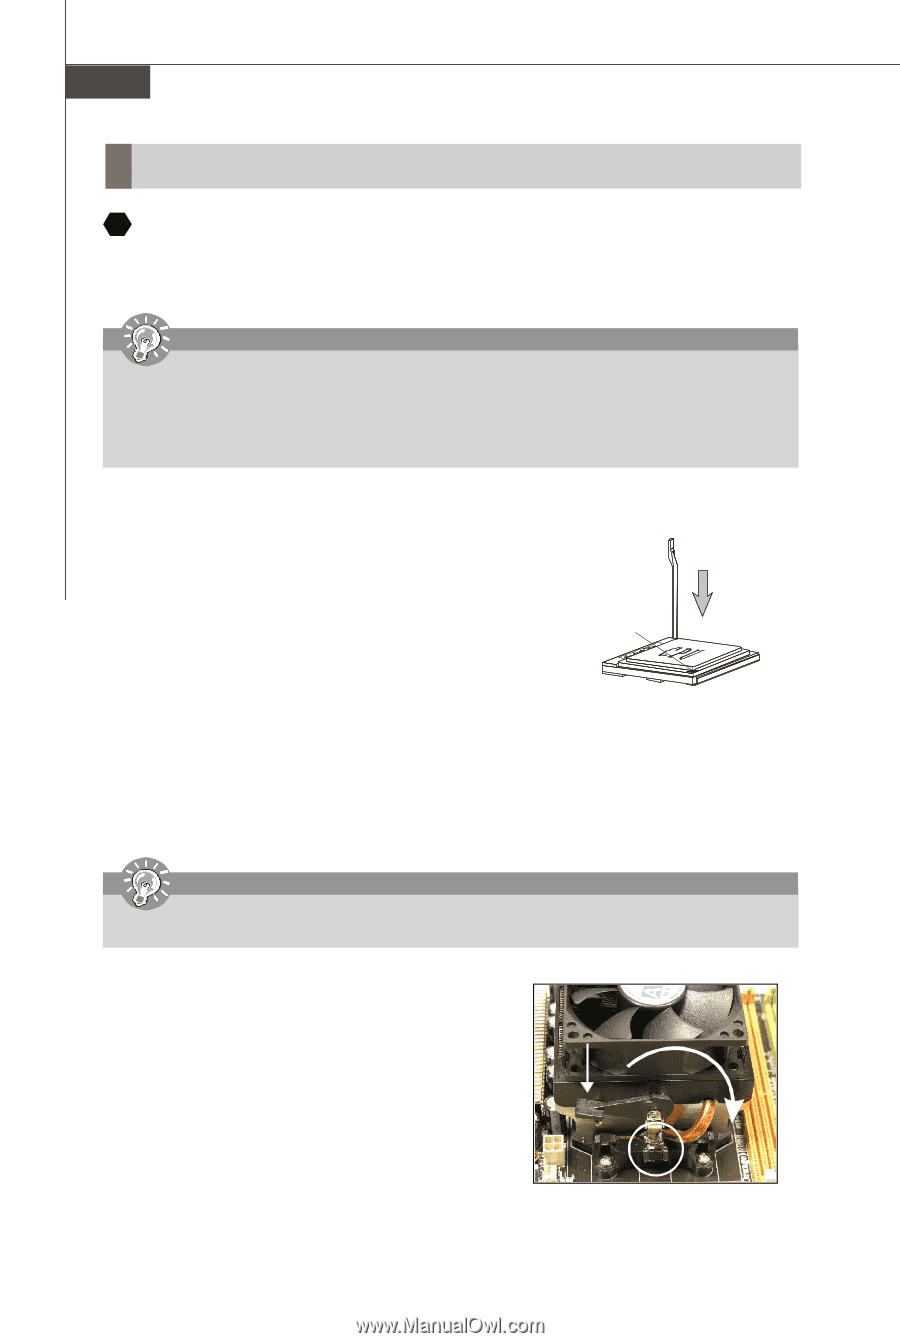
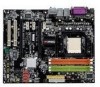
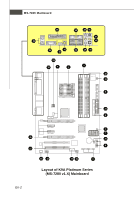
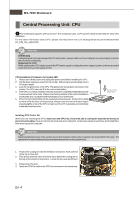
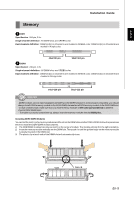
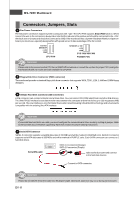
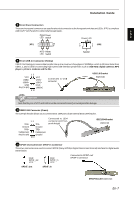
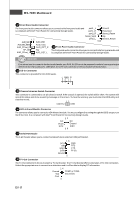
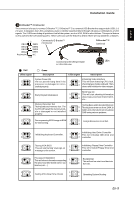
MS-7280 Mainboard Central Processing Unit: CPU 1 The mainboard supports VIA® processor. The mainboard uses a CPU socket called Socket AM2 for easy CPU installation. For the latest information about CPU, please visit http://www.msi.com.tw/program/products/mainboard/mbd/ pro_mbd_cpu_support.php Important Overheating Overheating will seriously damage the CPU and system, always make sure the cooling fan can work properly to protect the CPU from overheating. Replacing the CPU While replacing the CPU, always turn off theATX power supply or unplug the power supply's power cord from grounded outlet first to ensure the safety of CPU. CPU Installation Procedures for Socket AM2 1. Please turn off the power and unplug the power cord before installing the CPU. 2. Pull the lever sideways awayfrom the socket. Make sure to raise the lever up to a 90-degree angle. 3. Look for the gold arrow of the CPU. The gold arrow should point as shown in the picture. The CPU can only fit in the correct orientation. 4. If the CPU is correctly installed, the pins should be completely embedded into the socket and can notbe seen. Please note that any violation of the correct installation Gold arrow procedures may cause permanent damages to your mainboard. 5. Press the CPU down firmly into the socket and close the lever. As the CPU is likely to move while the lever is being closed, always close the lever with your fingers pressing tightly on top of the CPU to make sure the CPU is properly and completely embedded intothe socket. Correct CPU pl acement Installing CPU Cooler Set When you are installing the CPU, make sure the CPU has a heat sink and a cooling fan attached on the top to prevent overheating. If you do not have the heat sink and cooling fan, contact your dealer to purchase and install them before turning on the computer. Important Mainboard photos shown in this section are for demonstration of the cooler installation for Socket AM2 CPUs only. The appearance of your mainboard may vary depending on the model you purchase. 1. Position the cooling set onto the retention mechanism. Hook one end of the clip to hook first. 2. Then press down the other end of the clip to fasten the cooling set on the top of the retention mechanism. Locate the FixLever and lift up it . 3. Fasten down the lever. 4. Attach the CPU Fan cabletothe CPU fanconnector on the mainboard. Fixed Lever En-4
-
 1
1 -
2
-
3
-
4
-
5
-
6
-
 7
7 -
 8
8 -
 9
9 -
 10
10 -
 11
11 -
 12
12 -
 13
13 -
 14
14 -
 15
15 -
 16
16 -
 17
17 -
18
-
19
-
20
-
21
-
22
-
23
-
24
-
25
-
26
-
27
-
28
-
29
-
30
-
31
-
32
-
33
-
34
-
35
-
36
-
37
-
38
-
39
-
40
-
41
-
42
-
43
-
44
-
45
-
46
-
47
-
48
-
49
-
50
-
51
-
52
-
53
-
54
-
55
-
56
 |
 |