MSI MEG X570S ACE MAX User Manual - Page 40
Installing M.2 XPANDER-Z Gen4 S card, Loosen M.2 standoff.
 |
View all MSI MEG X570S ACE MAX manuals
Add to My Manuals
Save this manual to your list of manuals |
Page 40 highlights
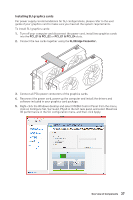
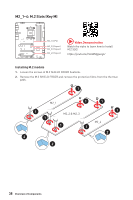
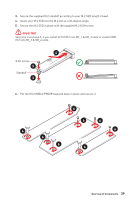
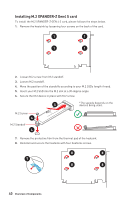
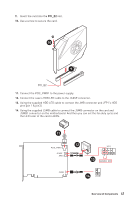
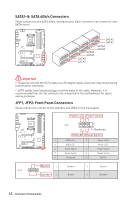
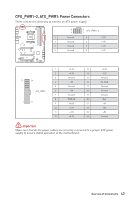
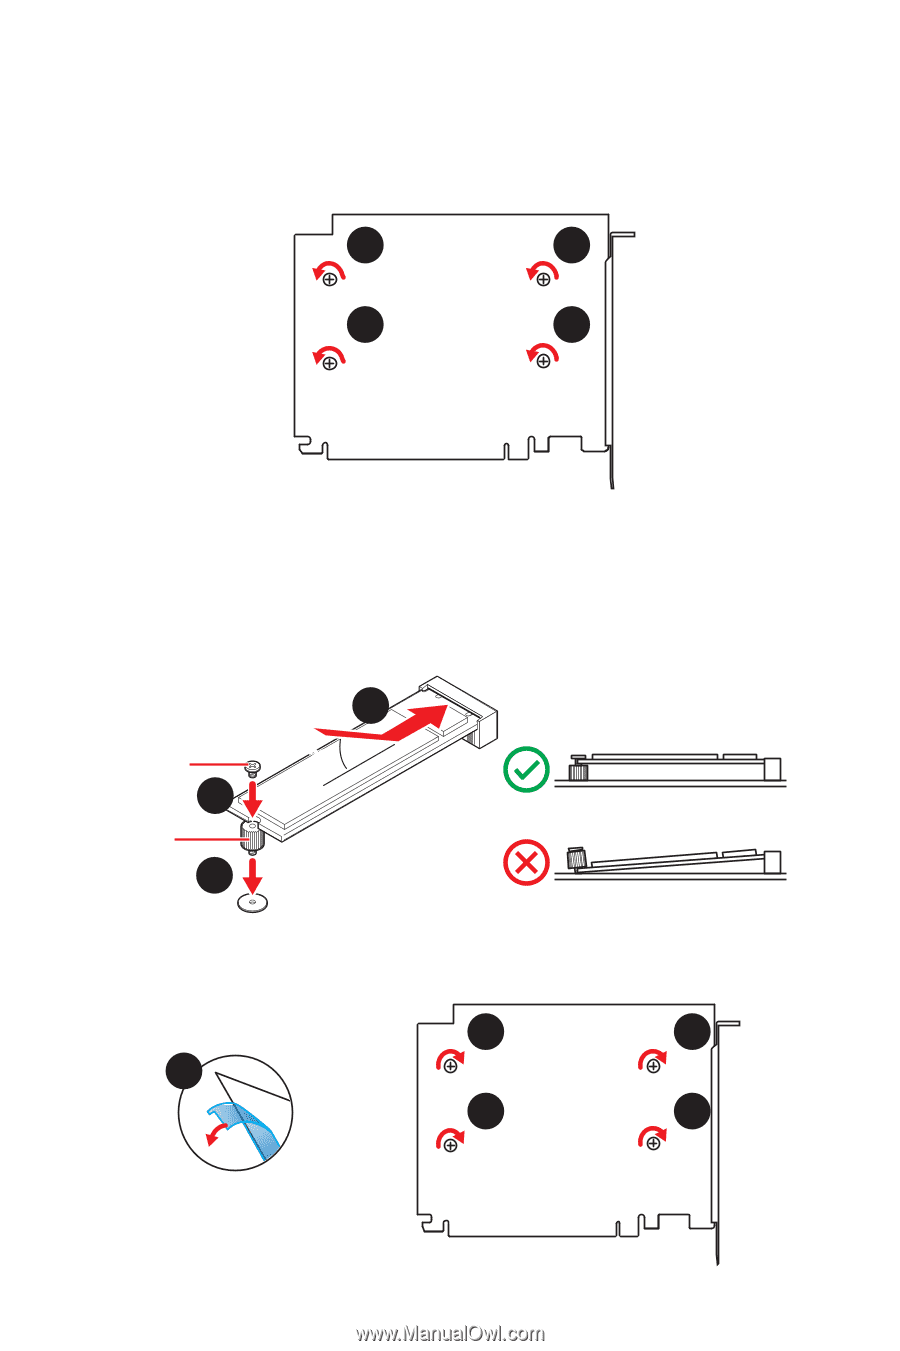
Installing M.2 XPANDER-Z Gen4 S card To install the M.2 XPANDER-Z GEN 4 S card, please follows the steps below. 1. Remove the heatsink by loosening four screws on the back of the card. 1 1 1 1 2. Loosen M.2 screw from M.2 standoff. 3. Loosen M.2 standoff. 4. Move the position of the standoffs according to your M.2 SSDs length if need. 5. Insert your M.2 SSD into the M.2 slot at a 30-degree angle. 6. Secure the M.2 device in place with M.2 screw. 5 *The speeds depends on the devices being used. M.2 Screw 30º 6 M.2 Standoff 4 7. Remove the protective film from the thermal pad of the heatsink. 8. Reinstall and secure the heatsink with four heatsink screws. 8 8 7 8 8 40 Overview of Components
-
 1
1 -
2
-
3
-
4
-
5
-
6
-
7
-
8
-
9
-
10
-
11
-
12
-
13
-
14
-
15
-
16
-
17
-
18
-
19
-
20
-
21
-
22
-
23
-
24
-
25
-
26
-
27
-
28
-
29
-
30
-
31
-
32
-
33
-
34
-
 35
35 -
 36
36 -
 37
37 -
 38
38 -
 39
39 -
 40
40 -
 41
41 -
 42
42 -
 43
43 -
 44
44 -
 45
45 -
46
-
47
-
48
-
49
-
50
-
51
-
52
-
53
-
54
-
55
-
56
-
57
-
58
-
59
-
60
-
61
-
62
-
63
-
64
-
65
-
66
-
67
-
68
-
69
-
70
-
71
-
72
-
73
-
74
 |
 |
40
Overview of Components
30º
30º
6
5
4
M.2 Screw
M.2 Standoff
Installing M.2 XPANDER-Z Gen4 S card
To install the M.2 XPANDER-Z GEN 4 S card, please follows the steps below.
1.
Remove the heatsink by loosening four screws on the back of the card.
2.
Loosen M.2 screw from M.2 standoff.
3.
Loosen M.2 standoff.
4.
Move the position of the standoffs according to your M.2 SSDs length if need.
5.
Insert your M.2 SSD into the M.2 slot at a 30-degree angle.
6.
Secure the M.2 device in place with M.2 screw.
8
8
8
8
7.
Remove the protective film from the thermal pad of the heatsink.
8.
Reinstall and secure the heatsink with four heatsink screws.
7
*The speeds depends on the
devices being used.
1
1
1
1