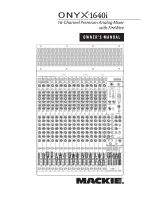
Mackie Onyx 1640i Owner's Manual
Mackie Onyx 1640i Manual
 |
View all Mackie Onyx 1640i manuals
Add to My Manuals
Save this manual to your list of manuals |
Mackie Onyx 1640i manual content summary:
- Mackie Onyx 1640i | Owner's Manual - Page 1
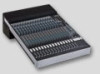
16-Channel Premium Analog Mixer with FireWire OWNER'S MANUAL ALTERNATE FIREWIRE ASSIGNMENTS 1 2 3 4 LINE FW 1 LINE FW 2 18dB/OCT 75Hz 18dB/OCT 75Hz 18dB/OCT GAIN GAIN GAIN GAIN GAIN GAIN GAIN GAIN GAIN GAIN GAIN GAIN GAIN GAIN GAIN GAIN 30 30 30 30 30 30 30 30 - Mackie Onyx 1640i | Owner's Manual - Page 2
. Servicing is required when the apparatus has been damaged in any way, such as power- supply cord or plug is damaged, liquid has been spilled or objects have fallen into the apparatus, the apparatus has been exposed to rain or moisture, does not operate normally, or has been dropped. 16 - Mackie Onyx 1640i | Owner's Manual - Page 3
a line input jack using a TS or a TRS 1/4" plug. • See page 42 for details of getting started with FireWire. 4. If your microphone requires phantom power, press in the 48V phantom power button. • PC drivers are on the supplied CD-ROM. Mac OS X contains built-in drivers, so no software 5. You can - Mackie Onyx 1640i | Owner's Manual - Page 4
of both the digital and analog realm to create seamless workflow that makes your sessions faster, easier and better sounding than ever possible before. Features • 16-channel premium analog mixer with integrated 24-bit/96kHz FireWire I/O • 16 Onyx boutique quality mic preamps • 4-band Perkins EQ with - Mackie Onyx 1640i | Owner's Manual - Page 5
C: Technical information. Appendix D: Rotopod instructions. Appendix E: FireWire. Appendix F: Modifications. Need help with your new mixer? • Visit www.mackie.com and click Support to find: FAQs, manuals, addendums, and other useful information. • Email us at: [email protected]. • Telephone 1-800 - Mackie Onyx 1640i | Owner's Manual - Page 6
SENDS 1-6 13 20. RECORDING OUTS 13 21. TURD POLISHER 13 CHANNEL CONTROLS 14 22. 48V PHANTOM POWER 14 23. LOW CUT 14 24. INPUT (LINE OR FW 1-16 15 25. HI-Z SWITCH (CHS. 1 AND 2 ONLY) ........ 15 26. GAIN CONTROL 15 27. SEND FIREWIRE PRE/POST 15 28. EQ IN/OUT 16 29. HIGH EQ 16 30. HIGH-MID - Mackie Onyx 1640i | Owner's Manual - Page 7
LOW MID 100 2k U LOW MID PREMIUM ANALOG MIXER w/ PERKINS EQ & FIREWIRE LAMP 12V 0.5A CTRL ROOM/PHONES channels 15/16. The club is driven by connecting a pair of HD1801 powered subwoofers and a pair of HD1531 powered speakers to the main left and right outputs. Recording outputs 1-16 may be used - Mackie Onyx 1640i | Owner's Manual - Page 8
at one time using audio production software. Mixer channels 15/16 can play the 2-channel signals from your computer if the FW 15/16 switches at the top of the 15/16 channel strips are engaged. This makes for easy playback for any overdubs that may be necessary. Typical Recording System 8 Onyx 1640i - Mackie Onyx 1640i | Owner's Manual - Page 9
. A desktop computer connects to a FireWire port, allowing 16 channels of playback from the audio production software. Mixer channels 1-16 can play all 16 channel signals from your computer if the FW 1-16 switches at the top of the 1-16 channel strip are engaged. Buses can be used to submix and then - Mackie Onyx 1640i | Owner's Manual - Page 10
power cord from the mixer and the AC mains supply. As a general guide, you should turn on your mixer first, before any external power amplifiers or powered speakers, and turn it off last. This will reduce the possibilities of any turn-on, or turn-off thumps in your speakers. 10 Onyx 1640i 3. FIREWIRE - Mackie Onyx 1640i | Owner's Manual - Page 11
Do not plug instrument outputs into the mic XLR input jacks with phantom power on, unless you are certain it is safe. Insert jacks can be used as channel direct outputs; post-gain, and pre-EQ. See the connector section on page 30 (figure G) showing three ways to use insert cables. Owner's Manual 11 - Mackie Onyx 1640i | Owner's Manual - Page 12
main out [10] signals (L+R). You may use this for a separate mix that does not require a stereo feed, or to simply test the monaural compatibility of the 12 Onyx 1640i 15. TAPE OUTPUTS These stereo unbalanced RCA outputs allow you to record the main stereo mix onto a tape deck, hard disk recorder, - Mackie Onyx 1640i | Owner's Manual - Page 13
direct outputs for channels 1-8 and 9-16, respectively. They are designed to be connected directly to a recorder's analog inputs, and use the TASCAM standard pinout for analog signal connections (the same standard used on the previous generation Onyx 1640 and other legendary Mackie products). The - Mackie Onyx 1640i | Owner's Manual - Page 14
SOLO SOLO 14 Onyx 1640i Channel Controls The vertical channel strips look very similar, and have only a few differences between them. Each channel works independently, and just controls the signals plugged into the inputs directly behind it. "U" like Unity gain Mackie mixers have a "U" symbol on - Mackie Onyx 1640i | Owner's Manual - Page 15
and the mixer (say over 25 or 30 feet), it is best to use a direct box with a balanced output to avoid picking up noise over the length of the cord. 26. GAIN CONTROL If you haven't already, please read the level-setting procedure on page 3. CHANNEL EQUALIZATION (EQ) All 16 channels have 4-band EQ - Mackie Onyx 1640i | Owner's Manual - Page 16
you plenty of control and is pleasing to the ear!). The 4-band equalization has low shelving at 80 Hz, low gain at the center, and can provide up to 15 dB of gain turned fully up. Chances are that you will never need this extra gain, but it's nice to know that it's there if you do. 16 Onyx 1640i - Mackie Onyx 1640i | Owner's Manual - Page 17
those channels. If you are creating new tracks or bouncing existing ones, you will also use the 1-2 and 3-4 switches, but not the main mix switch. Here you do not want the subgroups sent back into the main mix bus, but sent out, via the sub out jacks [17], to your multitrack inputs. Owner's Manual - Mackie Onyx 1640i | Owner's Manual - Page 18
However, if you are printing tracks via the recording outs [20] or via FireWire [3], the channel assignment switches no longer matter since the recording outs come before the assign switches. The Onyx 1640i is what we call a "true 4-bus mixer." Each channel may be assigned or unassigned to any of - Mackie Onyx 1640i | Owner's Manual - Page 19
PREMIUM ANALOG MIXER w/ PERKINS EQ & FIREWIRE 42 43 LAMP 12V 0.5A CTRL ROOM/PHONES SOURCE 44 MAIN MIX 45 TAPE 45 SUB 1-2 FW 1-2 SUB 3-4 46 ASSIGN TO MAIN MIX OO 47 MAX CONTROL ROOM OO 48 MAX PHONES 0dB=0dBu LR 20 CLIP 15 10 49 6 3 0 2 LEVEL 4 SET 7 10 20 30 50 RUDE SOLO - Mackie Onyx 1640i | Owner's Manual - Page 20
is not in record, record-pause, or input monitor mode when you engage these switches, or make sure the control room knob [47] is turned all the way down. 47. CONTROL ROOM Knob This knob is used to adjust the volume at the control room outputs [16], from off to maximum gain (+10 dB). It also - Mackie Onyx 1640i | Owner's Manual - Page 21
Listen. You will be able to hear the stereo output of the soloed channel - it will follow the channel's gain [26], EQ [29-34], fader [38] and pan [36] settings. It is similar to muting all of the other channels, but without the hassle. AFL mode is typically used during mixdown. Owner's Manual 21 - Mackie Onyx 1640i | Owner's Manual - Page 22
by the pre/post switches [56] next to the aux send masters [55]. Pre-fader aux sends are typically used to provide another mix for stage monitors. In this case, the aux returns aren't used to return the signal. Instead, they can be used as additional stereo inputs, or not used at all. 22 Onyx 1640i - Mackie Onyx 1640i | Owner's Manual - Page 23
software running effects plug-ins. • Return the processed output to mixer channels 1 and 2 (input switches set to FW 1 and FW 2). • Alternatively bring the processed sounds into the control room (engage FW 1-2) and add it to the main mix (engage assign to main mix). • You can even use to 10 dB gain - Mackie Onyx 1640i | Owner's Manual - Page 24
on, then it is off, and the mixer becomes a rather nice weight for keeping your morning newspaper from blowing away in the wind. If it does not turn on, make sure the power cord is correctly inserted at both ends, the local AC mains supply is active, and the power switch [2] is on. 24 Onyx 1640i - Mackie Onyx 1640i | Owner's Manual - Page 25
. Use this to communicate with the talent in the studio through the headphones during a recording session. When the talkback circuit is activated by pushing the talkback switch [68], the control room outputs [16] are attenuated to allow your voice to come through clearly. Owner's Manual 25 - Mackie Onyx 1640i | Owner's Manual - Page 26
be EQ'd on the Onyx 1640i mixer and routed to subgroups 1-2. These are then transmitted back for recording to your digital audio workstation (DAW) via FireWire. This is called track bounce. The seven tracks have now been reduced to a stereo pair, allowing us to free up processing power that may be - Mackie Onyx 1640i | Owner's Manual - Page 27
record the live performance main mix onto your computer. This does not affect the analog main mix outputs. The output level to your computer is not affected by the main mix fader [73]. Congratulations! You've just read about all the features of your mixer. Time for a frosty beverage. Owner's Manual - Mackie Onyx 1640i | Owner's Manual - Page 28
confirm the problem. Visit the Support section of our website (www.mackie.com) where you will find lots of useful information such as FAQs, documentation and any updated PC drivers etc. You may find the answer to the problem without having to send your mixer away. Troubleshooting Bad Channel • Is the - Mackie Onyx 1640i | Owner's Manual - Page 29
B: Connections "XLR" Connectors Mackie mixers use 3-pin female "XLR" level connections • Speaker connections Don't use guitar cords for speaker cables! They're not designed to handle E: Does not appear in this owner's manual, due to a contractual obligation, but performs nightly at the downtown - Mackie Onyx 1640i | Owner's Manual - Page 30
to one of the mixer's Channel Insert jacks. Figure F "ring" RETURN from processor The Recording Outs on the back of the Onyx 1640i provide balanced direct outputs for channels 1-16 on two female DB25 connectors. These connectors are pin-for-pin compatible with the analog (not TDIF) DB25 connectors - Mackie Onyx 1640i | Owner's Manual - Page 31
dBu (-97 dB SNR, ref +4 dBu) Main Mix knob unity, channel Level knobs unity: -91 dBu (-95 dB SNR, ref +4 dBu) FireWire Through (Record + Playback) Dynamic Range: 0 dBu mic input, to DAW, routed back to mixer direct to Control Room, all gain stages unity, 20 Hz to 20 kHz: All sample rates: -105 - Mackie Onyx 1640i | Owner's Manual - Page 32
website for any updates to this manual, or updates to the PC drivers: www.mackie.com. ©2009 LOUD Technologies Inc. All Rights Reserved. Dimensions Jacks to the front (with optional rotopod bracket) 20.83 in / 529.2 mm 12 rack spaces 26.24 in / 666.7 mm 16 rack spaces 7.59 in / 192.7 mm Jacks - Mackie Onyx 1640i | Owner's Manual - Page 33
Owner's Manual 33 48V Mono Channels Mic Line Mono FW stream from computer Analog Firewire Mic: 0 ~ +60dB Line: -20 ~ +40dB + - Gain bypass Low Cut HPF 75 Hz Insert LO MID MID EQ out in HI 80 100~2K 400~8K 12K 4-Band EQ PK +10 0 -20 Assign Pan L/R 1/2 Mute Level 3/4 Ch 1-2 Line Hi-Z + - Mackie Onyx 1640i | Owner's Manual - Page 34
Appendix D: Rotopod Instructions The Pod section of the Onyx 1640i mixer can be fitted in three different orientations to suit your preference: 1. From the factory, the Pod section has the input and output connections at the rear of the mixer. If you rack mount it, this will take up 16 rack spaces. ( - Mackie Onyx 1640i | Owner's Manual - Page 35
for step 6. The side trim pieces utilize seven screws for each side. There are two screws on each side of the mixer attaching the Pod to the mixer. And there are four screws for the bottom wire cover plate. (Cables not shown for clarity). Pod mounting screws Pod mounting screws Owner's Manual 35 - Mackie Onyx 1640i | Owner's Manual - Page 36
4. Gently pull straight back on the Pod until it stops. 5. Rotate Pod as shown below. Hold both sides of the Pod to keep the travel even. Move the Pod all the way back until it stops and the bottom surface of the Pod is parallel to the bottom of the main unit. 36 Onyx 1640i - Mackie Onyx 1640i | Owner's Manual - Page 37
mixer using the same silver flathead screws removed from the side trim. The rack ears are stamped with an 'R' or 'L' to denote which side of the mixer it goes on, based on house view. Finally, attach the wire cover bracket with the screws that it arrived with. NOTE: Be sure that the exposed cables - Mackie Onyx 1640i | Owner's Manual - Page 38
of the mixer. Additionally, there are four screws on each side of the mixer attaching the Pod to the mixer. Finally, there are four screws for the bottom wire cover plate that must also be removed. (Cables not shown for clarity.) 4. Gently pull straight back on the Pod until it stops. 38 Onyx 1640i - Mackie Onyx 1640i | Owner's Manual - Page 39
5. Rotate the Pod arms and reinstall the four arm screws. Rotate the Pod so that the connection jacks are parallel to the top of the mixer. Reinstall the two silver flathead screws through the side trim and back into the Pod. Owner's Manual 39 - Mackie Onyx 1640i | Owner's Manual - Page 40
two triangular cosmetic pieces with the supplied screws. Place the Pod bucket as shown. Attach the Pod bucket to the mixer using the screws removed in step 3. Screw the Pod bucket to the Pod using the supplied screws. Unscrew the feet from the Pod and reattach them to the Pod bucket. 40 Onyx 1640i - Mackie Onyx 1640i | Owner's Manual - Page 41
only use eight screws (four on each side) for the rack ears. The trim pieces and remaining screws should be stored away for safekeeping. 8. This step does not exist. You have completly front-mounted the Onyx 1640i Pod section. There is nothing else left to say about it, no more instructions. The - Mackie Onyx 1640i | Owner's Manual - Page 42
.. Mackie Windows FireWire Audio Driver Installation Instructions System Requirements Windows XP SP 2 or greater (Home and Pro) Windows Vista 32 RTM or greater (Home, Business, and Ultimate) Installation for Windows Vista 1. Connect the FireWire cable from your Onyx 1640i to the computer. 2. Power - Mackie Onyx 1640i | Owner's Manual - Page 43
the driver software will be installed. Installation for Windows XP 1. Connect the FireWire cable from your Onyx 1640i to the computer. 2. Power on your Onyx 1640i . 3. The Windows XP application will start its "Found New Hardware" wizard. 7. The following message confirms that the driver software - Mackie Onyx 1640i | Owner's Manual - Page 44
so good now. The audio interface is now ready to use with the Digital Audio Workstation software of your dreams, as well as with consumer audio applications such as iTunes® or Windows Media Player. A Note on Available Buffer Sizes 9. Repeat steps 3-8 to allow a second driver to be installed. The - Mackie Onyx 1640i | Owner's Manual - Page 45
higher. This OS includes the Apple FireWire 2.0 driver. The Onyx 1640i will only work with the 2.0 driver, so if you have an OS before 10.4.11, you will need to check your system for updates from the nice folks at Apple. 1. Connect a FireWire cable from your Onyx 1640i to a FireWire port on your Mac - Mackie Onyx 1640i | Owner's Manual - Page 46
can be carried out on the Onyx 1640i by an authorized service center. Authorized service centers may be found online at: www.mackie.com/scripts/service_centers/search.asp Please contact our technical support department if you are having trouble finding an authorized service center in your area. Modi - Mackie Onyx 1640i | Owner's Manual - Page 47
ALTERNATE FIREWIRE ASSIGNMENTS 1 2 3 4 LINE FW 1 LINE FW 2 LINE FW 3 LINE FW 4 48V 48V 48V 48V 1 5 LINE FW 5 48V SUBGROUPS 2 6 LINE FW 6 48V 3 7 LINE FW 7 48V 4 8 LINE FW 8 48V 1 9 LINE FW 9 48V AUX MASTERS MAIN MIX 2 10 LINE FW 10 9 10 11 12 13 14 15 16 Owner's Manual 47 - Mackie Onyx 1640i | Owner's Manual - Page 48
Track Sheet PREMIUM ANALOG MIXER w/ PERKINS EQ & FIREWIRE LAMP 12V 0.5A CTRL ROOM/PHONES SOURCE MAIN MIX TAPE SUB 1-2 SUB 3-4 FW 1-2 ASSIGN TO MAIN MIX OO MAX CONTROL ROOM OO MAX PHONES 0dB=0dBu LR 20 CLIP 15 10 6 3 0 2 LEVEL 4 SET 7 10 20 30 RUDE SOLO OO OO OO OO OO OO OO - Mackie Onyx 1640i | Owner's Manual - Page 49
mixer? • Visit www.mackie.com and click Support to find: FAQs, manuals, addendums, and other useful information. • Email us at: [email protected]. • Telephone 1-800-898-3211 to speak with one of our splendid technical support chaps (Monday through Friday, normal business hours, PST). Owner's Manual - Mackie Onyx 1640i | Owner's Manual - Page 50
16220 Wood-Red Road NE • Woodinville, WA 98072 • USA United States and Canada: 800.898.3211 Europe, Asia, Central and South America: 425.487.4333 Middle East and Africa: 31.20.654.4000 Fax: 425.487.4337 • www.mackie.com E-mail: [email protected]
-
 1
1 -
 2
2 -
 3
3 -
 4
4 -
 5
5 -
 6
6 -
 7
7 -
8
-
9
-
10
-
11
-
12
-
13
-
14
-
15
-
16
-
17
-
18
-
19
-
20
-
21
-
22
-
23
-
24
-
25
-
26
-
27
-
28
-
29
-
30
-
31
-
32
-
33
-
34
-
35
-
36
-
37
-
38
-
39
-
40
-
41
-
42
-
43
-
44
-
45
-
46
-
47
-
48
-
49
-
50
 |
 |
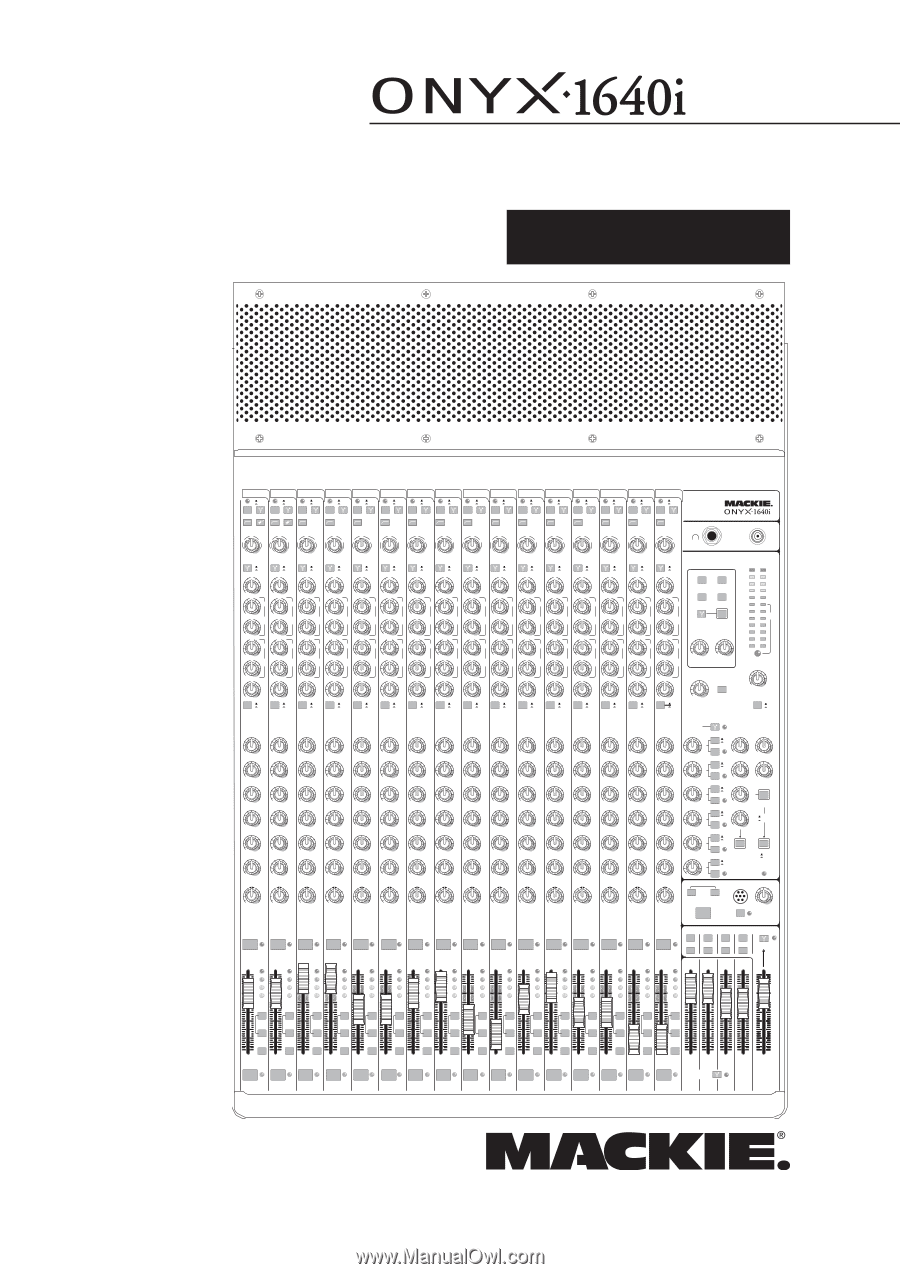
16-Channel Premium Analog Mixer
with FireWire
48V
48V
48V
48V
48V
48V
48V
48V
48V
48V
48V
48V
48V
48V
48V
48V
SOLO
MUTE
SOLO
MUTE
SOLO
MUTE
SOLO
MUTE
SOLO
MUTE
SOLO
MUTE
SOLO
MUTE
SOLO
MUTE
SOLO
MUTE
SOLO
MUTE
SOLO
MUTE
SOLO
MUTE
SOLO
MUTE
SOLO
MUTE
SOLO
MUTE
SOLO
MUTE
EQ
EQ
EQ
EQ
EQ
EQ
EQ
EQ
EQ
EQ
EQ
EQ
EQ
EQ
EQ
EQ
SOLO
SOLO
SOLO
SOLO
SOLO
SOLO
PREMIUM ANALOG MIXER
w/ PERKINS EQ & FIREWIRE
SUB
ASSIGN
MAIN
MIX
1-2
3-4
dB
30
20
10
40
50
5
5
U
60
10
O
O
5
GAIN
CR/PHONES
ONLY
SUBS
1-2
3-4
SEND
TO
4
CONTROL
ROOM
PHONES
MAIN MIX
L
R
SUB ASSIGN
MAIN MIX
L
R
MAIN MIX
L
R
MAIN MIX
L
R
TO AUX 5
MAIN
SUBS
TO AUX 6
SENDS
RETURNS
PRE
POST
PRE
POST
PRE
POST
PRE
POST
PRE
POST
PRE
POST
EFX TO
MON
RUDE
SOLO
20
15
10
6
3
0
2
4
7
10
20
30
SUB 3-4
FW 1-2
SUB 1-2
TAPE
ASSIGN TO
MAIN MIX
MAIN MIX
LEVEL
SET
CLIP
1
2
3
4
5
6
7
8
9
10
11
12
13
14
15
16
1
2
3
4
5
6
7
8
9
10
11
12
13
14
15
16
MAIN
MIX
SUB1
SUB4
SUB3
SUB2
SUB1
SUB4
SUB3
SUB2
4
3
2
2
1
1
6
4
2
1
5
6
3
PAN
AUX
AUX
AUX
AUX
AUX
AUX
AUX
AUX
AUX
AUX
AUX
AUX
AUX
AUX
AUX
AUX
12V 0.5A
LAMP
CTRL ROOM/PHONES
SOURCE
ASSIGN TO
FW 15-16
LEVEL
MIC
EXTERNAL
MIC
LINE
FW 1
LINE
FW 2
LINE
FW 16
LINE
FW 15
LINE
FW 14
LINE
FW 13
LINE
FW 12
LINE
FW 11
LINE
FW 10
LINE
FW 9
LINE
FW 8
LINE
FW 7
LINE
FW 6
LINE
FW 5
LINE
FW 4
75Hz
18dB/OCT
75Hz
18dB/OCT
75Hz
18dB/OCT
75Hz
18dB/OCT
75Hz
18dB/OCT
75Hz
18dB/OCT
75Hz
18dB/OCT
75Hz
18dB/OCT
75Hz
18dB/OCT
75Hz
18dB/OCT
75Hz
18dB/OCT
75Hz
18dB/OCT
75Hz
18dB/OCT
75Hz
18dB/OCT
LINE
FW 3
DESTINATION
AUX MASTER
SENDS 1-6
TO FW 9-14
TALKBACK
PHONES
AUX 1-6
1
2
3
4
5
6
7
8
9
10
11
12
13
14
15
16
HIGH
12kHz
LOW
80Hz
U
+15
-15
U
+15
-15
U
+15
-15
U
+15
-15
8k
400
2k
2k
100
400
HIGH
MID
FREQ
LOW
MID
FREQ
+
40dB
U
-
20dB
U
20
30
40
60
L
R
MAX
O
O
MAX
O
O
MAX
O
O
MAX
O
O
+
15
O
O
+
15
O
O
+
15
O
O
+
10
O
O
+
10
O
O
+
10
O
O
+
10
O
O
+
10
O
O
+
10
O
O
+
15
O
O
+
15
O
O
+
15
O
O
MAX
O
O
MAX
O
O
MAX
O
O
MAX
O
O
MAX
O
O
SEND
PRE
POST
OL
+
10
0
-
20
SUB
ASSIGN
MAIN
MIX
1-2
3-4
GAIN
4
2
1
5
6
3
PAN
HIGH
12kHz
LOW
80Hz
U
+15
-15
U
+15
-15
U
+15
-15
U
+15
-15
8k
400
2k
2k
100
400
HIGH
MID
FREQ
LOW
MID
FREQ
+
40dB
U
-
20dB
U
20
30
40
60
L
R
MAX
O
O
MAX
O
O
MAX
O
O
MAX
O
O
MAX
O
O
MAX
O
O
SEND
PRE
POST
OL
+
10
0
-
20
SUBS 1-4
TO FW 5-8
SOLO
LEVEL
PFL
AFL
TAPE TO
MAIN MIX
TAPE IN
MAX
O
O
MAX
O
O
SOLO
MODE
L
R
0dB=0dBu
POWER
SUB
ASSIGN
MAIN
MIX
1-2
3-4
GAIN
4
2
1
5
6
3
PAN
HIGH
12kHz
LOW
80Hz
U
+15
-15
U
+15
-15
U
+15
-15
U
+15
-15
8k
400
2k
2k
100
400
HIGH
MID
FREQ
LOW
MID
FREQ
+
40dB
U
-
20dB
U
20
30
40
60
L
R
MAX
O
O
MAX
O
O
MAX
O
O
MAX
O
O
MAX
O
O
MAX
O
O
SEND
PRE
POST
OL
+
10
0
-
20
SUB
ASSIGN
MAIN
MIX
1-2
3-4
GAIN
4
2
1
5
6
3
PAN
HIGH
12kHz
LOW
80Hz
U
+15
-15
U
+15
-15
U
+15
-15
U
+15
-15
8k
400
2k
2k
100
400
HIGH
MID
FREQ
LOW
MID
FREQ
+
40dB
U
-
20dB
U
20
30
40
60
L
R
MAX
O
O
MAX
O
O
MAX
O
O
MAX
O
O
MAX
O
O
MAX
O
O
SEND
PRE
POST
OL
+
10
0
-
20
SUB
ASSIGN
MAIN
MIX
1-2
3-4
GAIN
4
2
1
5
6
3
PAN
HIGH
12kHz
LOW
80Hz
U
+15
-15
U
+15
-15
U
+15
-15
U
+15
-15
8k
400
2k
2k
100
400
HIGH
MID
FREQ
LOW
MID
FREQ
+
40dB
U
-
20dB
U
20
30
40
60
L
R
MAX
O
O
MAX
O
O
MAX
O
O
MAX
O
O
MAX
O
O
MAX
O
O
SEND
PRE
POST
OL
+
10
0
-
20
SUB
ASSIGN
MAIN
MIX
1-2
3-4
GAIN
4
2
1
5
6
3
PAN
HIGH
12kHz
LOW
80Hz
U
+15
-15
U
+15
-15
U
+15
-15
U
+15
-15
8k
400
2k
2k
100
400
HIGH
MID
FREQ
LOW
MID
FREQ
+
40dB
U
-
20dB
U
20
30
40
60
L
R
MAX
O
O
MAX
O
O
MAX
O
O
MAX
O
O
MAX
O
O
MAX
O
O
SEND
PRE
POST
OL
+
10
0
-
20
SUB
ASSIGN
MAIN
MIX
1-2
3-4
GAIN
4
2
1
5
6
3
PAN
HIGH
12kHz
LOW
80Hz
U
+15
-15
U
+15
-15
U
+15
-15
U
+15
-15
8k
400
2k
2k
100
400
HIGH
MID
FREQ
LOW
MID
FREQ
+
40dB
U
-
20dB
U
20
30
40
60
L
R
MAX
O
O
MAX
O
O
MAX
O
O
MAX
O
O
MAX
O
O
MAX
O
O
SEND
PRE
POST
OL
+
10
0
-
20
SUB
ASSIGN
MAIN
MIX
1-2
3-4
GAIN
4
2
1
5
6
3
PAN
HIGH
12kHz
LOW
80Hz
U
+15
-15
U
+15
-15
U
+15
-15
U
+15
-15
8k
400
2k
2k
100
400
HIGH
MID
FREQ
LOW
MID
FREQ
+
40dB
U
-
20dB
U
20
30
40
60
L
R
MAX
O
O
MAX
O
O
MAX
O
O
MAX
O
O
MAX
O
O
MAX
O
O
SEND
PRE
POST
OL
+
10
0
-
20
SUB
ASSIGN
MAIN
MIX
1-2
3-4
GAIN
4
2
1
5
6
3
PAN
HIGH
12kHz
LOW
80Hz
U
+15
-15
U
+15
-15
U
+15
-15
U
+15
-15
8k
400
2k
2k
100
400
HIGH
MID
FREQ
LOW
MID
FREQ
+
40dB
U
-
20dB
U
20
30
40
60
L
R
MAX
O
O
MAX
O
O
MAX
O
O
MAX
O
O
MAX
O
O
MAX
O
O
SEND
PRE
POST
OL
+
10
0
-
20
SUB
ASSIGN
MAIN
MIX
1-2
3-4
GAIN
4
2
1
5
6
3
PAN
HIGH
12kHz
LOW
80Hz
U
+15
-15
U
+15
-15
U
+15
-15
U
+15
-15
8k
400
2k
2k
100
400
HIGH
MID
FREQ
LOW
MID
FREQ
+
40dB
U
-
20dB
U
20
30
40
60
L
R
MAX
O
O
MAX
O
O
MAX
O
O
MAX
O
O
MAX
O
O
MAX
O
O
SEND
PRE
POST
OL
+
10
0
-
20
SUB
ASSIGN
MAIN
MIX
1-2
3-4
GAIN
4
2
1
5
6
3
PAN
HIGH
12kHz
LOW
80Hz
U
+15
-15
U
+15
-15
U
+15
-15
U
+15
-15
8k
400
2k
2k
100
400
HIGH
MID
FREQ
LOW
MID
FREQ
+
40dB
U
-
20dB
U
20
30
40
60
L
R
MAX
O
O
MAX
O
O
MAX
O
O
MAX
O
O
MAX
O
O
MAX
O
O
SEND
PRE
POST
OL
+
10
0
-
20
SUB
ASSIGN
MAIN
MIX
1-2
3-4
GAIN
4
2
1
5
6
3
PAN
HIGH
12kHz
LOW
80Hz
U
+15
-15
U
+15
-15
U
+15
-15
U
+15
-15
8k
400
2k
2k
100
400
HIGH
MID
FREQ
LOW
MID
FREQ
+
40dB
U
-
20dB
U
20
30
40
60
L
R
MAX
O
O
MAX
O
O
MAX
O
O
MAX
O
O
MAX
O
O
MAX
O
O
SEND
PRE
POST
OL
+
10
0
-
20
SUB
ASSIGN
MAIN
MIX
1-2
3-4
GAIN
4
2
1
5
6
3
PAN
HIGH
12kHz
LOW
80Hz
U
+15
-15
U
+15
-15
U
+15
-15
U
+15
-15
8k
400
2k
2k
100
400
HIGH
MID
FREQ
LOW
MID
FREQ
+
40dB
U
-
20dB
U
20
30
40
60
L
R
MAX
O
O
MAX
O
O
MAX
O
O
MAX
O
O
MAX
O
O
MAX
O
O
SEND
PRE
POST
OL
+
10
0
-
20
SUB
ASSIGN
MAIN
MIX
1-2
3-4
GAIN
4
2
1
5
6
3
PAN
HIGH
12kHz
LOW
80Hz
U
+15
-15
U
+15
-15
U
+15
-15
U
+15
-15
8k
400
2k
2k
100
400
HIGH
MID
FREQ
LOW
MID
FREQ
+
40dB
U
-
20dB
U
20
30
40
60
L
R
MAX
O
O
MAX
O
O
MAX
O
O
MAX
O
O
MAX
O
O
MAX
O
O
SEND
PRE
POST
OL
+
10
0
-
20
SUB
ASSIGN
MAIN
MIX
1-2
3-4
GAIN
4
2
1
5
6
3
PAN
HIGH
12kHz
LOW
80Hz
U
+15
-15
U
+15
-15
U
+15
-15
U
+15
-15
8k
400
2k
2k
100
400
HIGH
MID
FREQ
LOW
MID
FREQ
+
40dB
U
-
20dB
U
20
30
40
60
L
R
MAX
O
O
MAX
O
O
MAX
O
O
MAX
O
O
MAX
O
O
MAX
O
O
SEND
PRE
POST
OL
+
10
0
-
20
SUB
ASSIGN
MAIN
MIX
1-2
3-4
GAIN
4
2
1
5
6
3
3
PAN
HIGH
12kHz
LOW
80Hz
U
+15
-15
U
+15
-15
U
+15
-15
U
+15
-15
8k
400
2k
2k
100
400
HIGH
MID
FREQ
LOW
MID
FREQ
+
40dB
U
-
20dB
U
20
30
40
60
L
R
MAX
O
O
MAX
O
O
MAX
O
O
MAX
O
O
MAX
O
O
MAX
O
O
SEND
PRE
POST
OUT
IN
OUT
IN
OUT
IN
OUT
IN
OUT
IN
OUT
IN
OUT
IN
OUT
IN
OUT
IN
OUT
IN
OUT
IN
OUT
IN
OUT
IN
OUT
IN
OUT
IN
OUT
IN
OL
+
10
0
-
20
AUX MASTERS
R
1
2
3
1
2
3
4
5
6
L
4
MAIN MIX
ALTERNATE FIREWIRE ASSIGNMENTS
SUBGROUPS
OWNER'S MANUAL