Mackie Onyx 1640i Owner's Manual - Page 35
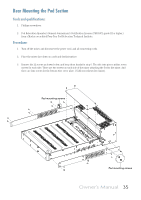
Rear Mounting the Pod
 |
View all Mackie Onyx 1640i manuals
Add to My Manuals
Save this manual to your list of manuals |
Page 35 highlights
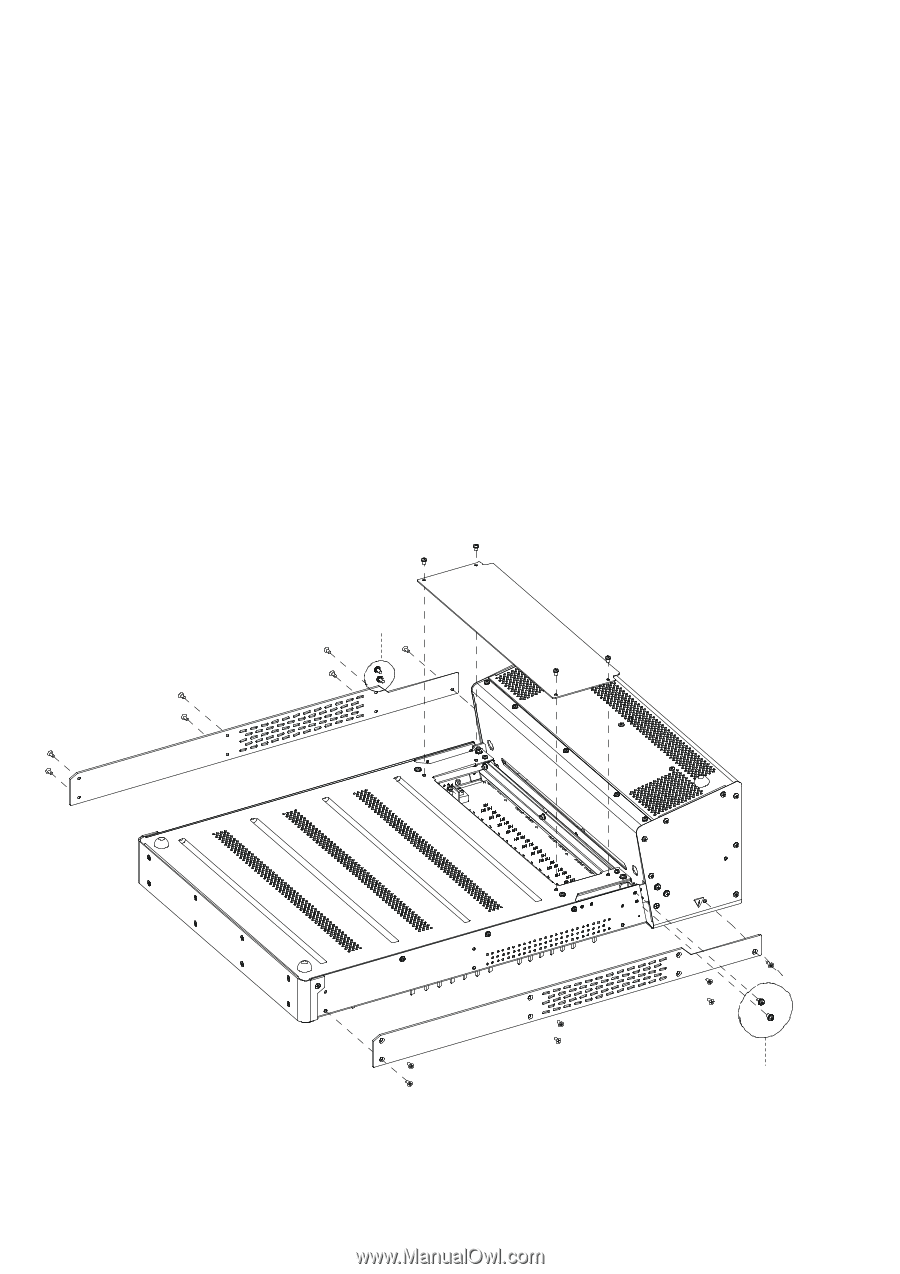
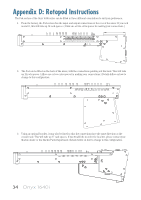
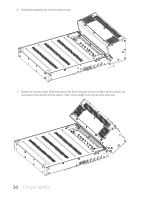
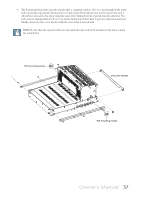
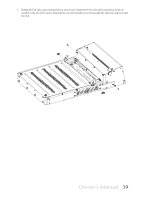
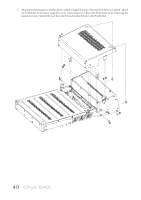
Rear Mounting the Pod Section Tools and qualifications: 1. Phillips screwdriver. 2. Pod Relocation Operator's General Journeyman's Certification License (PROGJCL grade III or higher) from a Mackie-accredited Four-Year Pod Relocation Technical Institute. Procedure: 1. Turn off the mixer, and disconnect the power cord, and all connecting cords. 2. Place the mixer face down on a soft and dry flat surface. 3. Remove the 22 screws as shown below, and keep them handy for step 6. The side trim pieces utilize seven screws for each side. There are two screws on each side of the mixer attaching the Pod to the mixer. And there are four screws for the bottom wire cover plate. (Cables not shown for clarity). Pod mounting screws Pod mounting screws Owner's Manual 35
-
 1
1 -
2
-
3
-
4
-
5
-
6
-
7
-
8
-
9
-
10
-
11
-
12
-
13
-
14
-
15
-
16
-
17
-
18
-
19
-
20
-
21
-
22
-
23
-
24
-
25
-
26
-
27
-
28
-
29
-
 30
30 -
 31
31 -
 32
32 -
 33
33 -
 34
34 -
 35
35 -
 36
36 -
 37
37 -
 38
38 -
 39
39 -
 40
40 -
41
-
42
-
43
-
44
-
45
-
46
-
47
-
48
-
49
-
50
 |
 |