Magellan MobileMapper 6 Getting Started Guide - Page 20
Using the Pictures & Videos Application
 |
UPC - 000099060350
View all Magellan MobileMapper 6 manuals
Add to My Manuals
Save this manual to your list of manuals |
Page 20 highlights
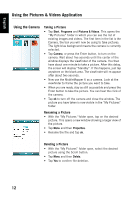
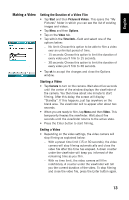
English Using the Pictures & Videos Application Using the Camera Taking a Picture • Tap Start, Programs and Pictures & Videos. This opens the "My Pictures" folder in which you can see the list of existing images and videos. The first item in the list is the Camera, the tool you will now be using to take pictures. The light-blue background means the camera is currently selected. • Tap Camera, or press the Enter button, to turn on the camera. Wait about five seconds until the center of the window displays the viewfinder of the camera. You then have about one minute to take a picture. After this delay, the screen will display "Standby". If this happens, just tap anywhere on the blank area. The viewfinder will re-appear after about two seconds. • Now use the MobileMapper 6 as a camera. Look at the viewfinder to frame the picture you want to take. • When you are ready, stay as still as possible and press the Enter button to take the picture. You can hear the click of the camera. • Tap ok to turn off the camera and close the window. The picture you have taken is now visible in the "My Pictures" folder. Renaming a Picture • With the "My Pictures "folder open, tap on the desired picture. This opens a new window showing a larger view of the picture. • Tap Menu and then Properties. • Rename the file and tap ok. Deleting a Picture • With the "My Pictures" folder open, select the desired picture using the Scroll button. • Tap Menu and then Delete. • Tap Yes to confirm file deletion. 12
-
 1
1 -
2
-
3
-
4
-
5
-
6
-
7
-
8
-
9
-
10
-
11
-
12
-
13
-
14
-
 15
15 -
 16
16 -
 17
17 -
 18
18 -
 19
19 -
 20
20 -
 21
21 -
 22
22 -
 23
23 -
 24
24 -
 25
25 -
26
-
27
-
28
 |
 |
