Magnavox MDV437 User manual, English (US) - Page 17
Step 3 : Setting up, Progressive Scan feature
 |
View all Magnavox MDV437 manuals
Add to My Manuals
Save this manual to your list of manuals |
Page 17 highlights
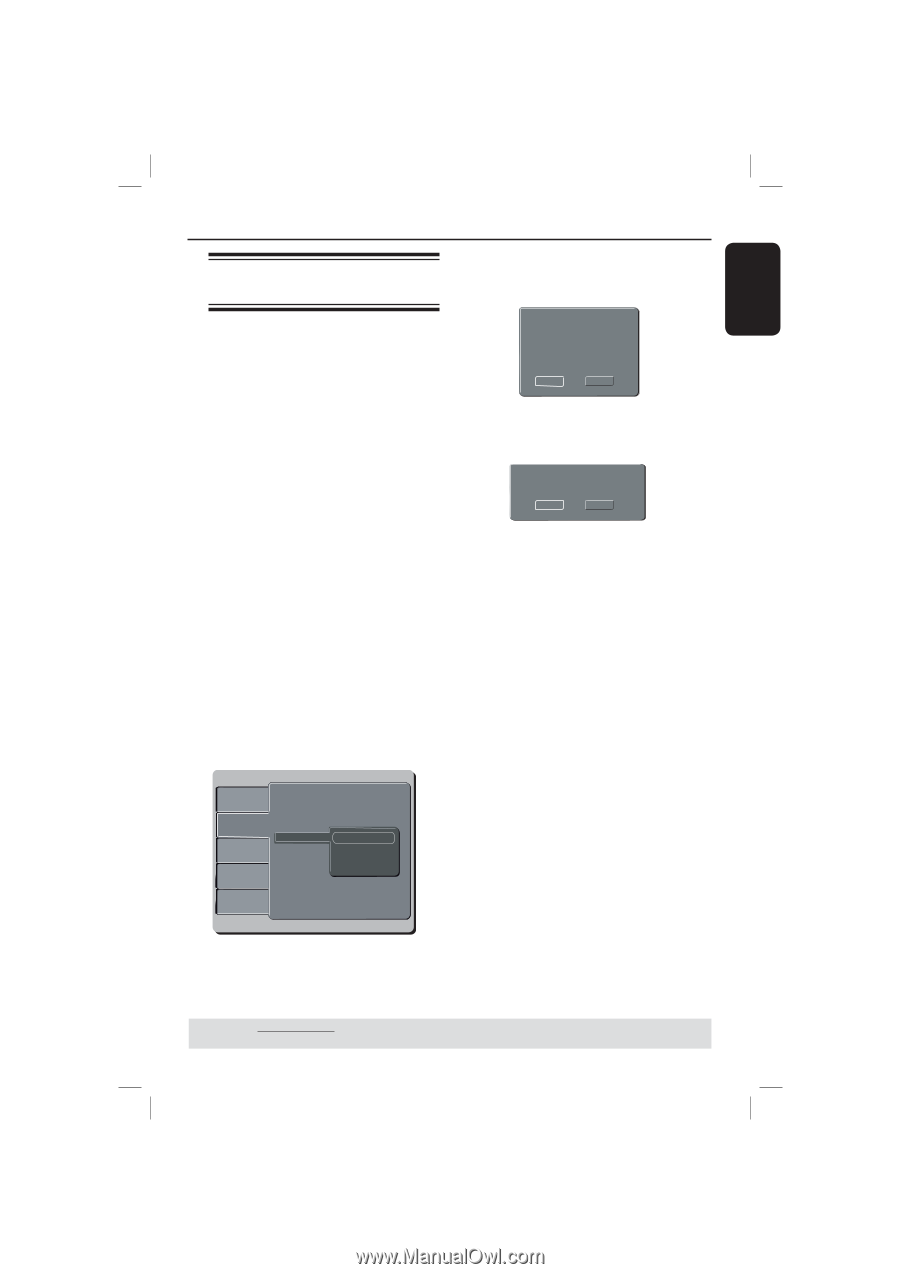
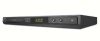
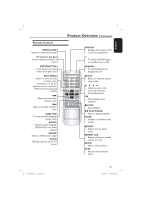
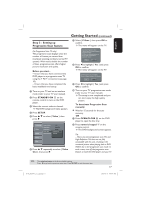
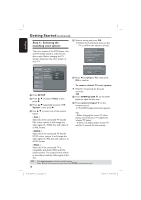
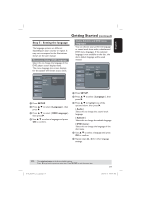
English Getting Started (continued) Step 3 : Setting up Progressive Scan feature G Select { P-Scan }, then press OK to confirm. The menu will appear on the TV. (for Progressive Scan TV only) The progressive scan displays twice the number of frames per second than interlaced scanning (ordinary normal TV system). With nearly double the number of lines, progressive scan offers higher picture resolution and quality. Before you start... - Ensure that you have connected this DVD player to a progressive scan TV using the Y Pb Pr connection (see page 10). - Ensure that you have completed the basic installation and set-up. A Turn on your TV and set to interlace mode (refer to your TV user manual). B Press STANDBY ON 2 on the remote control to turn on the DVD player. C Select the correct video-in channel. The DVD background menu appears. D Press SETUP. E Press to select { Video }, then press . Language Video Audio AAssppeeccttRRaattiioo VViieewwMMooddee TTVVSSyysstteemm VViiddeeooOOuutt SSmmaarrttPPiiccttuurree ::44::33 ::AAuuttooFFiitt ::NNTTSSCC Int:eCrloamcepdonent P-S:Pcearnsonal Rating Misc F Press repeatedly to select { Video Out }, then press . Activating Progressive Scan 1.Ensure your TV system supports Progressive Mode 2.If there is a distorted picture on the TV, wait 15 seconds for automatic recover Yes NO H Press to highlight { Yes } and press OK to confirm. The menu will appear on the TV. Confirm again to use new setting Revert to original setting in 14 seconds Yes NO I Press to highlight { Yes } and press OK to confirm. J Turn on your TV progressive scan mode (refer to your TV user manual). The setup is now completed and you can start enjoy the high quality picture. To deactivate Progressive Scan manually: Wait for 15 seconds for the auto recovery. OR A Press OPEN/CLOSE ç on the DVD player to open the disc tray. B Press numeric keypad '1' on the remote control. The DVD background screen appears. Tip: - There are some progressive scan TVs and High-Definition TVs that are not fully compatible with this unit, resulting in the unnatural picture when playing back a DVD VIDEO disc in the progressive scan mode. In such a case, turn off the progressive scan feature on both the DVD player and your TV. TIPS: The underlined option is the factory default setting. Press to go back to previous menu item. Press SETUP to exit the menu item. 01-43_MDV437_37_eng.indd 17 17 2007-01-31 4:49:47 PM
-
 1
1 -
2
-
3
-
4
-
5
-
6
-
7
-
8
-
9
-
10
-
11
-
 12
12 -
 13
13 -
 14
14 -
 15
15 -
 16
16 -
 17
17 -
 18
18 -
 19
19 -
 20
20 -
 21
21 -
 22
22 -
23
-
24
-
25
-
26
-
27
-
28
-
29
-
30
-
31
-
32
-
33
-
34
-
35
-
36
-
37
-
38
-
39
-
40
-
41
-
42
-
43
 |
 |