Maytag MGR6751BDB Use and Care Guide - Page 6
Surfu©e, ¢ookin
 |
UPC - 719881178714
View all Maytag MGR6751BDB manuals
Add to My Manuals
Save this manual to your list of manuals |
Page 6 highlights
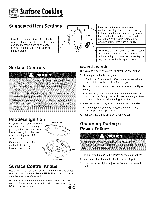
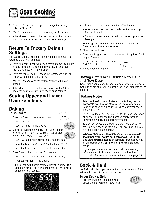
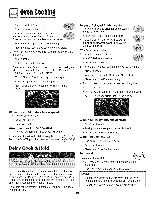
Surfu©¢eookin Suggested Heat Settings I 0 Low: Use to simmer foods, keep foods warm and melt chocolate or butter. Some cooking may take place on the Low setting if the pan is covered. Be sure flame is stable. Intermediate flame sizes are used to continue cooking. Food will not cook any faster when a higher flame setting is used than needed to maintain a gentle boil. Water boils at the same temperature whether boiling gently or vigorously. High: Use to bring liquid to a boil, or reach pressure in a pressure cooker. Always reduce setting to a lower heat when liquids begin to boil or foods begin to cook. Surface Controls Pilotless ignition Pilotless ignition eliminates the need for a constant standing pilot light. Each surface burner has a spark ignitor. Use care when cleaning around the surface burner. If the surface burner does not light, check if ignitor is broken, soiled or wet. BURNER CAP Setting the controls: The size and type of cookware will affect the heat setting. 1. Place a pan on the burner grate. The burner flame may lift off or appear separated from the port if a pan is not placed on the grate. 2. Push in and turn the knob counterclockwise to the Light setti ng. A clicking (spark:) sound will be heard and the burner will light. (All four ignitors will spark when any surface burner knob is turned to the Light position.:) 3. After the burner lights, turn knob to desired flame size. The ignitor will continue to spark until the knob is turned past the Light position. 4. After cooking, turn knob to OFF.Remove pan. Operating During a Power Failure BURNER BASE Surface Control Knobs Use to turn on the surface burners. An infinite choice of heat settings is available from Low to High. The knobs can be set on or between any of the settings. Graphics next to the knob identify which burner the knob controls. For example, the graphic at right shows the O O left front burner location. _O 1. Hold a lighted match to the desired surface burner head. 2. Push in and turn the control knob slowly to Light. 3. When the burner lights, adjust the flame to the desired level.
-
 1
1 -
 2
2 -
 3
3 -
 4
4 -
 5
5 -
 6
6 -
 7
7 -
 8
8 -
 9
9 -
 10
10 -
 11
11 -
 12
12 -
13
-
14
-
15
-
16
-
17
-
18
-
19
-
20
-
21
-
22
-
23
-
24
-
25
-
26
-
27
-
28
-
29
-
30
-
31
-
32
-
33
-
34
-
35
-
36
-
37
-
38
-
39
-
40
-
41
-
42
-
43
-
44
-
45
-
46
-
47
-
48
-
49
-
50
-
51
-
52
-
53
-
54
-
55
-
56
-
57
-
58
-
59
-
60
-
61
-
62
-
63
-
64
-
65
-
66
-
67
-
68
-
69
-
70
-
71
-
72
-
73
-
74
-
75
-
76
 |
 |
