Meade ETX125 Instruction Manual - Page 19
Observe a Star using the Automatic Tracking Feature, Initializing AutoStar
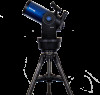 |
View all Meade ETX125 manuals
Add to My Manuals
Save this manual to your list of manuals |
Page 19 highlights
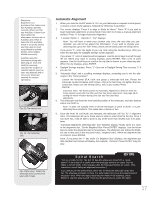
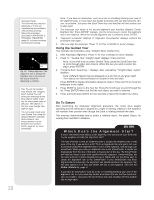
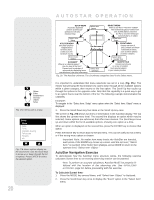
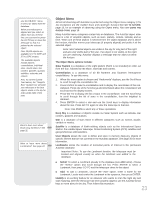
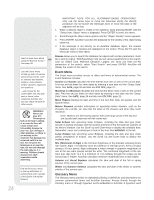
NOTE: Saturn is not visible the entire year and you may need to choose another object from AutoStar's database; however, the procedure, as described below, remains the same. If Saturn (or any other object) is not currently visible in the sky, AutoStar displays "Below Horizon." But you can use this procedure to find any object in the AutoStar database. 1. After the telescope is aligned, "Select Item: Object" displays. If "Select Item: Object" is not displayed on your handbox, keep pressing MODE until it does display. Press ENTER. 2. "Object: Solar System" displays. Press ENTER. 3. "Solar System: Mercury" displays. Keep pressing the Scroll Down key until "Solar System: Saturn" displays (or you may choose another object from the Solar System list if Saturn is not visible). 4. Press ENTER. "Calculating" displays. Then "Saturn" and a set of coordinates displays. Note that Saturn's (and other planets') coordinates change throughout the year. 5. Press GO TO. "Saturn: Slewing..." displays and the telescope slews until it finds Saturn. You may need to use the Arrow keys to center Saturn precisely in the eyepiece. AutoStar then automatically moves the telescope so that it "tracks" Saturn (or whatever other object you may have chosen); i.e., Saturn remains centered in the eyepiece. Observe a Star using the Automatic Tracking Feature In this example, the AutoStar Arrow keys are used to find a star and then AutoStar's tracking feature automatically keeps the star centered in your telescope's eyepiece. 1. Once your telescope has been aligned, you can use the Arrow keys (5, Fig. 4) if you wish, to observe a bright star in the night sky. Use the smartfinder (2, Fig. 1a) to help line up the telescope upon any star you wish to observe. The tracking motors will then keep the star you have chosen in the center of the eyepiece. If the telescope is not aligned, the object will not remain centered and will drift out of view in the eyepiece. Initializing AutoStar This section describes how to initialize AutoStar. Perform this procedure the first time you use AutoStar or after performing a RESET (see RESET, page 28). AutoStar will ask you to enter the current time and date and to choose your observing location and your telescope's model number from the list it displays. 1. Tighten the vertical and horizontal locks (6 and 9, Fig. 1) if necessary. 2. Make sure that AutoStar is connected to the HBX port (C, Fig. 2) of the telescope's computer control panel. 3. Flip the telescope power switch (A, Fig. 2) to the ON position. 4. The AutoStar screen displays a copyright message, followed by a short beep. Then AutoStar takes a few moments to start up the system. Important Note: While performing the automatic tracking procedure, only use the Arrow keys to move the telescope. Once the telescope has been aligned, do not loosen the telescope's vertical or horizontal locks (6 and 9, Fig. 1a and 1b) or move the base manually or alignment will be lost. 5. A message displays that warns not to look at the Sun. At the end of this message, press the key prompted by AutoStar to signify that the message has been read and understood. 6. The Getting Started menu displays a scrolling message. Press ENTER (2, Fig. 4) to bypass the Help tutorial and continue with initialization. 7. AutoStar then requests the current date. Use the Number keys (6, Fig. 4) to enter the digits for the date. Use the Arrow keys (5, Fig. 4) to move back and forth from one number to the next in the day display. Next, use the Right Arrow key to move to the month position. Use the Scroll keys (7, Fig. 4) to cycle through the list of months. When the current month is displayed, use the Right Arrow to move to the year position. Use the Number keys to enter all four digits of the current year. Press ENTER when the entire date has been entered. 8 AutoStar then requests the current time. Use the Number keys to enter the time. (Use a "0" for the first digit if it less than 10.) Use the Arrow keys to move from one number to the next. Press one of the Arrow keys to scroll to "AM" or "PM". If you select the "blank" choice that follows "AM" and "PM", then the clock displays time in a 24-hour (military time) format. Press ENTER to start the clock. 9. AutoStar then requests the status of Daylight Savings Time. Press a Scroll key to toggle between the YES/NO settings. Select a Scroll key to toggle between the YES/NO settings. Select the desired setting by pressing ENTER when the correct setting displays. Note: Daylight Savings Time may be referred to by a different name in various areas of the world. 10. AutoStar then requests the country or state (listed alphabetically) of the observing site. Use the Scroll keys to cycle through the database of countries, states and provinces. Press ENTER when the correct location displays. 11. AutoStar then requests the city (listed alphabetically) closest to the observing site. Use the SCROLL keys to cycle through the database of cities. Press ENTER when the closest city displays. 12. AutoStar then requests the telescope model number. Use the SCROLL keys to cycle through the database of models. Press ENTER when your model number displays. AutoStar Initialization is complete and the screen reads "Setup: Align." 19
-
 1
1 -
2
-
3
-
4
-
5
-
6
-
7
-
8
-
9
-
10
-
11
-
12
-
13
-
 14
14 -
 15
15 -
 16
16 -
 17
17 -
 18
18 -
 19
19 -
 20
20 -
 21
21 -
 22
22 -
 23
23 -
 24
24 -
25
-
26
-
27
-
28
-
29
-
30
-
31
-
32
-
33
-
34
-
35
-
36
-
37
-
38
-
39
-
40
-
41
-
42
-
43
-
44
-
45
-
46
-
47
-
48
-
49
-
50
-
51
-
52
-
53
-
54
-
55
-
56
-
57
-
58
-
59
-
60
 |
 |