Memorex 32023220 Manual - Page 11
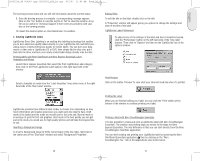
Launch Nero Express Essentials then select the Print LightScribe Label category
 |
UPC - 034707032200
View all Memorex 32023220 manuals
Add to My Manuals
Save this manual to your list of manuals |
Page 11 highlights
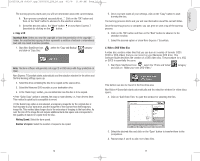
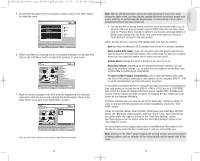
32023220_SG 050207.qxp:32023292_QIG_LO.qxp 8/3/07 11:48 AM Page 20 English The burning process starts and you will see information about the current status. 9. Once the burning process is complete, a corresponding message appears. Click on the "Yes" button to save the log file or "No" to close the window. A log file can be useful for Technical Support if there were any problems with your disc or the burning process. 10. Select the desired option or close NeroVision 4 Essentials. e. Creating LightScribe labels LightScribe Direct Disc Labeling is an exciting disc labeling technology that enables you to burn silkscreen-quality labels directly on your LightScribe CDs and DVDs providing easy to create professional quality no-hassle labels. You can burn your data, music or video onto a LightScribe CD or DVD, then simply flip the disc over, put it back into the drive, and burn your newly created label design directly onto the disc. Printing labels with Nero StartSmart and Nero Express Essentials Label Templates and Modes Launch Nero Express Essentials then select the Print LightScribe Label category then click on the Print LightScribe Label option in the right hand side of the window Select a template or mode from the "Label templates" drop down menu at the right hand side of the "Disc Label" window. LightScribe provides three different label modes to choose from depending on how much information and creative expression you want each disc label to have. Draft mode is the fastest and the mode you would use for text only and, Normal mode is an average of great for text and graphics. Best mode is the best quality you can get and is the mode you would use for high quality photos and will take the longest time to use. Inserting a Background Image To insert a background image to fit the round shape of the disc label, right-click in the center area of the "Disc label" window and select "Background Properties". 20 Editing Titles To edit the title on the label, double click on the title. A "Properties" window will appear giving you options to change the settings and style of the title of the label. LightScribe Label Preferences To adjust some of the settings of the label and how it should be burned, click the "Preferences" button on the left hand side of the "Disc label" window. Then click on "Options" and then on the "LightScribe" tab of the options window. Print Preview Click on the button "Preview" to view what your label will look like when it´s printed. Printing the Label When you are finished editing your label, you can click the "Print" button at the bottom of the window to continue printing your label. Printing a label with Nero CoverDesigner Essentials It is also possible to create and print a LightScribe label with Nero CoverDesigner Essentials. The creation and printing steps are similar to the steps for Nero Express Essentials. The only difference is that you can start directly from the Nero CoverDesigner Essentials application. You can start creating and printing your LightScribe label by launching the Nero StartSmart Essentials application then by clicking on the "Nero CoverDesigner Ess." link in the Applications area shown below. 21
-
 1
1 -
2
-
3
-
4
-
5
-
 6
6 -
 7
7 -
 8
8 -
 9
9 -
 10
10 -
 11
11 -
 12
12 -
 13
13 -
 14
14 -
 15
15 -
 16
16 -
17
-
18
-
19
-
20
-
21
-
22
-
23
-
24
-
25
-
26
-
27
-
28
-
29
-
30
-
31
-
32
-
33
-
34
-
35
-
36
-
37
-
38
-
39
-
40
-
41
-
42
-
43
-
44
-
45
 |
 |
