Memorex 32023220 Manual - Page 5
Uninstalling The Software, Software Installation - drivers
 |
UPC - 034707032200
View all Memorex 32023220 manuals
Add to My Manuals
Save this manual to your list of manuals |
Page 5 highlights
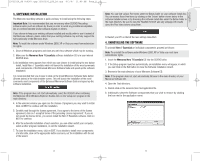
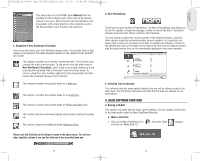
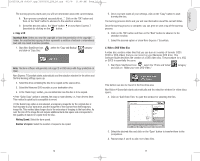
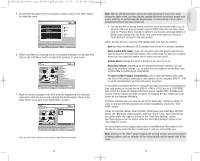
English 32023220_SG 050207.qxp:32023292_QIG_LO.qxp 8/3/07 11:48 AM Page 8 3. SOFTWARE INSTALLATION The Memorex recording software is quick and easy to install using the following steps: Important Note: It is recommended that you remove any other CD/DVD Recording software suites (such as software by Roxio) in order to avoid any possible incompatibilities or conflicts between similar software engines or drivers. If you choose to keep your existing software installed and would prefer to use it instead of the Memorex software, please realize that your existing software may not fully support the full functionality of the Memorex drive. Note: To install the software under Windows 2000, XP or Vista you must have administrator rights. 1. Close all Windows programs and close any anti-virus software which may be running. 2. Make sure the Memorex Nero 7 Essentials software installation CD is in your internal CD/DVD drive. 3. An installation menu appears from which you can choose to install using the one button install, Install Nero 7 Essentials which will launch the installation of the most commonly used components of the Enhanced Memorex Software Suite and speed up the software installation. It is recommended that you choose to click on the Install Memorex Software Suite button (Shown below) in the main installer screen. This will launch the installation of the most commonly used components of the Enhanced Memorex Software Suite and speed up the software installation. Note: If the program does not start automatically, select the CD/DVD drive containing the Memorex CD in Windows Explorer. Double click on the "setup.exe" program in the main directory. 4. In the welcome window you again see the choices of programs you may want to install. Click on NEXT to continue with the installation. 5. Carefully read through the license agreement. If you agree to the terms of the license agreement, click on "I accept all terms of the preceding License Agreement." If you do not accept the license terms, you cannot install the Nero 7 Essentials software. Click on NEXT to continue. 6. After the automatic installation of each selection, you can either restart your computer, select another program installation, or exit the installation wizard. 7. To close the installation menu, click on EXIT. If you decide to install more components at a later date, click on the appropriate button and carry out the installation with the aid of the wizard. Note: You can find various Free items under the Extras folder on your software install disc. You can access these Free items by clicking on the "Extras" button shown below in the software installer screen or by browsing the software install disc under the Extras folder in the main directory. Be sure to view the "ReadMe First.txt" and any webpage info sheets about the Free items before using them. 8. Restart your PC so that all the new settings take effect. 4. UNINSTALLING THE SOFTWARE To uninstall Nero 7 Essentials or individual components, proceed as follows: Note: To uninstall the software under Windows 2000, XP or Vista you must have administrator rights. 1. Insert the Memorex Nero 7 Essentials CD into the CD/DVD drive. 2. If the Setup program launches automatically, an installation menu will appear, in which you can Click on the Exit button to close the Software Installation wizard. 3. Browse to the main directory of your Memorex Software CD. Note: If the program does not start automatically, Browse to the main directory of your Memorex Software CD. 4. Open the Tools directory. 5. Double click on the General-Clean Tool application file. 6. Individually select the Software components that you wish to remove by clicking the box next to the application name. 8 9
-
 1
1 -
 2
2 -
 3
3 -
 4
4 -
 5
5 -
 6
6 -
 7
7 -
 8
8 -
 9
9 -
 10
10 -
 11
11 -
12
-
13
-
14
-
15
-
16
-
17
-
18
-
19
-
20
-
21
-
22
-
23
-
24
-
25
-
26
-
27
-
28
-
29
-
30
-
31
-
32
-
33
-
34
-
35
-
36
-
37
-
38
-
39
-
40
-
41
-
42
-
43
-
44
-
45
 |
 |
