Memorex 32023220 Manual - Page 9
d. Make a DVD Video Disc, c. Copy a CD, Important Note, Writing Speed, Number of copies
 |
UPC - 034707032200
View all Memorex 32023220 manuals
Add to My Manuals
Save this manual to your list of manuals |
Page 9 highlights
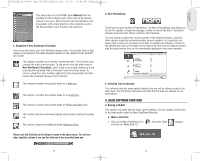
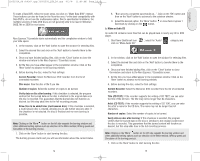
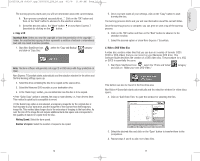
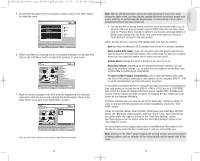
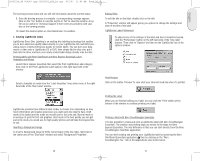
32023220_SG 050207.qxp:32023292_QIG_LO.qxp 8/3/07 11:48 AM Page 16 English The burning process starts and you will see information about the current status. 8. "Burn process completed successfully at...", Click on the "OK" button and then on the "Next" button to advance to the selection window. 9. Select the desired option, the "More" button or close Nero Express 7 Essentials by clicking on the button. c. Copy a CD Important Note: Unless you own the copyright or have the permission of the copyright holder, the unauthorized copying of discs represents a violation of national or international laws and may result in serious penalties. 1. Start Nero StartSmart Icon and click on "Copy Disc." ; select the "Copy and Backup" category Note: The Nero software will generally not copy CD or DVD discs with Copy protection on them. Nero Express 7 Essentials starts automatically and the selection window for the drives and the final burning settings opens up. 2. Select the drive containing the disc to be copied as the source drive. 3. Select the Memorex DVD recorder as your destination drive. 4. In the "Quick Copy" section, you can determine how the disc is to be copied. • If the "Quick Copy" option is selected, the copy is made directly, i.e., from drive to drive. This method is quick but is susceptible to errors. • If the Quick Copy option is not selected, a temporary image file for the original disc is first recorded to your hard drive, and the image file is then burned from the temporary image file. This method takes longer due to the extra step of Imaging to the hard drive. As well, the size of the image file will require additional hard disk space and corresponds to the quantity of data to be copied from the disc. Writing Speed: Select the burn speed. Number of copies: Select the number of copies to be copied. 5. Once you have made all your settings, click on the "Copy" button to start burning the disc. The burning process starts and you will see information about the current status. Once the burning process is complete, you can print or save a log of the burning process. 6. Click on the "OK" button and then on the "Next" button to advance to the selection window. 7. Select the desired option or close Nero Express 7 Essentials. d. Make a DVD Video Disc A video disc contains video files that you can burn in a variety of formats (VCD / SVCD or DVD-Video) that you can record on your Memorex DVD drive. This Software Guide describes the creation of a DVD video disc. The procedure for a VCD or SVCD is essentially the same. 1. Start Nero StartSmart Icon ; select the "Photo and Video" and click on "Make your own DVD-Video." category This button can also be found in the Favorites area. NeroVision 4 Essentials starts automatically and the selection window for video discs opens. 2. Click on "Add Video Files" to open the window for selecting the files. 3. Select the desired files and click on the "Open" button to transfer them to the compilation. 4. Repeat steps 2 and 3 to add more video files. 16 17
-
 1
1 -
2
-
3
-
 4
4 -
 5
5 -
 6
6 -
 7
7 -
 8
8 -
 9
9 -
 10
10 -
 11
11 -
 12
12 -
 13
13 -
 14
14 -
15
-
16
-
17
-
18
-
19
-
20
-
21
-
22
-
23
-
24
-
25
-
26
-
27
-
28
-
29
-
30
-
31
-
32
-
33
-
34
-
35
-
36
-
37
-
38
-
39
-
40
-
41
-
42
-
43
-
44
-
45
 |
 |
