Memorex MCC228RSBLK User Guide - Page 19
Downloading And Transferring Files
 |
UPC - 749720014958
View all Memorex MCC228RSBLK manuals
Add to My Manuals
Save this manual to your list of manuals |
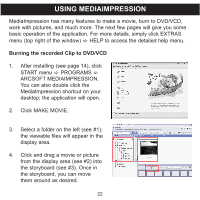
Page 19 highlights
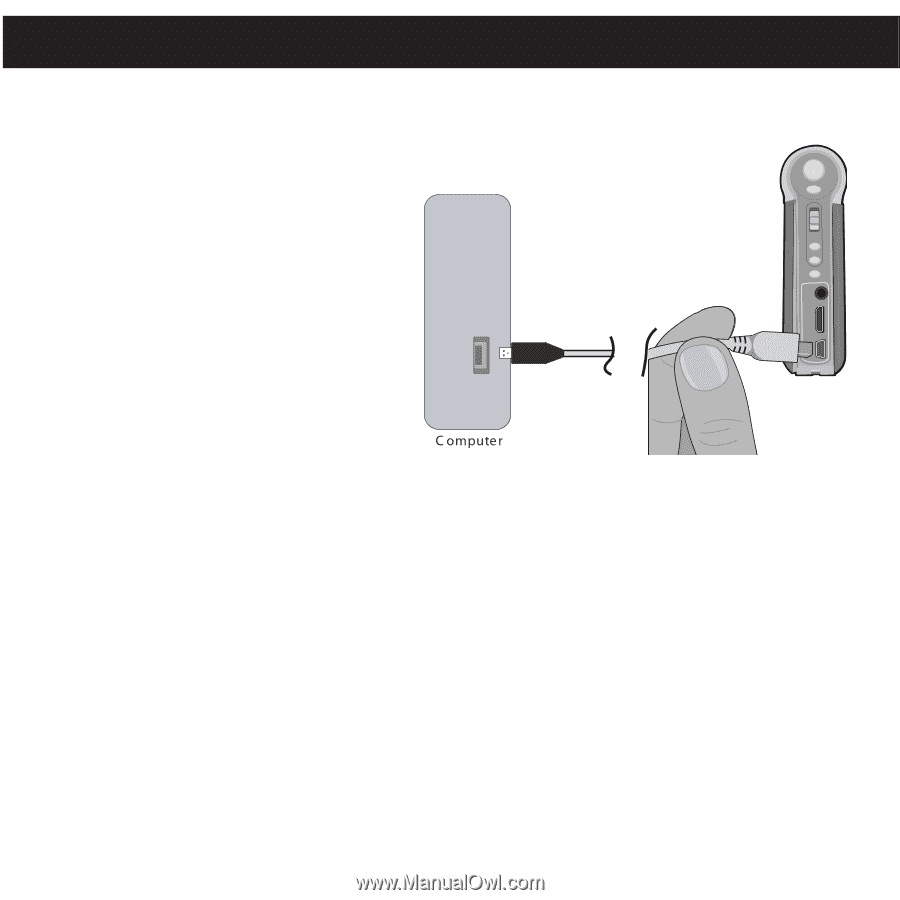
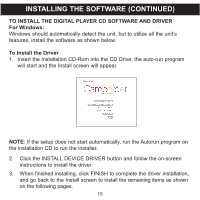
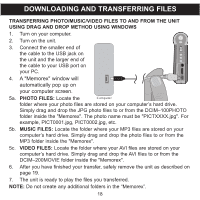
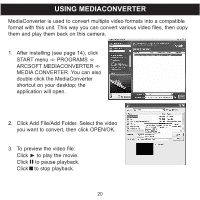
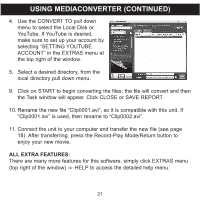
DOWNLOADING AND TRANSFERRING FILES TRANSFERRING PHOTO/MUSIC/VIDEO FILES TO AND FROM THE UNIT USING DRAG AND DROP METHOD USING WINDOWS 1. Turn on your computer. 2. Turn on the unit. 3. Connect the smaller end of the cable to the USB jack on the unit and the larger end of the cable to your USB port on your PC. 4. A "Memorex" window will automatically pop up on your computer screen. 5a. PHOTO FILES: Locate the folder where your photo files are stored on your computer's hard drive. Simply drag and drop the JPG photo files to or from the DCIM-100PHOTO folder inside the "Memorex". The photo name must be "PICTXXXX.jpg". For example, PICT0001.jpg, PICT0002.jpg, etc. 5b. MUSIC FILES: Locate the folder where your MP3 files are stored on your computer's hard drive. Simply drag and drop the photo files to or from the MP3 folder inside the "Memorex". 5c. VIDEO FILES: Locate the folder where your AVI files are stored on your computer's hard drive. Simply drag and drop the AVI files to or from the DCIM-200MOVIE folder inside the "Memorex". 6. After you have finished your transfer, safely remove the unit as described on page 19. 7. The unit is ready to play the files you transferred. NOTE: Do not create any additional folders in the "Memorex". 18
-
 1
1 -
2
-
3
-
4
-
5
-
6
-
7
-
8
-
9
-
10
-
11
-
12
-
13
-
 14
14 -
 15
15 -
 16
16 -
 17
17 -
 18
18 -
 19
19 -
 20
20 -
 21
21 -
 22
22 -
 23
23 -
 24
24 -
25
-
26
-
27
-
28
-
29
-
30
-
31
-
32
-
33
-
34
-
35
-
36
-
37
-
38
-
39
-
40
-
41
-
42
-
43
-
44
-
45
-
46
-
47
-
48
-
49
-
50
-
51
-
52
-
53
-
54
-
55
-
56
-
57
-
58
-
59
-
60
-
61
-
62
-
63
-
64
-
65
-
66
-
67
-
68
-
69
-
70
-
71
-
72
-
73
-
74
-
75
-
76
-
77
-
78
-
79
-
80
-
81
-
82
-
83
-
84
-
85
-
86
-
87
-
88
-
89
-
90
-
91
-
92
-
93
-
94
-
95
-
96
-
97
-
98
-
99
-
100
-
101
-
102
-
103
-
104
-
105
-
106
-
107
-
108
-
109
-
110
-
111
-
112
-
113
-
114
-
115
-
116
-
117
-
118
-
119
-
120
-
121
-
122
-
123
-
124
-
125
-
126
-
127
-
128
-
129
-
130
-
131
-
132
-
133
-
134
-
135
-
136
-
137
-
138
-
139
-
140
-
141
-
142
-
143
-
144
-
145
-
146
-
147
-
148
-
149
-
150
-
151
-
152
-
153
-
154
-
155
-
156
-
157
-
158
-
159
-
160
-
161
-
162
-
163
-
164
-
165
-
166
-
167
-
168
-
169
-
170
-
171
-
172
-
173
-
174
-
175
-
176
-
177
-
178
-
179
-
180
-
181
-
182
-
183
-
184
-
185
-
186
-
187
-
188
-
189
-
190
-
191
-
192
-
193
-
194
-
195
-
196
-
197
-
198
-
199
-
200
-
201
-
202
-
203
-
204
-
205
-
206
-
207
-
208
-
209
-
210
-
211
-
212
-
213
-
214
-
215
 |
 |