Motorola H201 User Guide - Page 7
Setting the display language, Setting date and time
 |
View all Motorola H201 manuals
Add to My Manuals
Save this manual to your list of manuals |
Page 7 highlights
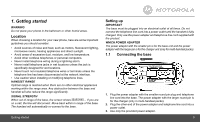
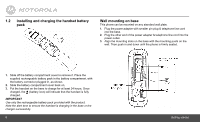
4. On the base's front, there is a rotatable knob near the speakerphone. When you mount it on the wall, rotate the knob to "wall" so that the handset will sit properly in the base, as shown below. Wall mounting status Desk status NOTE Do not use a power outlet controlled by a wall switch. Make sure the wall is capable of supporting the weight of the phone, and use the proper type of anchoring device for the wall material. 1.3 Setting the display language 1. Press MENU and then VOL+ or REDIAL/VOL- to select SETUP HS. 2. Repeat to select LANGUAGE. 3. Repeat to select language. 4. Press MENU to save. 1.4 Setting date and time 1. Press MENU to select DATE & TIME. If you're a subscriber to your network's Caller ID service, date and time is automatically set when a call is received. 2. Repeat to edit the year and date. 3. Press VOL+ or REDIAL/VOL- to move between the input fields YEAR and DATE. 4. Press MENU and then edit the time in 12hr format. Press VOL+ or REDIAL/VOL- to toggle AM/PM settings. 5. Press MENU to save the settings. Your phone is now ready for use. Getting started 7
-
 1
1 -
 2
2 -
 3
3 -
 4
4 -
 5
5 -
 6
6 -
 7
7 -
 8
8 -
 9
9 -
 10
10 -
 11
11 -
 12
12 -
13
-
14
-
15
-
16
-
17
-
18
-
19
-
20
-
21
-
22
-
23
-
24
-
25
-
26
-
27
-
28
-
29
-
30
-
31
 |
 |
