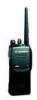
Motorola HT750 Service Manual - Page 27
CAUTION Take care not to damage the display. Do not cut, bend, or pinch the heat, seal. Display - speaker microphone
 |
View all Motorola HT750 manuals
Add to My Manuals
Save this manual to your list of manuals |
Page 27 highlights
Maintenance 3-7 3. To remove the keypad retainer shield: a. Insert the tip of a "penknife size," flat blade screwdriver in the opening at the end of the keypad retainer arm tab. b. Pry the tab away from the side of the front cover until it moves past the ledges on the side wall. Repeat this procedure for the four remaining retainer arm tabs. Speaker-Microphone Flex Circuit Tail Flat Blade Screwdriver Keypad Retainer Arm Tabs (4) Retainer Top Hooks Retainer Figure 3-6: Remove Retainer 4. Note that the two "top hooks" are still held underneath the front cover-right below the speaker. Lift the keypad retainer out of the front cover, then lift and pivot the two hooks out of the front cover. 5. If disassembly involves the removal of the display module, disconnect the display flex from the keypad option board connector by lifting the latch on the connector. (This is similar to the process for releasing the flexes.) (see page 3-5.) 6. The display module is attached to the front cover with a double-sided adhesive pad. Carefully pull up on the display module, using a small screwdriver, if necessary, and remove it from the front cover. Use a new piece of double-sided adhesive to re-mount the display to the cover. ! CAUTION Take care not to damage the display. Do not cut, bend, or pinch the heat seal. Display modules contain CMOS devices. Be sure to use ESD protection. C a u t i o n 7. The keypad/PassPort/option board can be removed without the use of tools.
-
 1
1 -
2
-
3
-
4
-
5
-
6
-
7
-
8
-
9
-
10
-
11
-
12
-
13
-
14
-
15
-
16
-
17
-
18
-
19
-
20
-
21
-
 22
22 -
 23
23 -
 24
24 -
 25
25 -
 26
26 -
 27
27 -
 28
28 -
 29
29 -
 30
30 -
 31
31 -
 32
32 -
33
-
34
-
35
-
36
-
37
-
38
-
39
-
40
-
41
-
42
-
43
-
44
-
45
-
46
-
47
-
48
-
49
-
50
-
51
-
52
-
53
-
54
-
55
-
56
-
57
-
58
-
59
-
60
-
61
-
62
-
63
-
64
-
65
-
66
-
67
-
68
-
69
-
70
-
71
-
72
-
73
-
74
-
75
-
76
-
77
-
78
-
79
-
80
-
81
-
82
-
83
-
84
-
85
-
86
-
87
-
88
-
89
-
90
-
91
-
92
-
93
-
94
-
95
-
96
 |
 |
