NaceCare TTV678 TTV678 Owners Manual (External Charger) - Page 8
Machine Set Up
 |
View all NaceCare TTV678 manuals
Add to My Manuals
Save this manual to your list of manuals |
Page 8 highlights
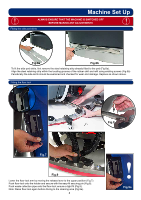
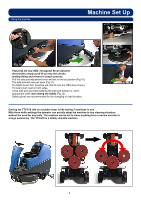
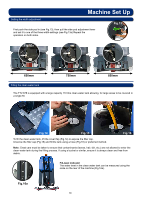
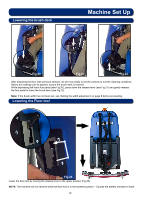
Machine Set Up ! ALWAYS ENSURE THAT THE MACHINE IS SWITCHED OFF BEFORE MAKING ANY ADJUSTMENTS ! Fitting the side pod skirts Fig.6a Fig.6b To fit the side pod skirts, first remove the steel retaining strip already fitted to the pod (Fig.6a). Align the steel retaining strip within the locating grooves of the rubber skirt and refit using existing screws (Fig.6b) Periodically the side skirts should be examined and checked for wear and damage. Replace as shown above. Fitting the floor tool Fig.8 Fig.7 Fig.9 Lower the floor-tool arm by moving the release lever to the upper position (Fig.7). Push floor-tool onto the holder and secure with the easy-fit securing pin (Fig.8). Push waste collection pipe onto the floor-tool; ensure a tight fit (Fig.9). Note: Raise floor-tool again before driving to the cleaning area (Fig.9a). 8 ! Fig.9a
-
 1
1 -
2
-
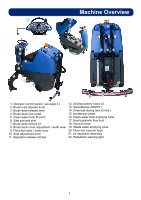 3
3 -
 4
4 -
 5
5 -
 6
6 -
 7
7 -
 8
8 -
 9
9 -
 10
10 -
 11
11 -
 12
12 -
 13
13 -
14
-
15
-
16
-
17
-
18
-
19
-
20
-
21
-
22
-
23
-
24
-
25
-
26
-
27
-
28
 |
 |
