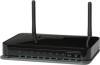
Netgear DGN2200v3 DGN2200v3 User Manual - Page 33
Wireless Settings Screen, Push Button, PIN Number - router disconnecting
 |
View all Netgear DGN2200v3 manuals
Add to My Manuals
Save this manual to your list of manuals |
Page 33 highlights
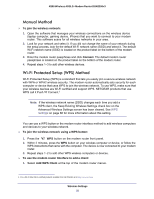
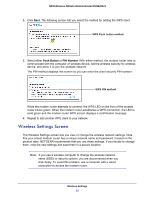
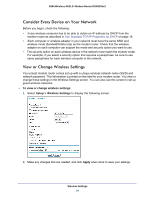
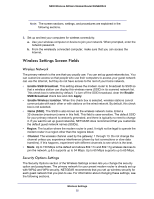
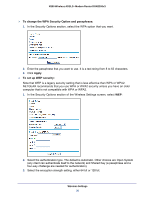
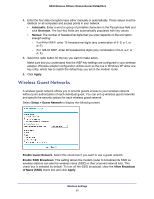
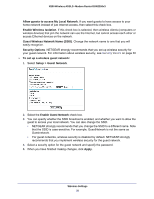
N300 Wireless ADSL2+ Modem Router DGN2200v3 2. Click Next. The following screen lets you select the method for adding the WPS client. WPS Push button method 3. Select either Push Button or PIN Number. With either method, the modem router tries to communicate with the computer or wireless device, set the wireless security for wireless device, and allow it to join the wireless network. The PIN method displays this screen so you can enter the client security PIN number: WPS PIN method While the modem router attempts to connect, the WPS LED on the front of the modem router blinks green. When the modem router establishes a WPS connection, the LED is solid green and the modem router WPS screen displays a confirmation message. 4. Repeat to add another WPS client to your network. Wireless Settings Screen The Wireless Settings screen lets you view or change the wireless network settings. Note that your preset modem router has a unique network name and password, located on the product label. NETGEAR recommends that you use these settings. If you decide to change them, note the new settings and save them in a secure location. Note: If you use a wireless computer to change the wireless network name (SSID) or security options, you are disconnected when you click Apply. To avoid this problem, use a computer with a wired connection to access the modem router. Wireless Settings 33
-
 1
1 -
2
-
3
-
4
-
5
-
6
-
7
-
8
-
9
-
10
-
11
-
12
-
13
-
14
-
15
-
16
-
17
-
18
-
19
-
20
-
21
-
22
-
23
-
24
-
25
-
26
-
27
-
 28
28 -
 29
29 -
 30
30 -
 31
31 -
 32
32 -
 33
33 -
 34
34 -
 35
35 -
 36
36 -
 37
37 -
 38
38 -
39
-
40
-
41
-
42
-
43
-
44
-
45
-
46
-
47
-
48
-
49
-
50
-
51
-
52
-
53
-
54
-
55
-
56
-
57
-
58
-
59
-
60
-
61
-
62
-
63
-
64
-
65
-
66
-
67
-
68
-
69
-
70
-
71
-
72
-
73
-
74
-
75
-
76
-
77
-
78
-
79
-
80
-
81
-
82
-
83
-
84
-
85
-
86
-
87
-
88
-
89
-
90
-
91
-
92
-
93
-
94
-
95
-
96
-
97
-
98
-
99
-
100
-
101
-
102
-
103
-
104
-
105
-
106
-
107
-
108
-
109
-
110
-
111
-
112
-
113
-
114
-
115
-
116
-
117
-
118
-
119
-
120
 |
 |
