Netgear RN204 Hardware Manual - Page 80
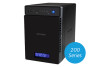
ReadyNAS 716X rear panel
 |
View all Netgear RN204 manuals
Add to My Manuals
Save this manual to your list of manuals |
Page 80 highlights
ReadyNAS OS 6 Desktop Storage Systems Rear Panel The following figure shows the rear panel of ReadyNAS 716X. 5 6 1 7 8 2 9 10 3 11 4 Figure 27. ReadyNAS 716X rear panel 1. Exhaust fan 2. Power cable socket 3. Power switch 4. Kensington lock 5. eSATA ports 6. 1Gb LAN ports with LED status indicators 7. HDMI port 8. eSATA port 9. USB 3.0 ports 10. Reset button 11. 10 Gb LAN ports with LED status indicators NETGEAR ReadyNAS 716X 80
-
 1
1 -
2
-
3
-
4
-
5
-
6
-
7
-
8
-
9
-
10
-
11
-
12
-
13
-
14
-
15
-
16
-
17
-
18
-
19
-
20
-
21
-
22
-
23
-
24
-
25
-
26
-
27
-
28
-
29
-
30
-
31
-
32
-
33
-
34
-
35
-
36
-
37
-
38
-
39
-
40
-
41
-
42
-
43
-
44
-
45
-
46
-
47
-
48
-
49
-
50
-
51
-
52
-
53
-
54
-
55
-
56
-
57
-
58
-
59
-
60
-
61
-
62
-
63
-
64
-
65
-
66
-
67
-
68
-
69
-
70
-
71
-
72
-
73
-
74
-
 75
75 -
 76
76 -
 77
77 -
 78
78 -
 79
79 -
 80
80 -
 81
81 -
 82
82 -
 83
83 -
 84
84 -
 85
85 -
86
-
87
-
88
-
89
-
90
-
91
-
92
-
93
-
94
-
95
-
96
-
97
-
98
-
99
-
100
-
101
-
102
-
103
-
104
-
105
-
106
-
107
-
108
-
109
-
110
-
111
-
112
-
113
-
114
-
115
-
116
-
117
-
118
-
119
-
120
-
121
-
122
-
123
-
124
 |
 |

NETGEAR ReadyNAS 716X
80
ReadyNAS OS 6 Desktop Storage Systems
Rear Panel
The following figure shows the rear panel of ReadyNAS 716X.
3
4
5
6
1
2
7
8
9
10
11
Figure 27. ReadyNAS 716X rear panel
1. Exhaust fan
2. Power cable socket
3. Power switch
4. Kensington lock
5. eSATA ports
6. 1Gb LAN ports with LED status indicators
7. HDMI port
8. eSATA port
9. USB 3.0 ports
10. Reset button
11. 10 Gb LAN ports with LED status indicators